Installing the Model F Sump
Sump that has to be shipped:
All sumps are shipped with insurance to protect both you and me. They are carefully packed with 4" of padding on all six sides, including beams to keep it centered at all times.
When the sump arrives, take pictures of the box immediately, as well as during the unpacking process. If for any reason the sump was damaged during shipping, your pictures will be the only way a claim will be honored. Pictures are proof, and that is why I'm emphasizing you be proactive, just in case. I've not filed a claim in three years, but you just never know.
The sump was shipped with pink foam sheet. This is meant to be placed beneath the sump during its installation. Your plumbing will press right into the bulkheads, no glue is necessary.
Sump Installation:
Model F (pictures may vary from what you've received)

View from the end where the skimmer fits:
You have received the Model F sump. Water enters from both ends simultaneously and flows into the center. Your submersible internal pump will pump water back up to the tank. You can use Eheim, Supreme Mag, Marineland Maxijet Utility, or Quiet One pumps. Eheim has the best reputation, Marineland comes with a three year warranty. Mag pumps are good pumps, but use more power and add heat to the water. Quiet Ones are the cheapest and feel less solid overall.
A probe holder in the middle section is there if you plan to use a controller with pH, ORP, and Temperature probes. Also, a smaller bracket is glued in to accept an electric float switch for automatic top off (replenishes evaporation with RO/DI water).
This is the bubble tower:
You will need to carefully unscrew the bulkhead to get the pipe & bulkhead out of the way to feed small pieces of live rock rubble into that tower. Using long forceps (big tweezers), put them in one by one. Do not drop rocks into the corner of the sump and risk cracking the acrylic. Laying it on its back is best. You want enough rubble to create a 6" tall pile. Carefully tilt the sump back upright, and
install the bulkhead again, tightening the nut hand-tight. Example pictures:


The water in the skimmer zone will be 9" deep, so the 6" of rubble will be fully submerged. The pipe will extend under water 1/2", keeping it flowing quietly and keep bubbles under control.
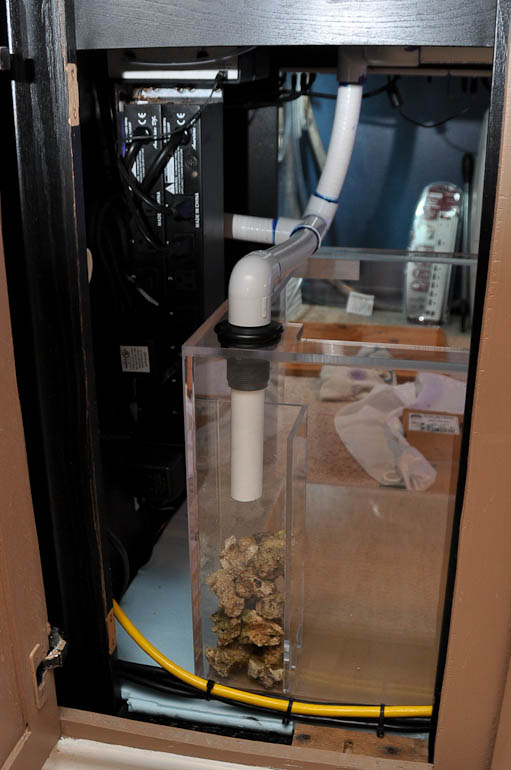
On the refugium end, the elbow is higher up in the sump, this is intentionally done so.


This fitting is at the proper height. Water flows out of the elbow at the normal water's surface for this zone, allowing air to breathe out. You can turn the elbow to the direction you like. I'd point it toward the front so the surface ripples; water will then flow over the wall through the teeth into the return zone.
The bulkheads are 1" slip. When you install the plumbing from the tank, gluing in the plumbing is best. If you only press it in, salt creep will appear on the top side of your sump and create a messy buildup.
Ideally, you'll want 75% of the tank's draining water to go into the skimmer section and
25% to the refugium. If your tank has only one drain line, the example on this page will help you understand how to plumb the PVC to feed two ends at once. https://melevsreef.com/articles/plumb-single-overflow-two-zones
If you have questions, email me.