How to rinse out an older sand bed, and why...
If it is time to move from one tank to another one, or you are simply moving the tank from one location to another, the big question that comes up often is "how do I transfer the sandbed?" The reason this is a concern is because the sand bed traps all kinds of detritus and this builds up to toxic levels. While scooping it out of the tank for the move or the upgrade to a larger tank, these toxic zones can cause a major catastrophe when setting up the tank anew. And a sandbed loaded with detritus will surely feed nuisance algae. Yet another reason to do this.
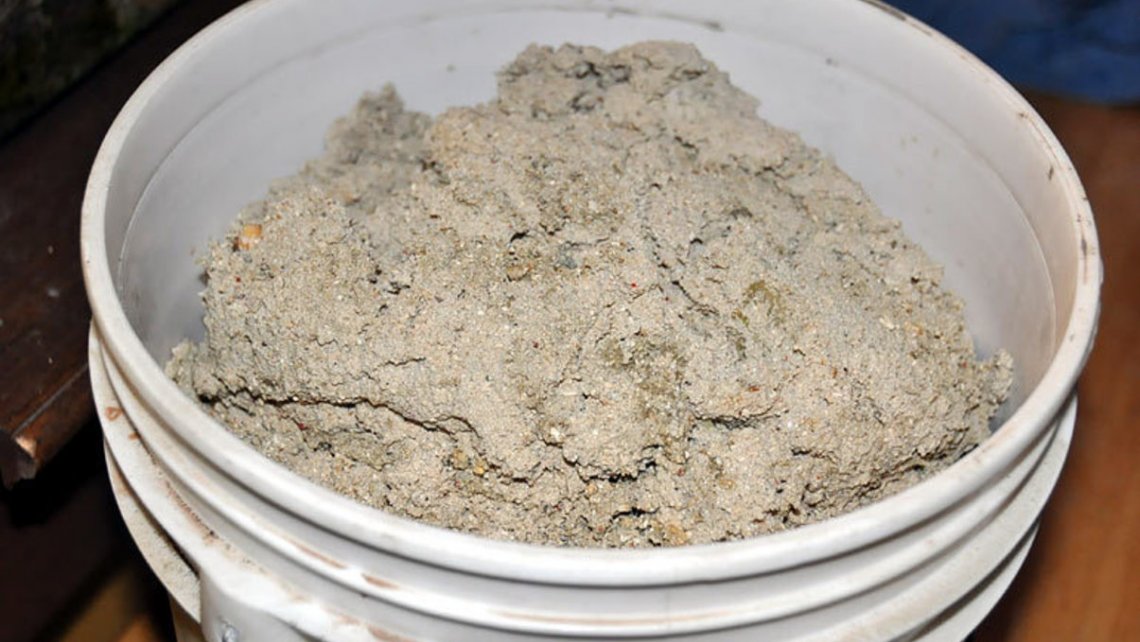
The DSB in this tank is over two years old, and must be washed out if it is to be used in a new tank.
If the sand bed is less than six months old, it is usually safe to remove and add to the next tank. However, after six months you would be wise to pull it out, wash it out thoroughly, thus starting fresh in your next setup. This pertains even moreso to a DSB (Deep Sand Bed), with layers that purposefully trap and process waste with anoxic (oxygen-free) zones.
Removing the detritus and toxic waste will avoid a cycle, reduce both nitrates and phosphates in the new tank, and the sandbed will be clean and fresh from day one.
Carefully scoop up two or three cups of sand from the top surface of the current sandbed, and save it in a ziplock bag. Place it somewhere stable, where it will stay room temperature and not get too cold nor baked in the sunlight.
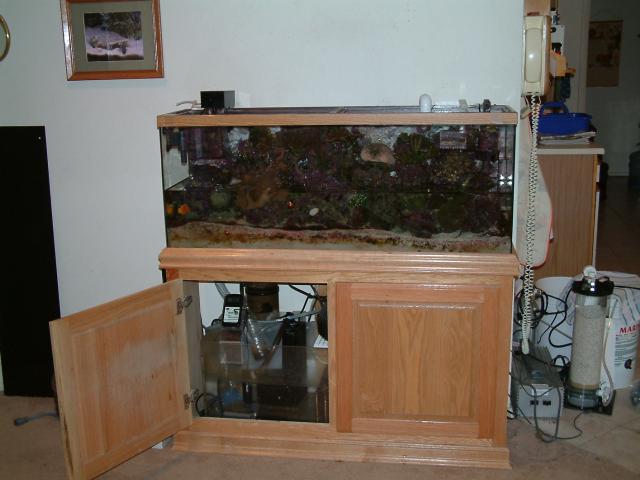
Next, all the live rock in the old tank should be removed and placed in a clean trashcan (or other plastic container) and filled up with tank water to keep the rock fully submerged. This prevents the rock from starting a "cycle", caused by the die-off of lifeforms, especially sponges. You may need to place a heater in the water and some powerheads for circulation if the transition to the new system will take some time to accomplish.
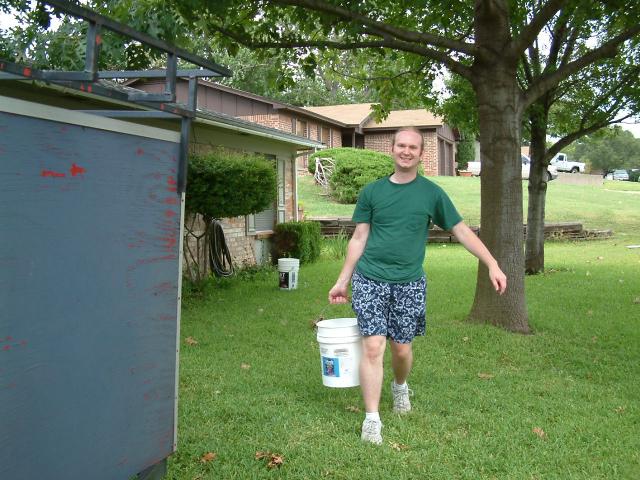 Having a helper with this project is a great idea. Sand is heavy. Take a 5 gallon plastic bucket and fill it 1/3 with sand. Now grab the garden hose and turn it on full blast and fill the bucket up with water, stirring it around and around. Leave the water running during this rinse period. Pour off excess water and look for the lighter detritus to collect on the surface of the sand as you swirl it around while pouring it out. You want all of the waste out of the bucket. Once the sand looks clean, pour that into the tank. Fill the bucket with more of the dirty or used sand, and repeat. Do this until all the sand has been rinsed out.
To refill the tank with saltwater, cover the sand with a black trash bag liner, and place a heavy serving platter on the plastic. Then place a glass or plastic pitcher on top of the platter.
Add saltwater (from the old tank as well as any newly mixed water) to the tank, pouring or pumping it into the pitcher, which will then overflow onto the platter and then the plastic liner. Do this until the tank is half full. At this point you can remove the plastic, the platter and pitcher. Carefully add the LR (live rock) to your tank, keeping it submerged as much as possible. Finally add the rest of the water needed to fill the tank.
Take your three cups of sand, and gently release it in three little mounds on the substrate in the tank. Don't spread it around nor try to mix it in. Just pour it in little hills. The microscopic critters will work their way into the rest of the sandbed, rather than floating around in the water column. The bacteria will replenish the DSB; this is referred to as re-seeding the sandbed.
Turn on the pumps. You're done!
If possible, try to get another cup or two from a local hobbyist or from an existing tank at your LFS (local fish store). This will add some new biodiversity to your sandbed, and should be done every six months.