10 Step Phytoplankton Culture
Susan did a great job putting together a working manual for everyone follow, including myself. After a few years, that resource vanished from the web. This page was originally written by Susan J. Wilson; page last found online on Sept 12, 2006: http://www.sjwilson.net/reef/phytosteps.html Contents placed on my site as reference only, and these are all her words below...
DISCLAIMER
I've been helping people get started with culturing phytoplankton through email so I thought step-by-step instructions might be helpful. However, please note, the instructions below are just how I culture phytoplankton. There are other ways which may or may not produce better cultures. I developed this method because it is cheap, easy and works for me. I am not an expert and will not be held responsible for any consequences resulting from these instructions - good or bad. I've yet to hear of anyone having a problem though.
NOTE June 14 - 2003
I had shut down my cultures for several months while battling a flatworm infestation. After resolving this problem I set up my cultures again and tried a slightly new technique which I've found has resulted in much more dense cultures. As of this date I'm updating the instructions below to reflect the new technique.
STEP 1 - Phyto starter disks and fertilizer
Go to www.florida-aqua-farms.com and place an order for:
- two 2oz nanochloropsis disks (product number AA-NCP)
- one 8.5oz bottle of micro algae grow (product number FA-MIS)
Florida Aqua Farms is just one place that you can purchase culturing supplies. I don't work for them or benefit in any way from suggesting you use them, I just recommend them because I know they stock these items and ship outside the US. They also sell culture kits and many other culturing supplies. My list includes just the bare necessities but your cultures will be no better with more supplies.
STEP 2 - Culture bottles
While you're waiting for the order to arrive start saving clear 2L pop bottles. You will need two to start with and at least another two a week or so later. When you empty a bottle just put the cap on tightly, don't do anything else with it until you're ready to use it. No more drinking out of bottles allowed in your house!
The best bottles are the ones with the round bottoms. I couldn't find them where I live so I went with the typical dimpled bottomed bottles. Pretty much anything will work but the smoother inside the better, less places for gunk to settle. Bottles can be rinsed and reused but after a while they will get a filmy opaque coating inside and should be replaced. If necessary, you can clean them with vinegar and a bottle brush but be sure to rinse VERY WELL afterwards.
STEP 3 - Hardware
Go to a hardware store and buy:
- 3' shelf and brackets
- 3' strip lights for 2 fluorescent tubes, normal output is fine
- 2 3' fluorescent lights (get the cheapest you can find)
- timer (cheap, no need for anything heavy duty)
- funnel
- small shelf for air pump and gang valves (I made mine with wood I had)
- waterproof marker for writing dates on bottles
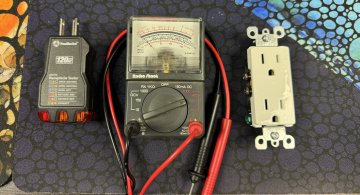
STEP 4 - Aeration Supplies
Go to a pet store and buy:
- about 10' of soft silicone air tubing (regular will do if you can't get the silicone but the softer the better)
- 2 brass gang valves that have 3 outlets each (if you can only get plastic ones get the best you can find, the cheap ones are too hard to adjust)
- 2 or 3 3' lengths of rigid tubing small enough to fit inside the flexible airline tubing (note - you may have to order these, they can be hard to find)
- air pump with 2 outlets (a cheap one is fine for a small culture center, if you plan to run 6 or more bottles invest in a good one)
- a syringe or something for accurately measuring the fertilizer in milliliters
STEP 5 - The culture station
- Mount your brackets and attach the shelf.
- Attach your lights to the wall to allow the light to hit the middle of the pop bottles.
- Set up your small shelf for your air pump and gang valves.
- Figure out how you want to set up your gang valves, I adjust mine fairly often so make sure you can get at them and they are stable and easy to tell which tube goes to which bottle (I just smashed the plastic casing off mine with a hammer and nailed the gang valves to the little shelf).
- Use some silicone tubing to connect your pump to your gang valves, don't make any really tight corners.
- Cut the rigid tubing into one foot lengths but don't set up your bottles or the flexible tubing for them yet (less chance for contamination).
STEP 6 - Culture medium
Culture medium is just new salt water mixed at a specific gravity of 1.020 with some micro algae grow fertilizer (2ml per gallon) in it. You can mix the salt with regular tap water or with RO/DI water, I haven't seen any difference in my cultures either way. I used to use a couple 1 gallon jugs I had to mix up my culture medium but I've recently switched to using an old Instant Ocean salt bucket so I don't have to mix it as often. I drilled it to make a little spigot tap and keep a powerhead inside to keep it mixed. What you use should be determined by how many bottles you plan to run. It can be mixed right in the pop bottles if you like. Do not use tank water or natural sea water, it has to be new salt water (with no micro organisms) and should be kept sealed to prevent contamination.
The trick here is to chose the way you want to do it, work out how much salt you need to add to make it 1.020 and how much micro algae grow (2ml per gallon) and write it down to make it easier the next time. If well sealed, culture medium can be kept for months. I just mix more whenever I run out. The fertilizer can either be added to the water or directly to the bottles of phyto. I've done it both ways and they seem to work equally well.
STEP 7 - Preparing the starter culture disk
When the order from Florida Aqua Culture arrives:
- Open the nanochloropsis disks and put a few drops of culture medium on each so that the tops are very wet (don't touch them unless you wash and rinse your hands first).
- Put the covers back on the disks and let them set for 24 hours (air tight isn't necessary but try and have it reasonably sealed to prevent contamination). This process will help loosen the cells from the gel underneath and make it easier to get them into the culture bottles. Some people believe that if you put the disks in moderate light the phytoplankton cells will start to revive. I have always just set them on the culture shelf without worrying about lighting and they always seem to do just fine.
STEP 8 - Setup time
- Get a pair of scissors (for cutting the airline tubing).
- If you aren't going to drill the bottle tops get a couple tissues.
- If you're going to drill the bottle tops go ahead and drill two caps.
- Take 2 pop bottles and tear/cut off the labels (as best you can) and rinse them out well in cold tap water.
- Fill the bottles to within a couple inches from the top with culture medium.
- Wash and rinse your hands and get out your culture disks.
- If there isn't any liquid left, put a few more drops of culture medium on them. You can use your finger to gently "finger paint" on the disks to loosen the green cells from the clear gel below or a sterile q-tip (often shipped with the disks).
- You need to get as much of the green stuff into the bottles as possible, it's tricky, if you can just squeeze the disk and pour it into the bottles fine, if you have a little plastic cup like the ones that come with some additives it might be easier to pour it into that and then pour into the bottles.
- Do not worry if you get a little of the clear gel in or if the green cells have some chunks. The first round of cultures always end up with some "extra stuff" in them. It's harmless and as you propagate more and more you'll eventually get rid of it.
- The water will not have much colour to it at all at this stage, you'll probably find it hard to believe this will ever become phytoplankton, that's normal.
- If you didn't add the micro algae grow fertilizer to the culture medium you can now add it to the bottles. I add 1ml to each bottle.
- Put your bottles on the end your shelf (allowing lots of room for more bottles) and, if you drilled the caps, put them on.
- Take your full length of flexible tubing and attach one end to a piece of rigid tubing. Put the rigid tubing into the bottle. Cut the flexible tubing at an appropriate length to reach one of the brass gang valves. You don't want it too tight but you don't want a lot of slack either. Do the same with the second bottle. Set the timer that your lights are plugged into to give your cultures 16 hours of light. The 8 off hours should be dark.
- If you didn't drill the bottles put a tissue loosely in the tops of each bottle to keep the dust out. The only time I had contamination in my phytoplankton was when I didn't bother to cover the bottles, it is important.
- Adjust your gang valves so that you have an even flow of bubbles in your bottles, you need a fairly strong flow (like a rapid boil, your wife will know) but not so strong that it causes foam - we want to keep the culture moving not create a protein skimmer in them.
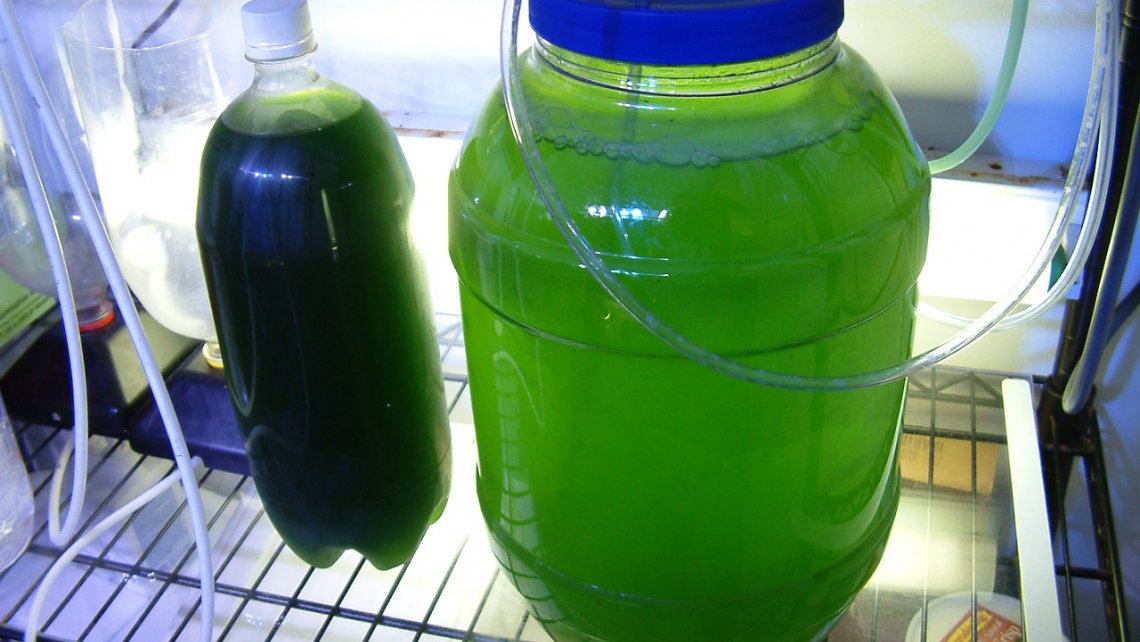
- That's it, do nothing for 6 to 9 days, expect it to take several days before it even starts to look any different. You will know your phytoplankton is ripe when it stops getting any greener. If you used nannochloropsis disks the culture should be very green with no brown tinge to it and be so dense that you cannot see through it at all, even with the lights shining behind it. First generation cultures from disks will take a little longer than the next generations made from ripe phytoplankton. It can be tricky to know just when it's ready but it doesn't have to be exact. Try to take note after the 6th day to see if it's still getting darker or not but don't let it go past 10 days.
STEP 9 - The initial cultures mature
After 6 - 9 days:
- Rinse out and drill 2 more pop bottles.
- Take each bottle of phytoplankton and pour half into another bottle using a funnel. Put one of the half bottles back on the culture shelf - this is for feeding the tank.
- Top the other 3 bottles with culture medium. Add 1ml of fertilizer to each bottle if you didn't mix it into the culture medium.
- Write the date on each of the 4 new bottles with a waterproof marker.
- The new bottles started with mature phyto should mature a little faster than the first ones started from the disks but every culture is different. You should start new bottles with fresh phyto, within a few days of maturing.
STEP 10 - Feeding phyto and continuing the culture
Start with 1/4 cup once a day for a week, then after about a week go with 1/4 cup twice a day. I'm feeding 1/2 cup twice a day but how much you feed really depends on what critters you have eating it, i.e. clams, feather dusters, gorgonians, etc.
You may notice an increase in small feather dusters on your rocks, more sandbed critters and pods, etc. After a while you may find you have less micro algae and have to scrape your glass less. The phytoplankton will, to some degree, compete with other micro algae in your tank. Go with what seems to work best for your tank but start with a small amount at first.
Don't be tempted to use phytoplankton that is too old, it will be at its best for 3 or 4 days after maturing but can be used up to a week. Remember, it's pretty much free from here on in, it's better to give it away or discard it if you have too much.
NOTE: Do not dump discarded phytoplankton in a sink or other drain. Nannochloropsis is both fresh water and marine, there is a chance that it could survive and cause an ecological problem.
Susan Wilson
aka Flame*Angel
www.sjwilson.net/reef
swilson@accesswave.ca