How to set up a Calcium Reactor
A calcium reactor is a piece of equipment that helps maintain alkalinity and calcium in a reef tank. For years, I didn't buy one mainly because they are expensive, and dosed my tank with B-Ionic daily. That worked fine for a 29 gallon and a 55 gallon reef, but if your tank is larger than those, you may decide that a calcium reactor is the better choice long term.
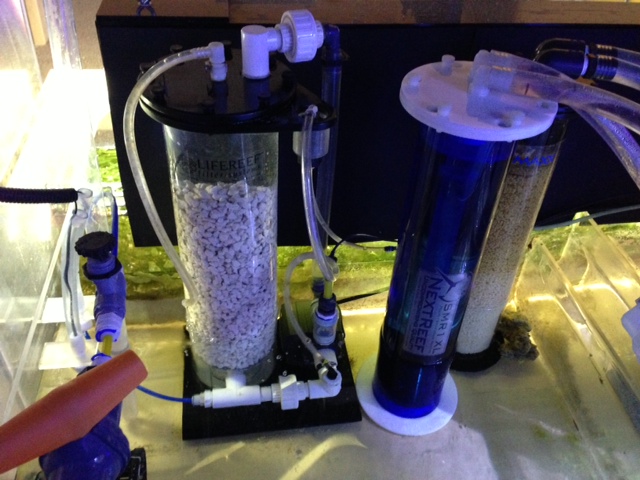
Many companies build reactors, some better than others. When I bought my 280 gallon system, it came with a Lifereef Calcium Reactor. Prior to that purchase, I was planning to build my own, using a DIY design. I'd acquired all the goodies, but was worried about making a good venturi that would work as expected. My procrastinating paid off, because I ended up with a very nice unit that I've been using since 2004.
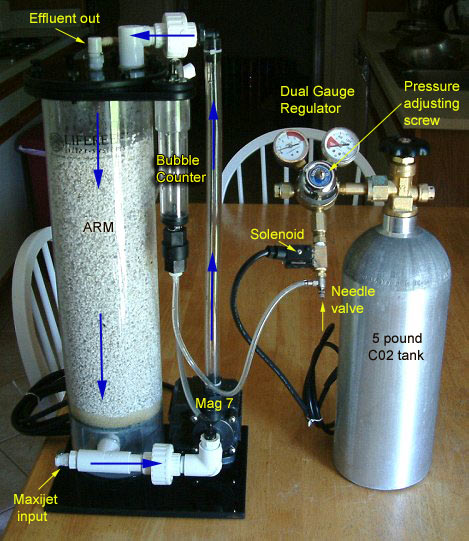
Let me explain what you see above. The tall object on the left is the Calcium Reactor. The silver aluminum cylinder on the right is the CO2 tank, using the same CO2 gas used for carbonated drinks. CO2 can be purchased at liquor stores and welding suppliers. The thing screwed onto the CO2 tank is called a regulator. This regulator has two gauges on it: one to measure how much CO2 gas is in the tank, and the other is how much pressure is going to the calcium reactor.
At the base of the regulator, you can see a black cord. This is a safety device called a solenoid. If a power outage occurs, it closes the valve and stops any more CO2 from being added to the system and your reef. Definitely something every reactor should have, especially when used with a pH controller (more about that in a few minutes).
Some regulators come with a bubble counter. In the picture above, you can see some airline tubing below the black cord on the regulator that is leading up to the built-in bubble counter on the reactor itself.
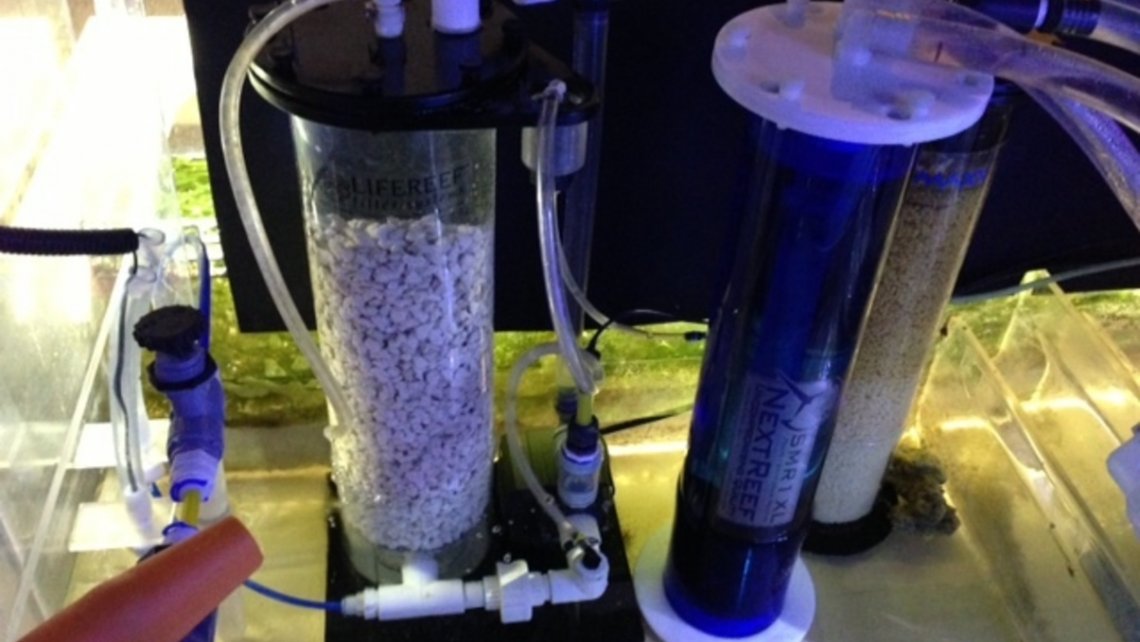
At the base of the Calcium Reactor, a Mag 7 is plumbed in. Its job is to create circulation through the reactor all the time. Lifereef provides these pumps with a two year warranty, because they are glued shut and can not be taken apart for periodic cleanings. Inside the reactor is a sponge at the bottom of the media chamber, and a full container's worth of ARM (Aragonite Reactor Media) by CaribSea.
Not included in the picture is a Maxijet pump. That pump is placed in the sump, and pushes water through some tubing into the reactor, and the effluent comes out of a fitting at the top of the reactor. Effluent is the water coming out of a Calcium Reactor.
So how does it work?
Once the reactor is full of tank water, the Mag 7 is plugged in and will remain on 24 hours a day. It circulates the water through the media from the bottom to the top all the time. The CO2 tank has a needle valve that is opened up to allow a very small amount of gas to be added to the reactor. As more and more CO2 accumulates within the reactor, the aragonite (calcium-based media) dissolves very slowly into liquid calcium. The Maxijet introduces new water into the reactor from the sump, which forces some effluent out the top - this is dripped back into the sump full of alkalinity and calcium.
Where does it go?
The calcium and alkalinity is constantly being taken up by corals, fish and invertebrates, as well as coralline algae. By adding it to the tank around the clock, stability is attained and overall growth is improved.
I chose to place my reactor in the sump, so if it ever leaked the water would stay in the system. I made a stand for it so that it would keep the pump out of the water to avoid adding heat to the tank during the summer months. In the winter, I can submerge the pump and let the heat of the pump aid in keeping the tank temperature up instead of paying for heaters to do that job. In the picture below, you can see the Maxijet pump on the floor of the sump, which feeds water into the reactor at the bottom left. The extra wires and tubing you see is just there to add to your confusion. ;) The CO2 tank is on the floor next to the sump.

In the background, you can see a red cup filled with water. That is my old effluent cup. It worked in conjunction with a pH Controller, which would control how much CO2 is added to the reactor. The effluent's pH is measured with a pH probe. Later, I replaced that red cup with this.
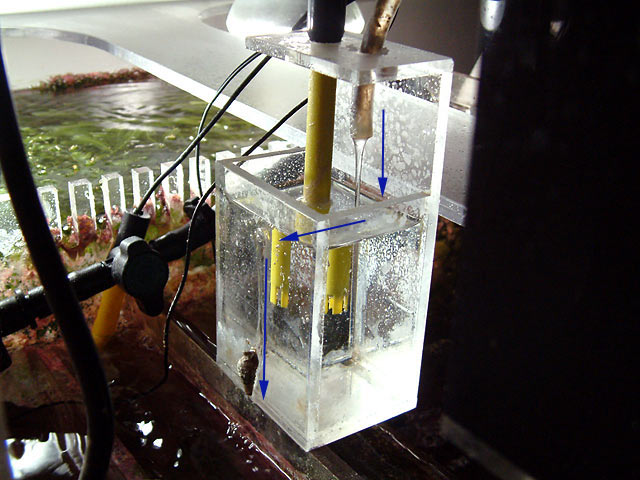
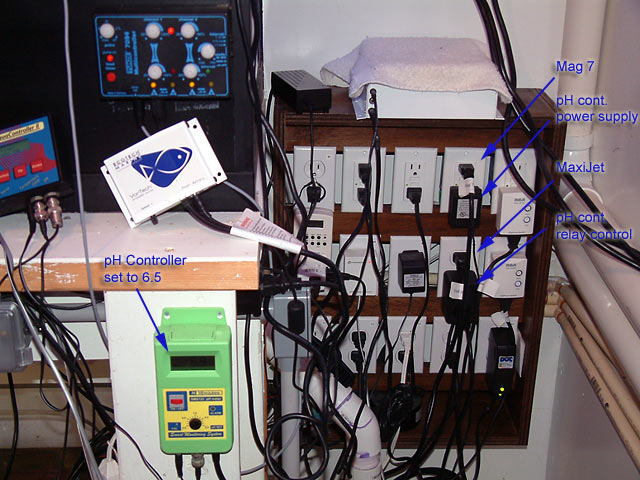
The effluent is pouring (not dripping) out of the tubing into the acrylic container, where the pH probe can measure it at all times. The effluent then pours out a small hole in the front and trickles into the sump below. You can see the Milwaukee pH Controller in this picture below. It is the bright green device.
For my system, dripping the effluent wasn't effective. I prefer to allow it to flow at a solid trickle (roughly 100 - 120 ml per minute). With the effluent flowing steadily, the pH probe can get an accurate measurement vs. what would occur within the reactor while effluent is dripping out of the tubing at a much slower rate.
Some Calcium Reactors have a probe holder built in, so the probe is inside the reactor getting a measurement. Since mine doesn't come that way, I made the effluent box to do the job this way.
The benefit of using a pH controller is that you can set it and forget it. Instead of constanly tinkering with your Calcium Reactor, let the controller do that job for you. Minor adjustments will need to be made, but it will allow you to enjoy the hobby instead of stressing over how to get your reactor to work correctly.
Regulators
There are a number of regulators on the market. I've been using Milwaukee regulators for years. Unfortunately, I see a number of posts about this regulator that I have to wonder if they are as good as promised. My regulator's bubble counter is set to release one bubble per second, but I've had it up as high as 3 bubbles per second to match my tank's demands. Here is a brief video (EDIT: sorry, had to point you to a different clip since the original is gone. Each red blink of the light is a bubble being released into the reactor) of the bubble counter in action. The thick liquid inside is from Marine Depot, and is called Bubble Counter Liquid 50ml. One bottle will fill up two bubble counters, and it doesn't evaporate. I filled mine up once and haven't needed to add another drop since.
After buying a new regulator almost annually, and eventually purchased a vastly better one from AquariumPlants.com due to their three year warranty. Here's my product review: http://www.reefaddicts.com/content.php/181-AquariumPlants-CO2-Electronic-Regulator-Solenoid
Youtube video showing how the CO2 is dosed: http://youtu.be/-rO3s24nXjU
Getting Started...
Let's assume you have the Calcium Reactor, a full tank of CO2 gas, the media is in the reactor and you've filled it up with tank water. Purge the CO2 tank by briefly opening the valve to blast out any trapped dust, then attach the regulator to the CO2 tank. Use a wrench to make sure it is tightly sealed, so the gas isn't leaking out and wasted.
- Turn on the circulation pump on the calcium reactor.
- Turn on the feed pump to the calcium reactor.
- Open the pinch (or needle) valve on the effluent tubing to allow water to flow out of the reactor freely and remove any trapped air.
- Pour RO/DI, distilled water, or the oil mentioned above (NOT SALTWATER) into the bubble counter.
- Open up the main valve on the CO2 tank. The gauge on the regulator should jump quickly to show how many pounds of pressure is in the tank.
- Slowly twist shut the regulator's knob on the front (this could be a screw on yours). This will increase the pressure and the needle will rise in the second gauge. I would set this to 12 lbs of pressure.
- Open the needle valve on the side of the regulator to allow a bubbles to rise in the bubble counter. To start off, one bubble every three seconds is recommended.
- Close the pinch valve on the effluent tubing so that the output is roughly 40-60ml per minute.
That's it. Now you need to be patient, as any changes you make can take hours to affect the system. When I first started up my calcium reactor, I didn't even turn on the CO2 for two days. After I had a feel for how the reactor worked, only then did I open the valve and allow CO2 to enter the reactor one bubble at a time. Remember that CO2 lowers pH, which is why it is so important to limit how much is added to your reactor as well as your system.
Which is exactly why I use a pH Controller. With that, I can set the pH to 6.5 and it will measure the effluent at all times. Once the pH reaches 6.5, the controller simulates a power outage that the solenoid senses, and the solenoid then shuts the valve and prevents any more C02 from entering the reactor. The feed pump continues to push water from the sump (with a pH of 8.2) into the reactor, which causes the pH to rise slowly internally. When the pH reaches 6.9, the controller restores power, the solenoid senses power and CO2 resumes flowing bubble by bubble into the reactor. Gradually, the pH drops again until it reaches 6.5 at which point the C02 is shut off again for a duration.
This system has worked very well for me for the past 3 years. The Milwaukee SMS-122 costs less than $100 and is worth every penny.
Things to keep in mind
- ARM dissolves at a pH of 6.5, while other products such as Schuran media needs to reach 6.2 before it will dissolve.
- To increase alkalinity in the effluent, either slow the effluent rate even more, or increase bubbles per minute.
- To decrease alkalinity in the effluent, allow more effluent to exit, or decrease bubbles per minute.
- Any changes or adjustments you make should be tiny ones. Test your tank the next day to see how the parameters are currently. Try not to overreact. You can fine tune the system gradually over several days or even weeks.
- It is very important to check the effluent tubing daily to make sure it is dripping or flowing at the normal rate. It can clog up, and if water cannot exit, the pH can potentially drop within the reactor to the point of causing all the media to melt down at once. Check the bubble counter as well.
- Clean the pH probe if you use a controller, and calibrate it every six months.
- Every six months, clean the reactor out well, clean the feed and circulation pumps and the tubing. Replace the media.
- Have an extra tank of CO2 ready, so when you run out you'll be able to swap tanks out immediately. Refill the empty tank at your convenience.
With a properly set up Calcium Reactor, you should never (or rarely) need to dose extra Calcium or Alkalinity to your system, unless you are growing a fanstastic forest of corals. If that ever happens to me, I may have to update this last paragraph. :)
2011 and forward:
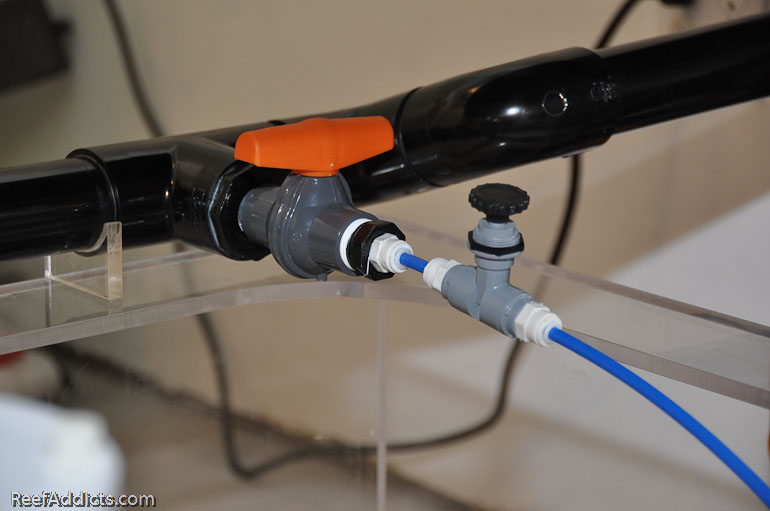
Two pictures from the current setup in my 400g. The reactor is located in the return section in the sump, and it is fed from a manifold valve. The manifold provides water to multiple pieces of gear from a single pump. I use a needle valve to control the flow of water going to the reactor, as it is the best way to set the precise rate coming out (the effluent).
Please read this excellent article as well.


