29g - How to Build a SCWD closed-loop

The plumbing of all this together is truly a jigsaw puzzle of pieces. I'll try to help you out. Basically, I stood in the plumbing aisle almost 2 hours figuring out what fit into what, and laid them out like a skeleton in my shopping cart so I'd not have to make a return trip. (Let me qualify that though... I was doing two separate projects on two tanks that same night. Shave off 45 mins. hehe)
You will need
- (1) 10' pipe of 3/4" thinwall pvc. Thinwall will be 7/8" internal opening.
- Full bag of 3/4" 90 degree elbows.
- (2) 1/2 unions (see below)
- (3) 3/4" couplings (threaded internally one one side only)
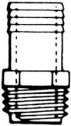
- (3) 3/4" threaded straight hose barbs (3/4" threaded for pipe(NOT FAUCET), 3/4" barb .. make sure they match. The barb will fit tightly in tubing)
- (3) 3/4" ball valves
- (2) 1/2" nipples
- (1) 3/4" nipple
- 12" of 3/4" vinyl tubing
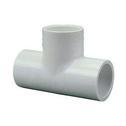
- (2) 3/4" Tee
- (2) slip reducers (1/2" threaded on the inside)
- (1) threaded 3/4" cap
- (1) unthreaded 3/4" cap
- 6 hoseclamps (metal is fine, these will not touch water)
- 2 part glue (see below)
- Teflon tape on all threaded nipples. Wrap teflon with the threads so it won't unwrap when screwing together.
 |
 |
 |
 |
 |
 |
 |
 |
 |
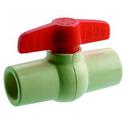
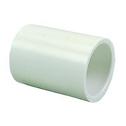
| 3/4" ballvalve | 3/4" slip cap | 3/4" threaded cap | 3/4" slip elbow | 3/4" slip coupling | 3/4" tee | 3/4" threaded coupling | Teflon tape | 3/4" x 3/4" plastic hosebarb |
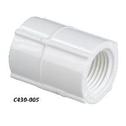
| You want (2) 1/2" unions, both of which need to be attached to your pump. To do that (assuming you are using the Mag7), you'll need 1/2" nipples about 1.5" long (threaded on both ends, come in black). This way you can unscrew the unions to remove your pump easily to clean it. This is what one looks like, although mine is white: | 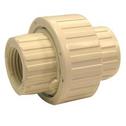 |
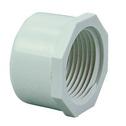
| You need (2) 3/4" to 1/2" reducer. They are called "bushings" at Home Depot. This little plastic piece will fit INTO a 3/4" coupling (no threads), and the center of it will be threaded to fit a 1/2" nipple. Here is a picture of it, but note that this picture does not display the internal threads: | 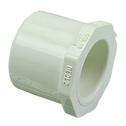 |
You will need the two-part glue as well (purple cleaner and clear pvc glue... the standard stuff) to assemble it. I glued everything that was not under water. That stuff that is submerged doesn't need gluing as no air can get into it. Just rinse it out well before hooking it up to your tank.
You will need one foot of clear 3/4" flexible tubing, and 6 hose clamps. That is to connect the SCWD to rigid plumbing. You will also need 3 hose barb fittings. I used 3/4" x 3/4" (one end threaded to fit into a 3/4" internally threaded coupling, the other end to slide into the tubing. (Heat the tubing in your oven at 200F for 5 mins to make that really easy!)
From the pump going up:
1/2" nipple ![]() 1/2" union
1/2" union ![]() 1/2" nipple
1/2" nipple ![]() reducer (1/2" to 3/4")
reducer (1/2" to 3/4") ![]() 3/4" (one side threaded) coupling
3/4" (one side threaded) coupling ![]() 3/4'x3/4" threaded straight hose barb
3/4'x3/4" threaded straight hose barb ![]() 3./4" vinyl tubing
3./4" vinyl tubing ![]() SCWD! Yay.
SCWD! Yay.
From the scwd going out:
3/4" vinyl tubing ![]() 3/4"x3/4" straight hosebarb
3/4"x3/4" straight hosebarb ![]() 3/4" (one side threaded) coupling
3/4" (one side threaded) coupling ![]() length of pipe
length of pipe ![]() 3/4" ball valve
3/4" ball valve ![]() length of pipe
length of pipe ![]() elbow turned upwards
elbow turned upwards ![]() length of pipe
length of pipe ![]() elbow turned toward front of tank
elbow turned toward front of tank ![]() very short length of pipe (1.5")
very short length of pipe (1.5") ![]() elbow pointing downward
elbow pointing downward ![]() short length of pipe
short length of pipe ![]() elbow pointing toward front of tank that remains unglued / adjustable. Remember, this paragraph is doubled, as there are two outlets on the SCWD.
elbow pointing toward front of tank that remains unglued / adjustable. Remember, this paragraph is doubled, as there are two outlets on the SCWD.
Water going to pump:
3/4" end cap (not glued) ![]() 9" length of pipe (not glued to coupling)
9" length of pipe (not glued to coupling) ![]() 3/4" coupling
3/4" coupling ![]() 3" length of pipe
3" length of pipe ![]() elbow to back of tank
elbow to back of tank ![]() very length of pipe (3.5")
very length of pipe (3.5") ![]() 3/4" Tee
3/4" Tee
----- from Tee you assemble two ways:
Down / toward the pump:
length of pipe ![]() 3/4" Tee
3/4" Tee
Up / away from pump:
very short length of pipe(1.5") ![]() 3/4" (one side threaded) coupling
3/4" (one side threaded) coupling ![]() 3/4" nipple
3/4" nipple ![]() 3/4" threaded cap
3/4" threaded cap
----- from the lower Tee, you assemble two ways as well:
Toward pump:
3/4"x1/2" reducer ![]() 1/2" nipple
1/2" nipple ![]() 1/2" union
1/2" union ![]() 1/2" nipple
1/2" nipple ![]() pump!!!
pump!!!
Away from pump:
short length of pipe ![]() 3/4" ball valve - > short length of pipe
3/4" ball valve - > short length of pipe ![]() elbow pointing down for draining.
elbow pointing down for draining.
These instructions are modified from the original picture, because I wanted to be able to close the system when I need to remove the scwd and/or pump for maintenance. It includes valves after the SCWD to prvent water from draining from the tank (the output lines), and allows the pump and SCWD to be drained once the top cap has been removed as well.
How to drill the intake tube:
- Take your 9" 3/4" thinwall tube, and press a 3/4" tee on both ends. This will keep it from moving or rolling.
- With a ruler and a fine marker, mark a spot every 1/2" along the top.
- Flip it over, and do the same again. Now you have a series of dots on opposing sides.
- Turn the tees 90 degrees, so your have the blank sides of your 9" pipe facing up again. Mark it every 1/2" again.
- Flip it over, and do the same again. Now you should have a series of dots on 4 sides (3, 6, 9, & 12 o'clock)
I have an auto nailset, and left a small dimple on each mark before drilling. Home Depot sells a 1/8" drill bit with a special point to avoid the drill bit wandering. That will make it the easiest to drill these holes.
See pictures of the closed loop installed.