The Light Rack
I love having full access to the reef, and a rolling light rack is my favorite way to create that kind of space.
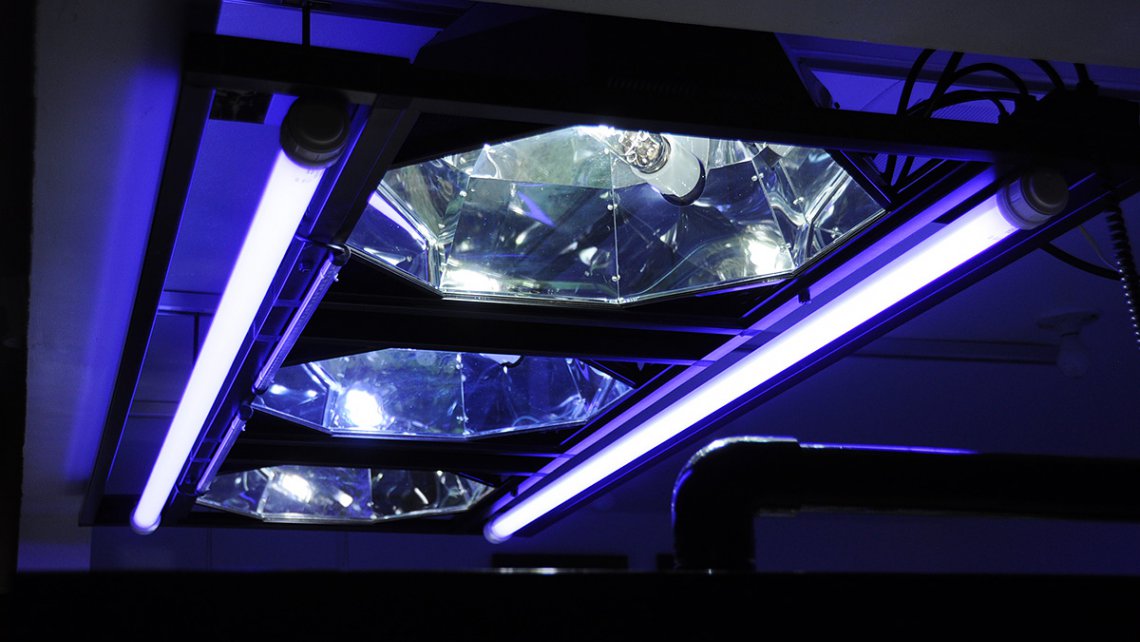
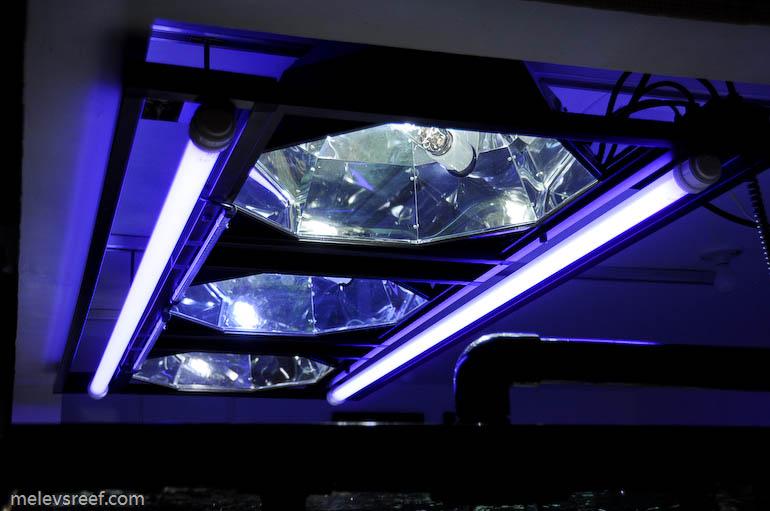
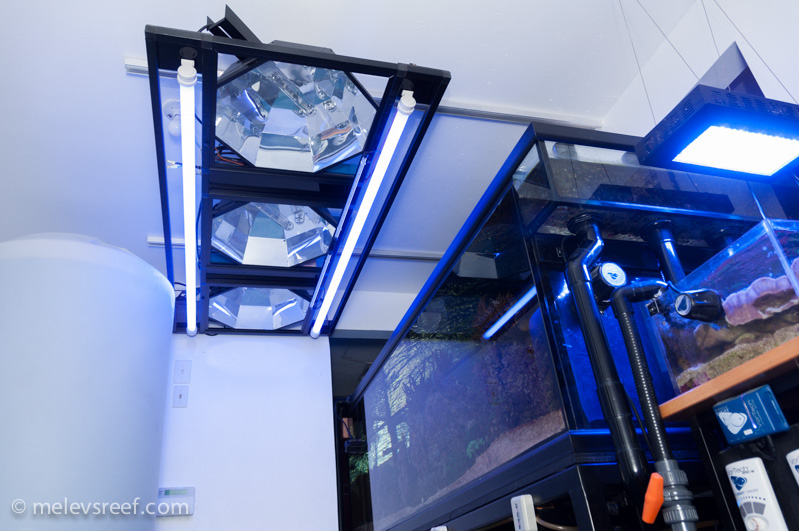
Lighting is crucial for a reef tank because without it, we'd have little to look at. Most of the corals we purchase are photo-synthetic, or light-demanding. A few years ago, I took the plunge and bought some Lumenbright Reflectors, which made my metal halide bulbs shine ever-so-brightly. They take up space, with each pendant measuring 20" wide and 9" tall. Couple those pendants with VHO (T12 bulbs); it can be a challenge to secure these over a tank and even more so when you don't have a canopy to hide them.
Personally, I like the way they look and take the time to clean them often so my investment will last. One of my friends showcased how he suspended his lights with a modular framework that could roll out of the way, and its design was clearly worth imitating.
Breakout picture of tubing and connectors
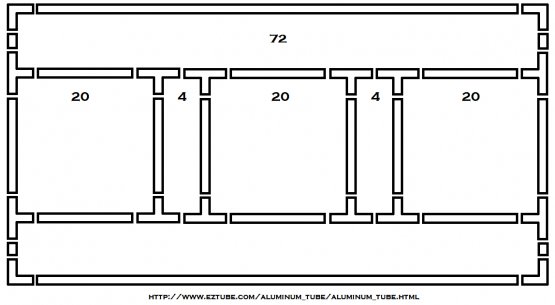
I had to order the parts from two websites, eztube.com and mcmaster.com - this is an area where you can partially save a few dollars but I chose to spend more for a modern look. The representative at eztube offered to cut the square tubing to the sizes I'd need, but I felt it would be prudent to just order long sticks of tubing and cut it myself. Eztube offers the elbow and tee connectors that piece it together, and everything comes with color choice. I wanted everything in black because it would match the tank's trim, the steel stand and all the plumbing. The connectors came in dark grey, which was close enough.
The track and rolling hangers from McMaster were straight forward. The only modification I needed was some longer threaded rod to connect the light rack to the rollers. I bought steel threaded rod and spray-painted it black to match.
The rack is made with two types of metal. Aluminum primarily with two full length steel rods that act like handles when pushing the rack back and forth. This was so the frame would be more rigid when pushed into place and to avoid the arcing across the full length. The aluminum square tubing comes with a flange if so ordered , and is useful to set the pendant fixture upon. I cut it carefully to get a good fit with limited play with the goal that a light would never come crashing down accidentally. The flange is 3/4" wide, a decent lip on all four sides for each of the three openings. I did have to cut off the end of each flange tab at a 45 degree angle to get that picture frame look, because the tabs can't overlap and would otherwise interfere during assembly.
With all the tubes cut and the connectors laid out in order, sections were hammered together with a rubber mallet. Once done, I set the pendants into the frame and located the best spot to drill for the hanger rods that would limit how much the light rack would bow. If it doesn't hang straight and true, the Lumenbrights would cast their light at angles rather that straight down. Planning out little details like this is why it took so long to get each phase of my rebuild done. A year later, the light rack continues to work perfectly as it did the day it was installed.
During the construction of the fishroom, I jotted down where the ceiling joists were prior to sheetrocking, and made sure that the lumber in the ceiling would work with the rolling track. When it was time to install each track, I had my notes to refer to and was able to drill holes in the aluminum where each joist was. The tracks were screwed to the ceiling without guesswork or errors. The kit is rated for 150 lbs, and the fully loaded light rack weighs between 90 and 100 pounds. The empty light rack weighs 20 lbs.
Once the enter rig was secured to the ceiling, I tested how it would roll back and forth. It wasn't as smooth as I liked, but once everything was installed the additional weight resulted in a perfect outcome. The pendants fit into their recessed spaces. I used some wet-application heavy duty 3M double sided tape to adhere black acrylic on the rack for the ballasts and VHO endcaps. From below, you can't see any of the ballasts, and from above they aren't going anywhere. With a little cable management, it has a nice clean look.
Using the Neptune Systems Apex controller for my reef, I installed a PB-8 (power bar with 8 outlets) at the top corner near the power outlet. During the construction of the room, one outlet was wired near the ceiling to supply power to the lights. The PB-8 has one power cord which I've tethered to the ceiling and plugged into that outlet. All the individual metal halides, the VHO actinics, and the moonlights are plugged into the PB-8, which keeps everything looking tidy. And with the power cord tethered to the ceiling, I'm able to roll the light rack back and forth without wires hanging down or being tugged out of place. It's a very clean solution.
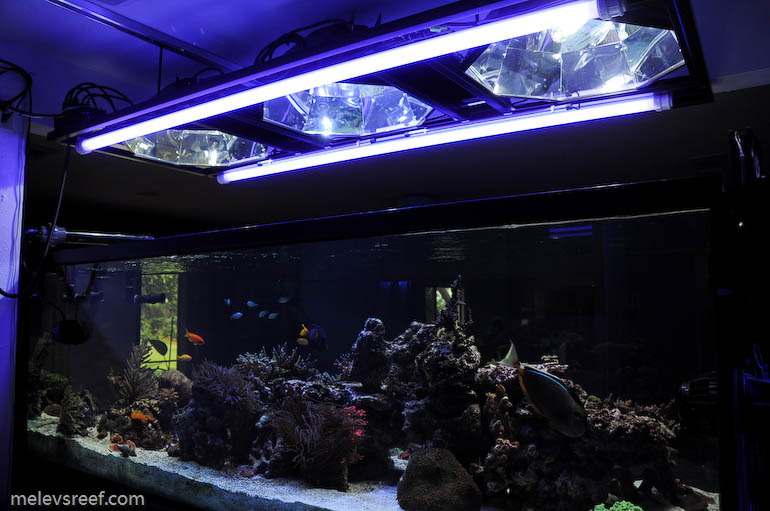
The reason for the light rack to move out of the way is mainly convenience. The assembly hangs high above the water so I can work in the tank without feeling crowded, but sometimes it is nice to push it out of the way when I'm tinkering in my reef. It rolls completely to the side of the tank, permitting me to clean the glass or change out the bulbs away from the surface of the aquarium so nothing falls into the water.
This was an excellent upgrade from my previous method, and was a fun project too.

For additional reading on the actual process of the assembly and installation, here are the blog entries on Reef Addicts:
The light rack project - http://www.reefaddicts.com/entry.php/1214-The-light-rack-project
Filling up a light rack with MH & VHOs - http://www.reefaddicts.com/entry.php/1343-Lighting-filling-up-an-empty-light-rack-with-MH-and-VHOs
Something with HTML textformat