Model "B" Sump

Having trouble fitting a sump under a 55 gallon Reef? After giving it some thought, I came up with a solution!
What I needed was something that would fit in a very narrow area, due to the bracing in the back of the stand. However, I had more space on both sides of the brace, which would add up to more gallons of water if utilized. I gave this a lot of thought, trying to come up with a way to install the sump within the stand without having to take down the tank in the process. After a few weeks, I finally realized the perfect solution.
So now I knew it was possible to build a single unit that would fit, and avoid any bulkheads between individual smaller containers. Reducing the risk of leaks and 'dead' zones in the water flow, I designed this to fit my exact needs. Obviously not all stands are constructed the same way, but perhaps this will give you some ideas that may help you design one that works for you.
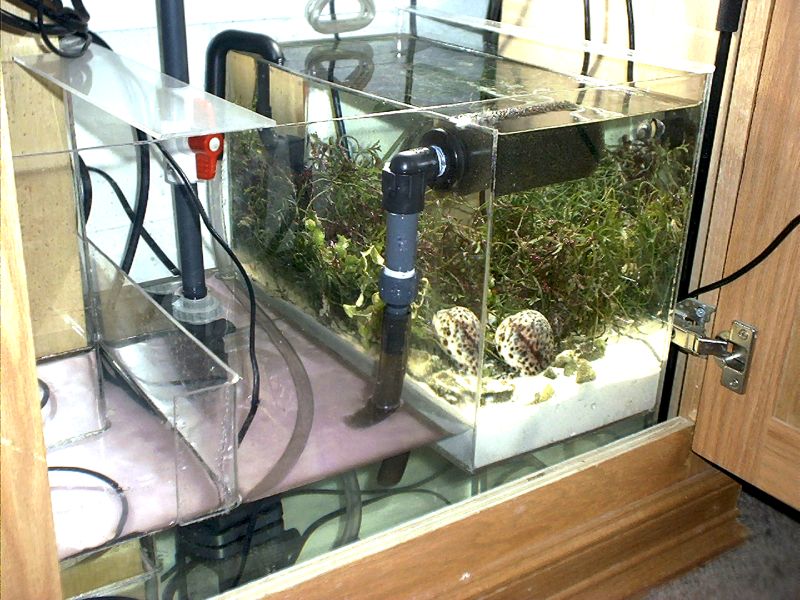
I have a huge protein skimmer - the Aqua C EV-200. It stands 23" tall, barely fitting in the stand. I really wanted to avoid running it externally, in case it ever "went nuts" and overflowed. This PS can also add a lot of micro bubbles to the water, so I had to make enough room for it to skim the water and still allow the air bubbles some time to dissipate. I also wanted a large return area, so that evaporation would be less of an issue if I couldn't tend to the tank for a few days. Lastly, I wanted a refugium to help export nitrates and add copepods, amphipods, bristle worms and other beneficial critters to aid in filtration as well as the general health of the tank's inhabitants.
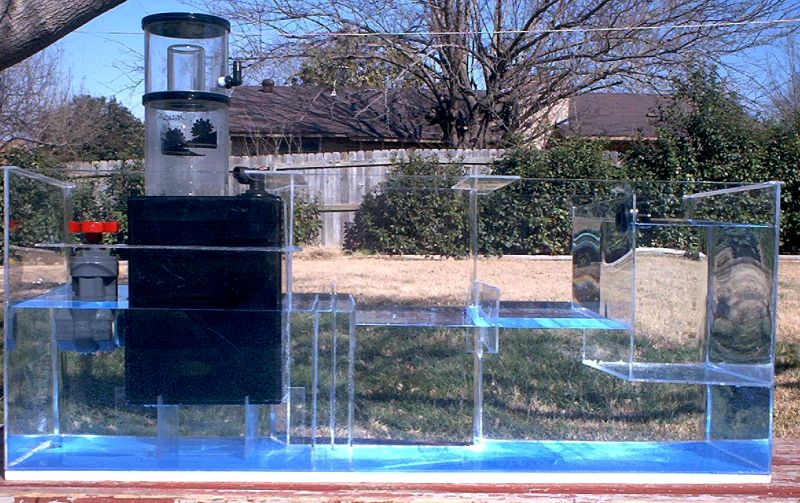
So this was born...(02/03/03)
Here are a few more angles:
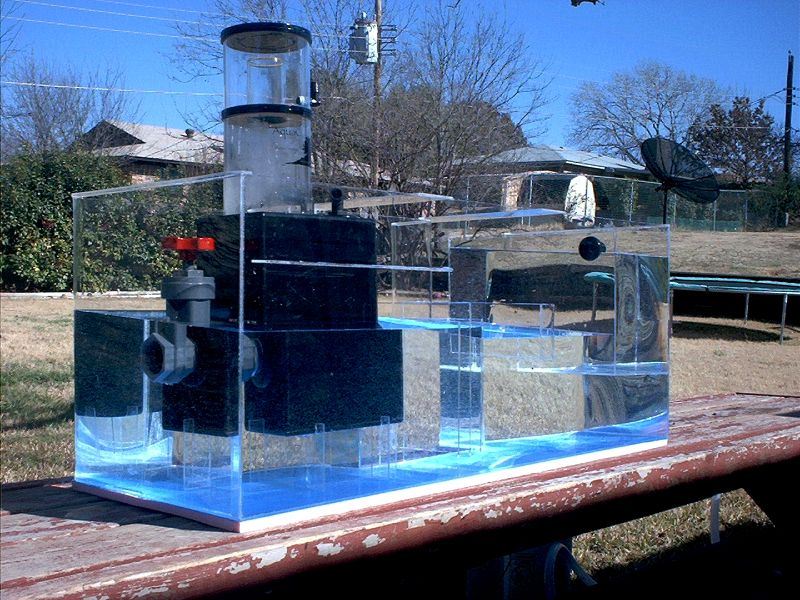
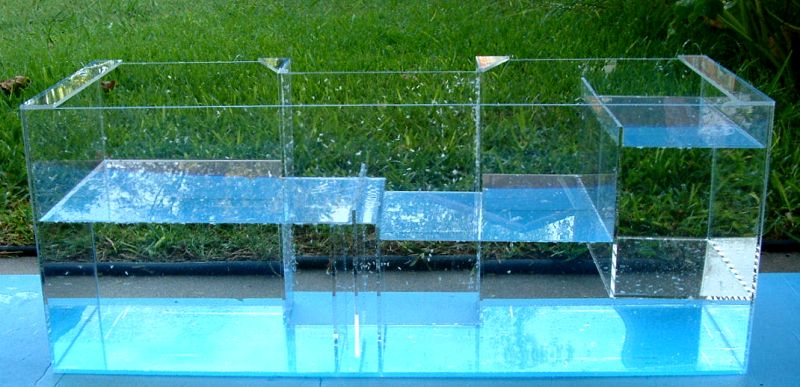
So here are the specs about the unit
42" long x 15" deep x 16" tall
Intake section (where PS is located): 10 gallons
Return section (where evaporation takes place): 10 gallons
Refugium: 5 gallons
The water level is governed by the bubble trap. This is set at 9" tall.
If I were to fill this entire sump to the top, it could potentially hold 35 gallons! And it still fits inside the stand.
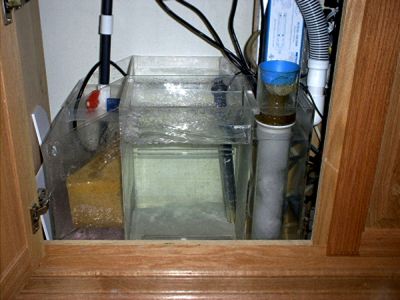
Here is a back view of the sump prior to completion. It was filled with water to test for leaks.
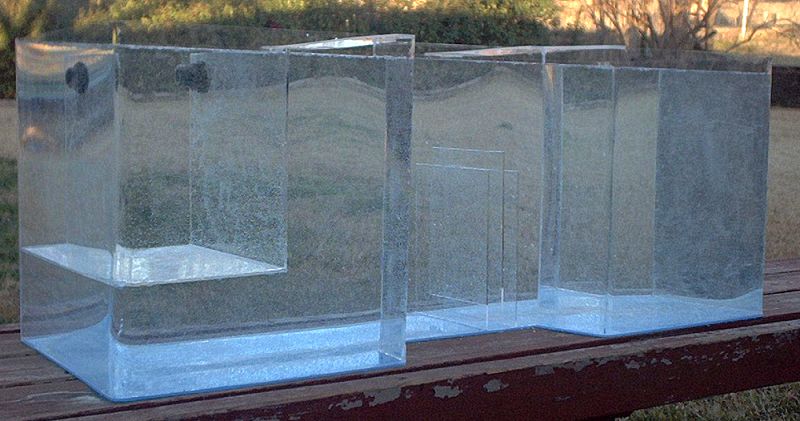
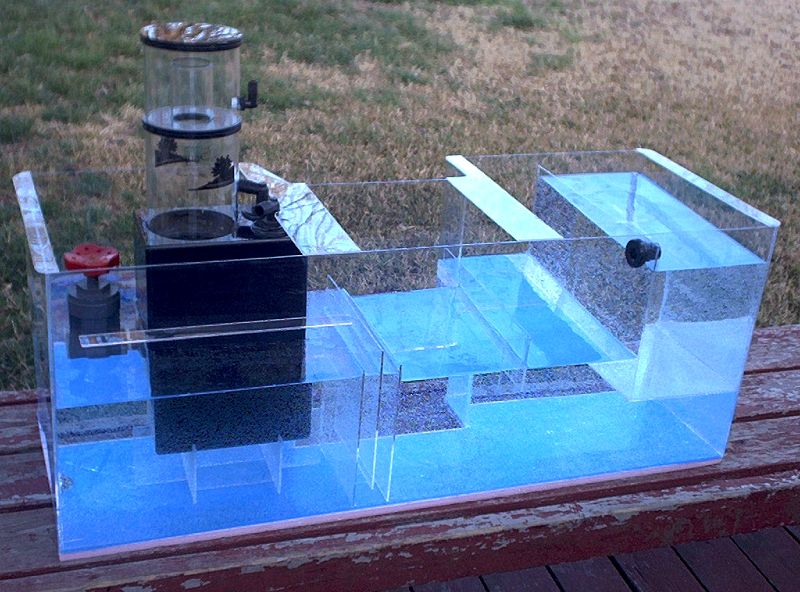
Notice the recessed area? That is where the center brace of the stand is located. The indention is about 4", so the width of that middle section is 10 3/4" wide, compared to the end sections which are 15" wide. Also, because of where my electrical outlets are located, I made an allowance for those with a special angle.
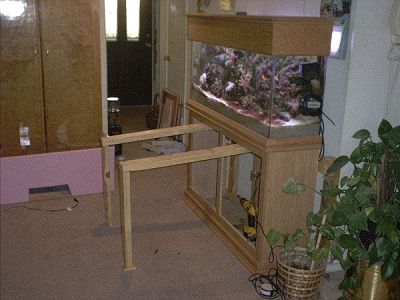
Here is a small picture of what I had before.
And this is what it looks like now!
This is how it got in there:
 |
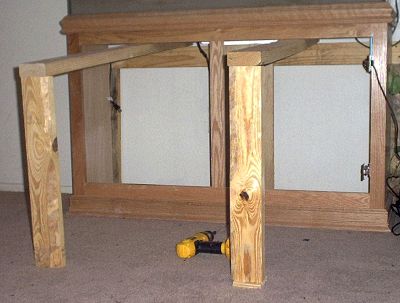 |
| An inverted "U" was installed temporarily. You can see the horizontal 2x4 near the top |
Cross braces rested on the temporary beam, then shimmed up to accept the load. |
 |
 |
| Another angle: The center brace is ready to be removed. |
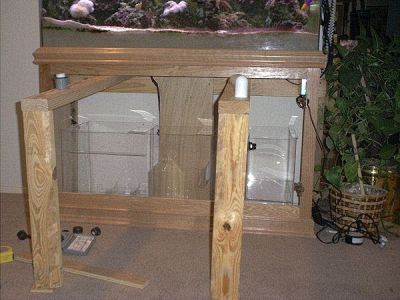
New sump has been inserted atop 1/2" polyfoam sheet (to relieve any pressure points). |
The sump was built from 1/8" Acrylite, and cut on a simple table saw. To reduce the amount of joints needing glue, I used a propane torch to carefully heat the material until it was pliable enough to bend. Once it was at the angle I wanted to achieve, I held it in place for a minute or two to cool. By heating and bending I was able to make the outer walls with 3 pieces of acrylic rather than 8. Less joints also means less chances for leaks.
Everything was glued together with Weld-On #3, using a needle applicator. I bought a very small can, but only used a fraction of that can for this entire project. Once all my pieces were in place, I ran a thin bead of Weld-On #16 along the seams as well, just in case.
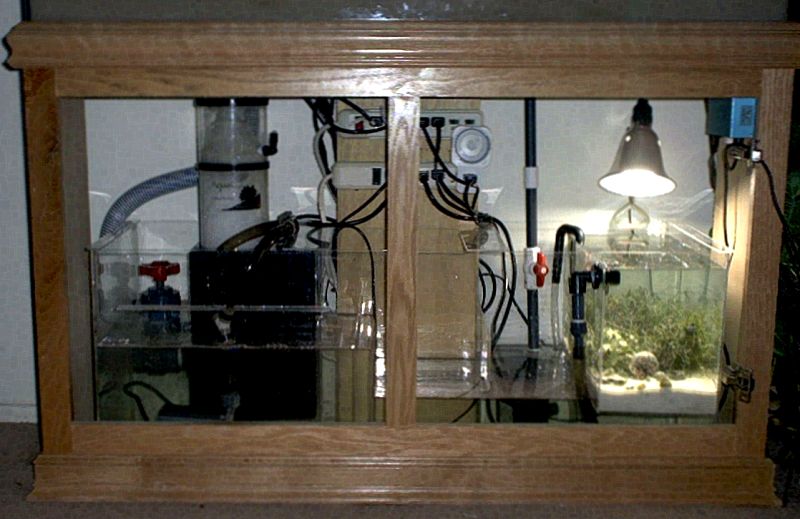
How was this plumbed?
- To keep things very simple, I used a bulkhead from the previous sump. Water drains downward from the overflow into this 90° bulkhead.
- Water enters the large chamber on the left where the protein skimmer is.
- A Mag 12 pumps the water into the skimmer, which drains back into the same area. (The skimmer is sitting on a 3" stand)
- Water flows out of this zone via a bubble trap.
- A Mag 9.5 pumps the water back up to the tank from the large return area on the right side.
- Above that area hangs the refugium, which is fed from a T in the return line of the Mag 9.5. A gate valve sets the rate of flow.
- The refugium has a 3/4" bulkhead, draining back into the return area.
- A 200w heater is in the return area as well.
Two days later, I took a couple of close-ups
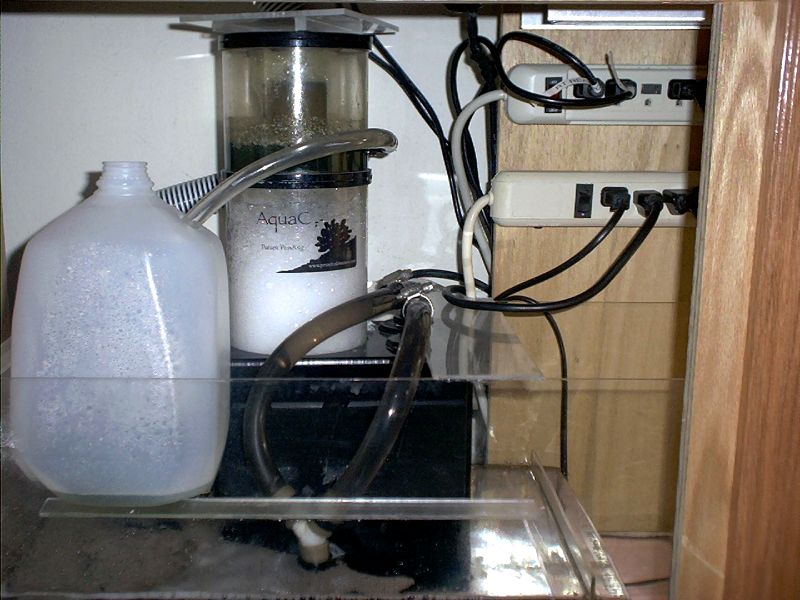
This skimmer is rated for up to a 200g tank. It should be a tremendous help in keeping the tank clear of DOCs.
Everyone loves to see a close-up of the refugium. I'm using a spare outlet to spread the waterflow evenly, providing water to the 'fuge with a Rio 600. This was temporary while awaiting the new Mag 9.5 return pump. A foam block prevented anything from clogging the drain to the return zone. This was removed later.
February 15, 2003 - I installed a Mag 9.5 to the system. Using 1" plumbing, this pump produces more water flow than my tank can currently handle. I am diverting a little of the water from the return into my refugium as originally planned, and I'm also redirecting some of the water right back into the sump to prevent too much water rising up to the display tank. By adjusting a ball valve, I can control the flow. Currently, even with two U tubes in my overflow box, I still have the ball valve open quite a bit.

The drain from the refugium has a hard plastic strainer inserted, to keep snails out of the opening.
10/09/03 - A stronger sump of the same design
The last sump was 1/8" material. I built this one with 1/4" material, since all the sumps I make are made of this thickness or better. I figured when people come over, it would be nice to show them a sample of my work, plus there were a couple of adjustments made. I decided not to bend the material for this one, opting for cleaner seams instead. This sump is 2" shorter in overall length, but that wasn't intentional. I simply made a mistake during construction.

As you can see, this sump didn't need all the extra reinforcement of the previous one. The refugium's base still has a 1/4" slope, to avoid trapping air bubbles beneath it. With the thicker acrylic, the refugium wall no longer bows outward.

Same skimmer, the Aqua C EV-200. The drainline from the tank pours in behind the skimmer. I decided not to put a bulkhead on this sump, to further avoid potential leaks. And when I did so, the overflow box became silent with the hose submerged.

This version, the refugium uses a new drainpipe, to streamline the flow of water a bit better. The heater is located beneath the refugium, sitting on an acrylic stand to avoid possibly melting the sump's base. Extra pieces of LR are in the return zone as well.

The surface agitation looks good at this point, and there is no noise from the drain. The LS (live sand) and macros were moved from the old refugium to this one, so the plants look dusty and bland.