280g Reef - The 14 day install
My build thread on reefcentral.com documented this project. Warning: It is long and informative. lol The information below is compiled in real-time, which is why it reads in the present tense. The 14 day project lasted from July 20, 2004 - August 2, 2004. This is a dairy of those days.
The planning stages
I decided to upgrade to a huge 280g Starfire tank. I'm buying it used from a club member, and set a goal to set it up in 14 days. The events are documented below to allow others to see how it would be accomplished.
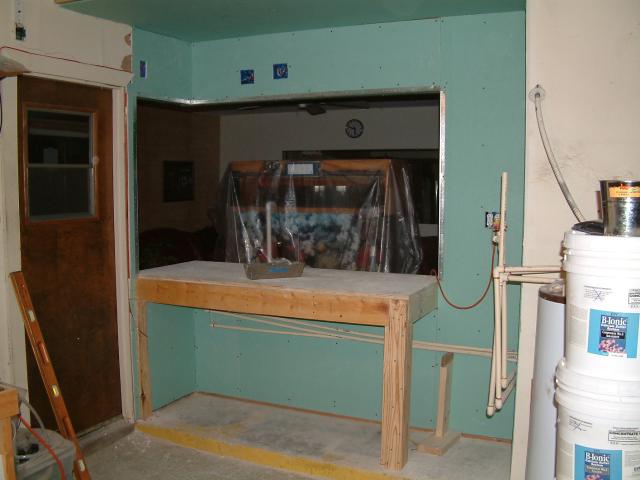
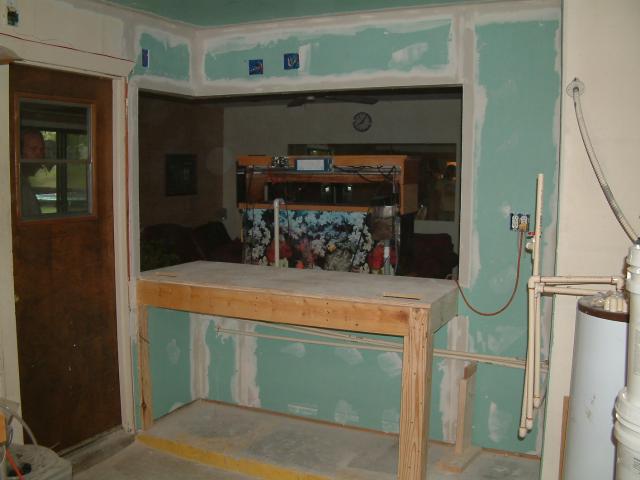
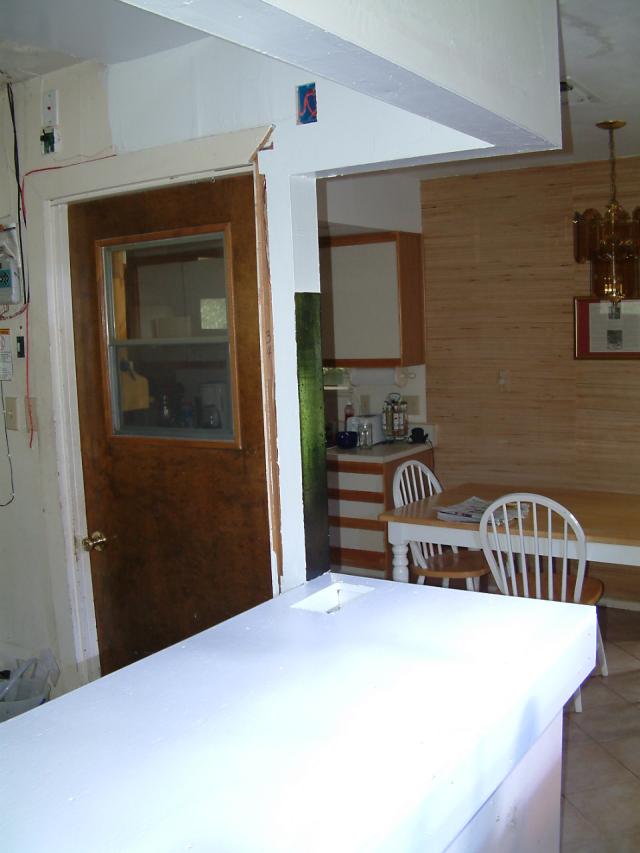
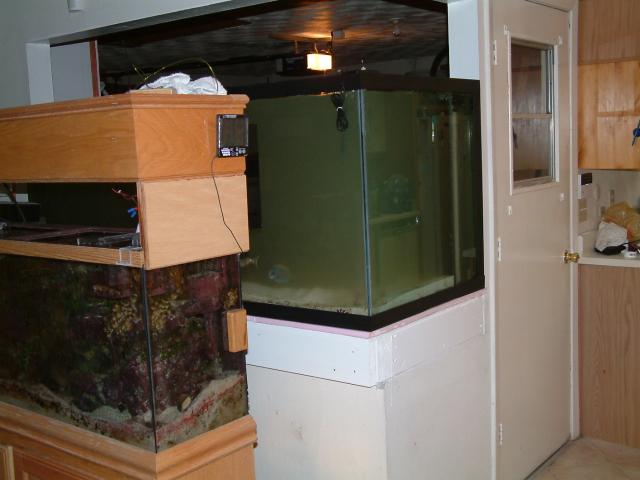
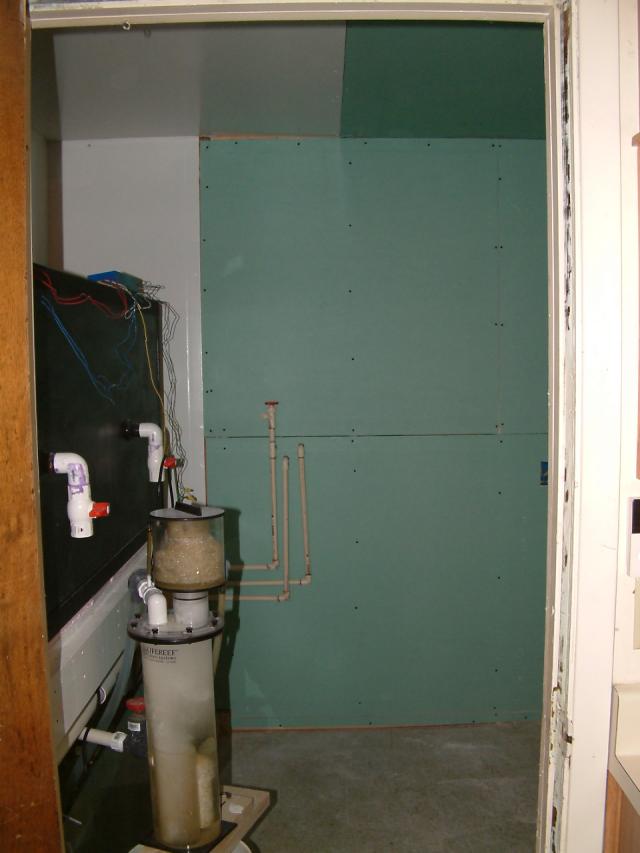
Here are a few images to set the stage. First, the tank is going where my 55g is currently located, but it'll go in-wall:
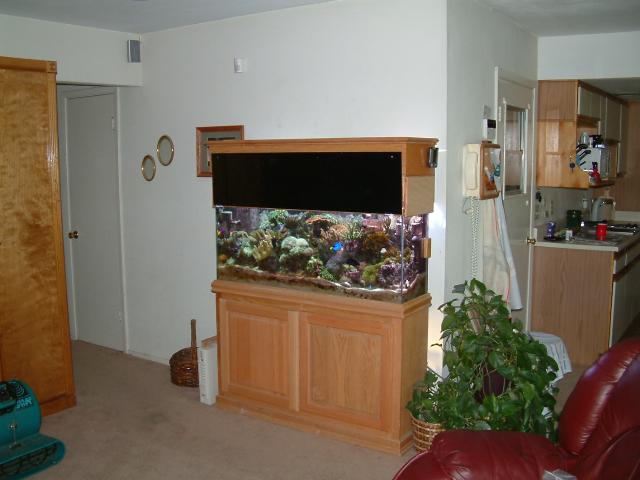
The new tank will face the living room, but the right side will be visible too, so this corner will be cut out so I can view the tank from the end from the kitchen.
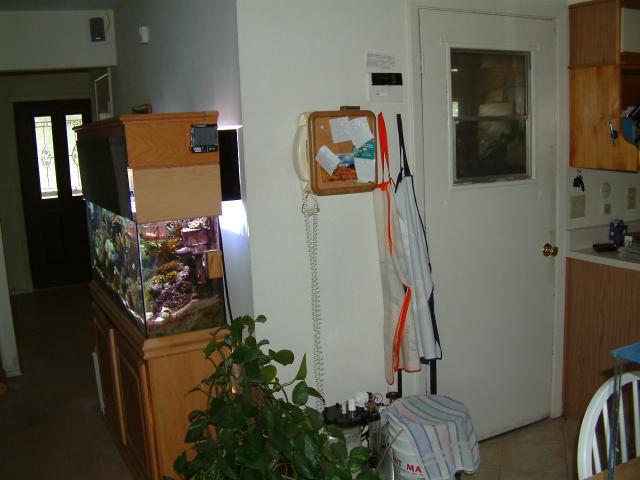
This is the other side of the garage, as you can see it is nowhere near ready. YET.
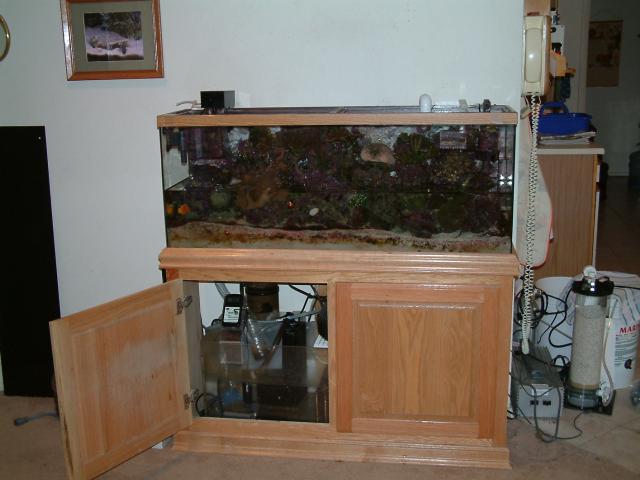
And this is a shot of the tank I'm getting:

Currently, the tank is on a 40" welded steel stand, which is too tall. The tank is 36" tall as far as I know, but I'm going to remeasure it.
Lighting is 3x400w 10,000K MH, and 2x(6' long) actinic VHO. What is that wattage, btw?
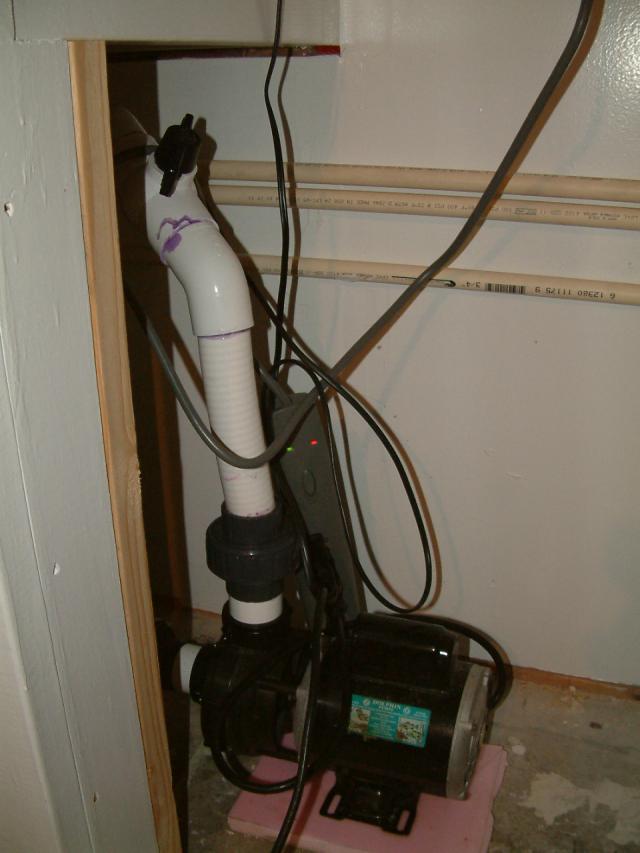
Return pump is an Ampmaster 4700, and the tank is drilled in the back - halfway down- for a closed loop. It has dual overflow boxes in the rear corners.
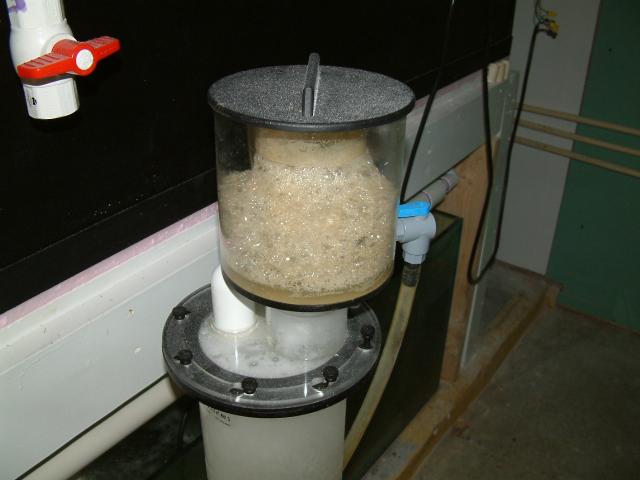
Two Tunze Stream pumps will move help keep the current random. A Lifereef protein skimmer and Calcium Reactor will handle those needs, and of course I'll be using RO/DI water as always.
The livestock from my 29g and my 55g will end up in this tank, along with all the live rock (LR) I have. I believe I have 200 lbs worth currently.
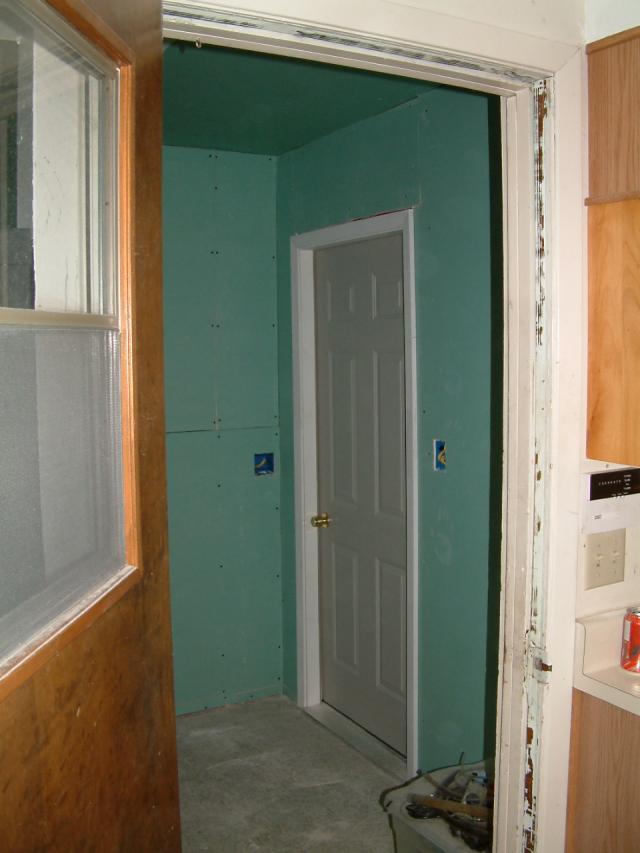
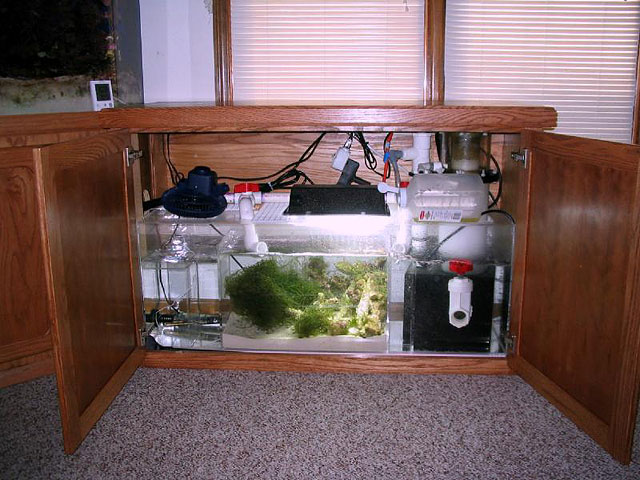
Inside the garage, I'm going to build two interior walls, and insulate them from the heat of summer / cold of winter. It'll be my little fish room. I do have to move the water heater, but will have access to water and a drain. That allows me to put an RO/DI unit in the same room as the tank. I'll keep my other RO/DI unit in the utility room as we like to make our own drinking water and it is handy.
My plan is to add an A/C duct to the ceiling of the fish room, and a vent fan (similar to those used in a bathroom). I may set up that fan on a thermo-sensor. Another idea is a window unit to cool the room, and create a plenum that would vent all the hot air of the window A/C right up into the attic area. I don't really like that option, because window units are not very energy efficient.
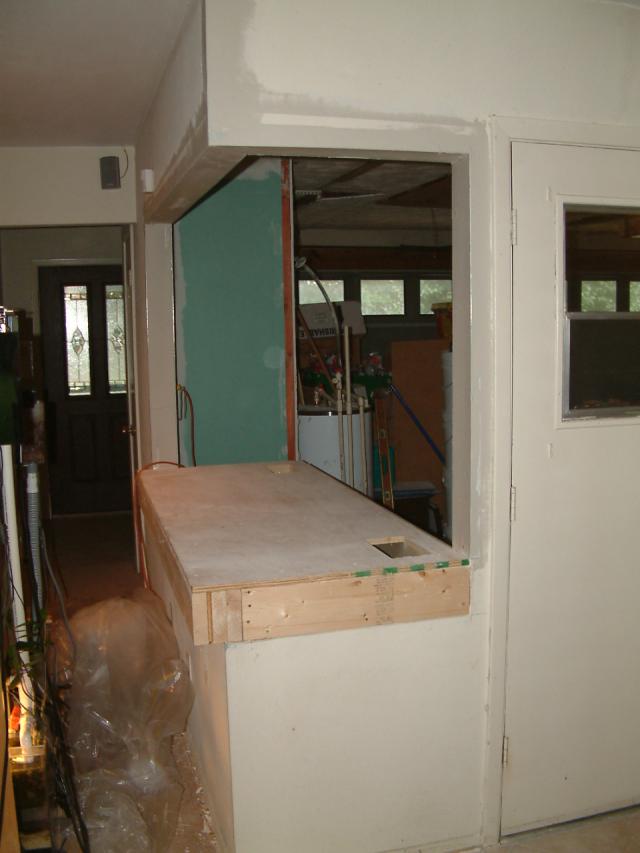
Access will be from the fishroom, but also from the front. Currently, I have no plans to access the lower section from the front. I need to remeasure the tank again so I can design the new platform/stand and make sure it is strong enough.
Week One
Day 1 - Tuesday, 7/20/04
Here's what got done this evening.
Moving the outlets will be a breeze, and the other stuff can be relocated relatively easily.
I don't know what will happen with my 29g. In a way, it is its own legacy, and I thought about using it as a quarantine system, but how many quarantines do you know of with a skimmer, PC lighting, closed loop w/ SCWD, sump and refugium?
Since I can't do computer rendering, what I'm about to describe will require your imagination to follow along. Access to the tank will be from the living room side and from the garage of course.
My plan is to create a lighting rack that will be supported on the ends. These ends will have 3 wheels each, rolling in a track. A stop will be built into the track.
With the canopy door opened, I will be able to push the lighting forward from inside the garage, to gain access to the rear of the tank and still see. From the front of the tank, I'll be able to push the rack away from me and into the garage.
With the wheels evenly spaced, the center wheel would hit the stop either direction, to prevent the rack from rolling too far outward. Just getting 12" of space from either end should do nicely.
My plan is to create a mantle of sorts, which will wrap arond the front and side of the tank. It'll only stick out 6" to 8", and help hide the front edge of the sand bed. Plus it'll give me a spot to put a drink down, or rest my elbows during picture taking. Just a handy shelf.
The top canopy door will also be some type of woodwork that wraps around the front and side, but only the front will open. I'd actually like that door to lift up and slide in, but I may just lift up and lock it in place instead.
Using the lighting box on wheels method, I'll probably create a box with highly polished aluminum, so I won't be blinded when opening the door.
Day 2 - Wednesday, 7/21/04
Okay, just got done with the water heater project. Whew!!!
While it was draining, I went and got all new CPVC plumbing fittings, as well as more wiring for the water heater since its location further away. I'm trying to avoid any trips up into the attic at this point if possible.
While the water heater was accessible, I went ahead and cleaned out the waste at the base:
We are supposed to do this yearly. This is the sediment that accumulates over time, probably by the calcium deposits that form on the heating elements. I really don't know what causes it precisely, but I do know it builds up in the base of our heaters, and eventually it can build up so high that the element fails. Where I used to live, the water quality was so bad that I could fill up a 5 gallon bucket with what looked like Crushed Coral substrate!
I've lived here for a few years, and this wasn't really that much sediment, but the water is so much better here.
Next, I cut out the old copper plumbing, and sweated on some new connections the convert to CPVC. You can see the three stages in this picture. The middle is the drain line for when the water heater's Temperature & Pressure Relief Valve blows.
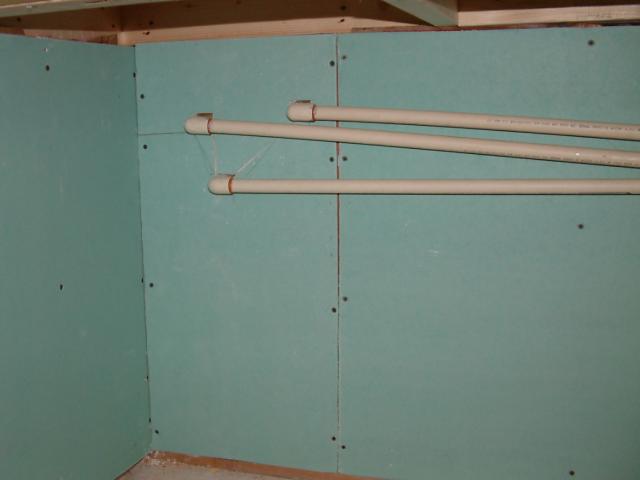
Here is a picture of the new plumbing running along the front of the wall. I left enough space to slide in the sheetrock later. I'll also put insulation in the spaces, to dampen any sound.
This is where the plumbing goes to the water heater. I have a plan but I don't know if it will work. If it doesn't, I'll just cap it off. My idea was that I'd use the cold water line going to the water heater for an RO/DI unit. The waste water can go down the tall drainpipe.
However, two things have occured since I made this transition. #1) when I tested the TPRV on the heater, water did come out the top of the pipe, which I hoped would not. Solution? Put a cap on it, and thread in a John Guest fitting so the drainline will push water down the line, but not have the water heater push water out the top and spray water all over the fish room. #2) I only discovered this evening that the drain leads to a spot on my patio, so if I did run my RO/DI unit, waster water would always be flowing across the concrete.
So, I'll have to do some thinking about this. Of course, because my RO/DI unit is only about 25 feet away from this spot, I could run a piece of tubing through the attic and into the fish room for easy access.

And finally, this is the junction box where the old 220v and the new 220v lines connect. The old wiring is stranded aluminum, the new is single-strand copper. I used some anti-oxidant in the wire nuts.
Next step is to make the cut-out in the wall, and build the stand so I can sheetrock. I'll use the green sheetrock as it can handle moisture better.
From reading a few comments today I learned that screwing down the platform is wise. Thanks!
A number of club members have volunteered to help move the new tank into its location this Sunday, so I can't sit on my hands and do nothing.
My goal at this point is to have as much done as possible so that we can slide the tank in place and refill it with the water.
I will be strapping the plumbing in place, once the sheetrock is in. I'll insulate the pipe as well. It was insulated in the wall with a black foam tubing, and I'll just put on the same for the CPVC. Btw, I did talk with a plumber about using this for my water heater, and specifically discussed the hot, the cold, and the drain line. I was assured these will be fine. Hopefully they will be, because it'll be a real drag having to crawl under the tank one day, if necessary.
Accidentally, I set off the panic alarm with my keyfob. After the police showed up and all was well, a funny moment occured while we were talking about the possibility of a forced entry. He told me that up the street something had occured, and at first thought this call was about the same location. Then he asked me if there were any noise complaints. Perplexed, I told him I didn't have a problem with anyone and that they were all nice and quiet. He meant were my neighbors annoyed with my remodel!!!! I told him you can't make that much noise running wiring and gluing plumbing together. He smiled and told
me when I turn on my circuit breaker again, then the fireworks will go off.
I used to be a trim carpenter for a couple of years, and I asked my friend to come over this Saturday to discuss the canopy and mantle ideas I have in mind. I'm hoping he'll give me some good feedback.
Day 3 - Thursday, 7/22/04
The 55g is moved out of the way.
First I removed the canopy and all the associated wiring, so that it wouldn't be top-heavy. Then I drained the sump of all the water I could, plus at least half the water from the display. This took about 5 minutes, using a pump.
Next, I had a helper put their foot againt the baseboard and pull on the stand near the base on one end. I stood in front of the tank, and lifted slightly at the cabinet opening on the same end. We worked it out about 10", then did the same at the opposite end. By my lifting a little bit, he was able to pull the stand and tank toward the living room without stressing the stand. It is now about 2' from the wall. This took about 5 minutes, btw.
Here's the back of the 55g. This should answer all those questions about plumbing finally.
The tank was refilled quickly, by pumping water into a cup so that the force would not displace the stand or distress the corals further.
Here it is with the canopy back on, and the lights plugged back in. One of the MH was still warming up, so it looks a bit yellow on the left.
And the wall is ready to mark and cut out now. Moving the tank took about 30 minutes, tops.
I talked with Mitch at InterAmerican (where it was built) about this tank, and he told me to use the pink foam sheet available at Home Depot. Plywood top, then foam. When I told him the tank has been directly on the steel frame since day one, he was shocked.
I sure hope this tank won't let me down, after being set up incorrectly for 8 months.
Day 4 - Friday, 7/23/04
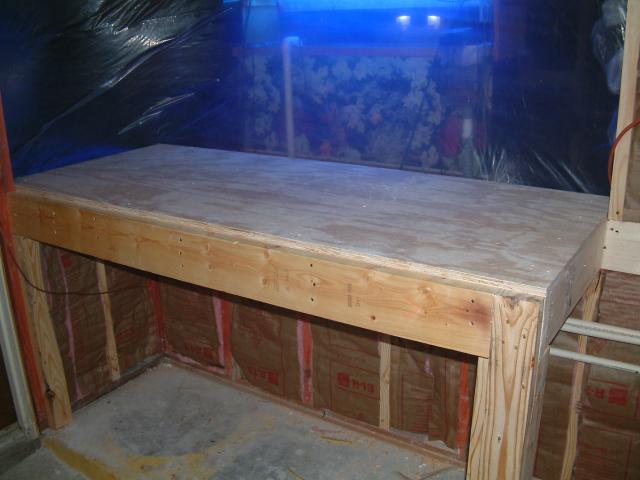
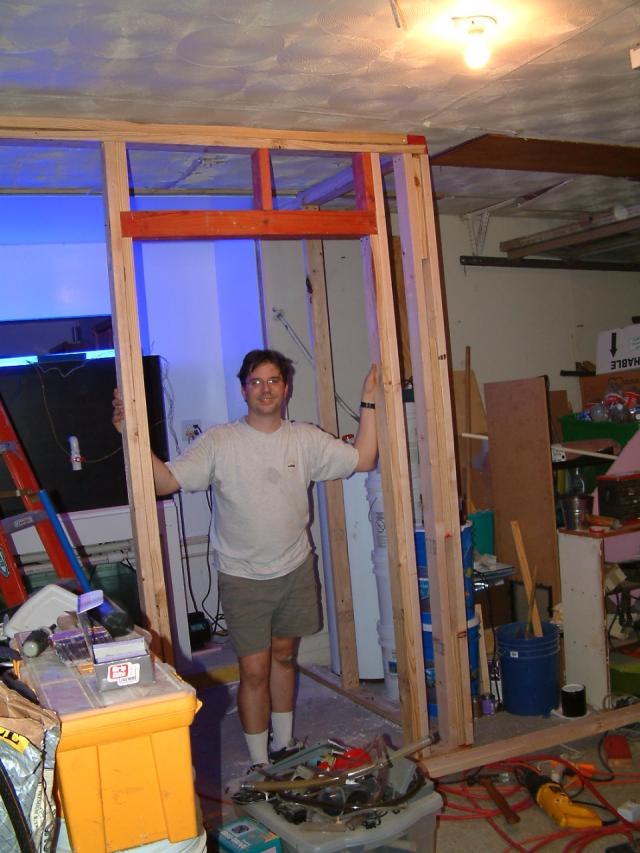
Alright, the hole is cut, and the stand is 95% done.
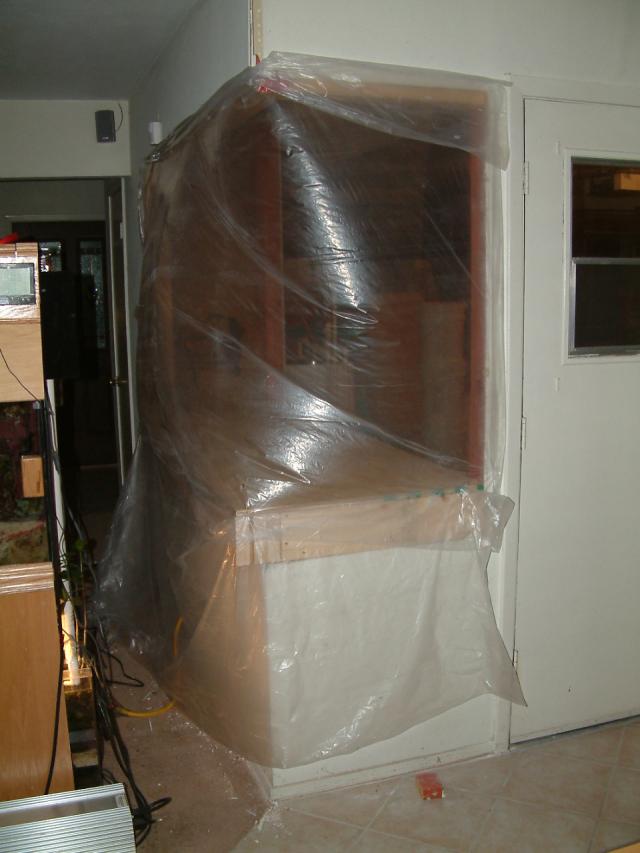
First I tarped off the area so that the dust wouldn't affect the 55g. This is cheap 1 mm 9' x 12' drop cloth, and worked great:
Then after drawing the opening on the wall, the first piece was cut out.
Todd, a new club member and a custom home builder by trade came over to help this evening, and after we got part of the platform done, it was time to eat. This is where we were at that point:
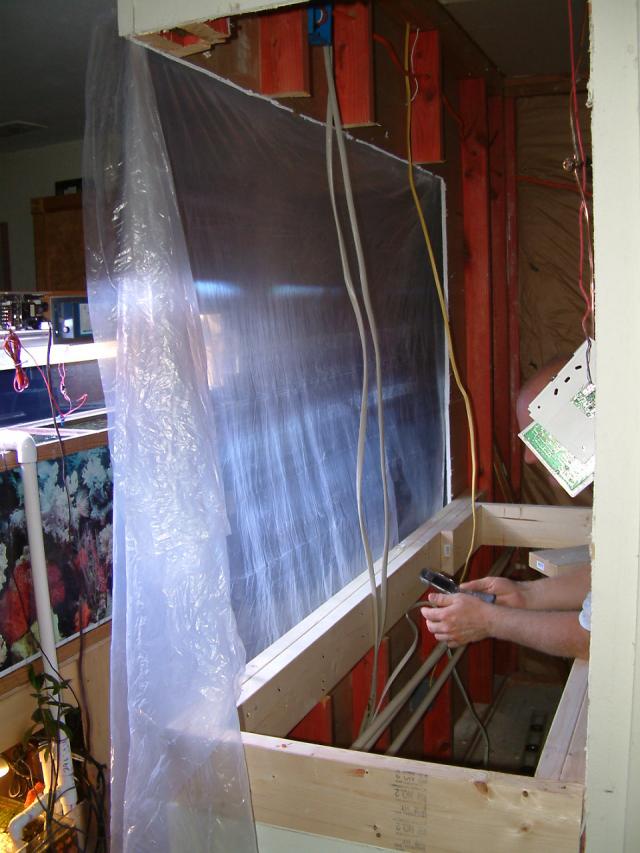
Then I measured again, and found that after the tank is installed, I'd only have 10" of space above the tank, and I wanted 12". So Todd recut the sheetrock, and after he was done, it was capped with a 2x4.
Here's what the stand looks like. The frame is made of 2x6 whitewood, and the uprights (or cripples) are 2x4 yellow pine.

And here is the upper section.
Tomorrow, I need to finish up the platform, because I ran out of 2x6s and need two more. I'll reroute the wiring that you see in the way, install the plywood top and get to sheetrocking.
Now I know a number of you will tell me the stand isn't strong enough, but it isn't finished. I ran 3 2x6's across the back section, because I really do NOT want an upright in the center because the sump goes there. However, I may make an upright that can be inserted for safety measure, and if necessary to remove it, I could use a small jack to lift the stand slightly to get it back out.
The front of the platform will get two more 2x6's and a piece of 1/2" plywood, to reach the full 30". Because the tank sticks out of the wall 3", I've decided to put two uprights under the 2x6's, at each end, and then I will wrap them with columns when the trimwork is done.
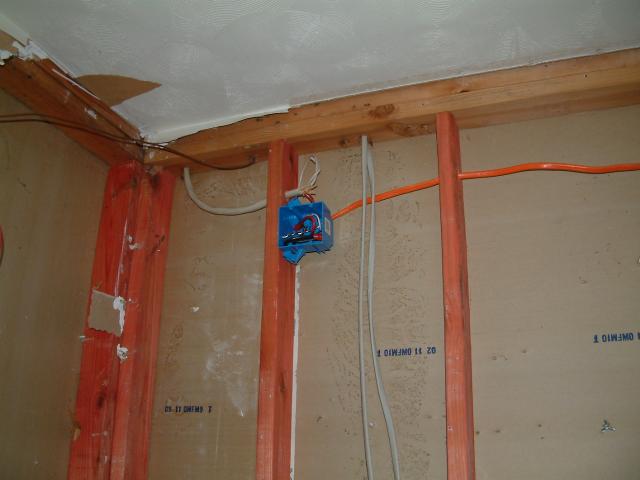
The wiring has been moved. I didn't have time to reply to some of the comments on Reef Central because I'm up to my eyebrows in insulation fibers, saw dust, and sheetrock dust!
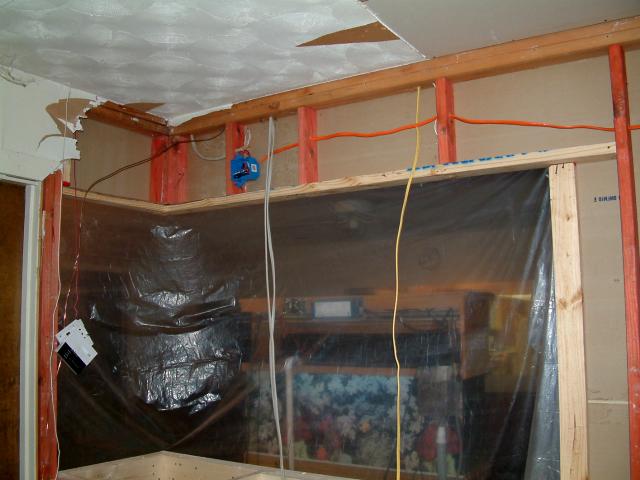
Here are the latest images. As I stated, the electrical was finished off. I have two circuits running to this spot, and at this point you'll only see two outlets. Each outlet is its own circuit, and I plan to get those DJ power centers that are all the rage in '04! That is why you don't see 20 boxes all over the place awaiting the equipment cords. I'll probably put them all on one panel, but after the tank is in. The two outlets are to the right side of the tank, not the blue boxes at the top.
The insulation is in, the wiring routed, the alarm panel relocated (THANKS BRANDON!!!), the phone wiring removed.
Also, for those of you worried about the furr-down section, I went ahead and talked to another framing genius, and he recommended in this application to put 3" screws in each upright. By securing them to the double-headers, it'll avoid sagging. While doing so, I noticed one double plate had separated, but one screw pulled everything up nicely. So I put three more screws just in case!
I finished the platform. You know how we always over do it? I think I did as well. Because the tank will stick into the room a couple of inches, and because I had no room to pull it into the garage any further due to the adjacent doorway, I added another 3.5" of wood across the front. That puts three 2x6's across the front, plus a sheet of 1/2" plywood as a spacer. And there are three across
the back. The ends are made up of two 2x6's, and there are two cross braces evenly spaced in the middle section (every 22").
I still need to add a couple of 2x4s as legs on the front, in each corner facing the living room. Those I will wrap with fluted columns, which will accenting the mantle that will be in front of the tank. I'll be able to put things down in front of the tank, like a beer.
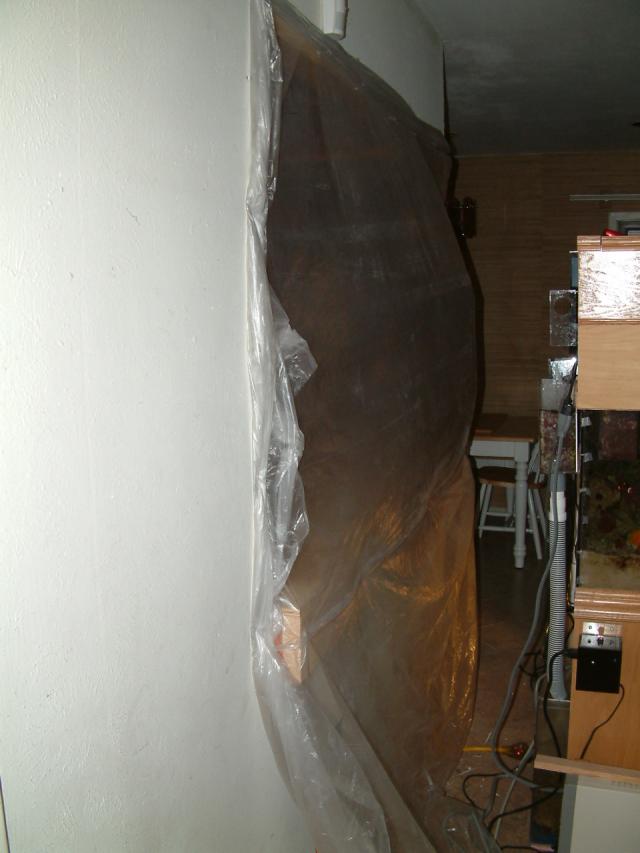
I know you can't see the front edge well, but it is pretty darn hot outside and I use this plastic to trap the a/c in the house.
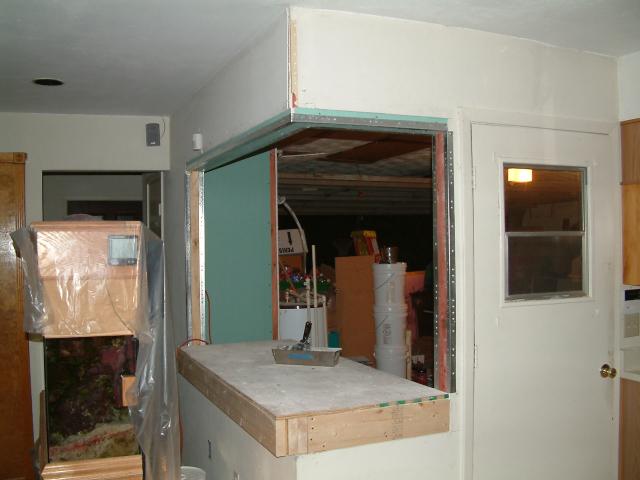
Here you can see (a little) how far the front of the tank will stick out of the wall when you walk in. Roughly 2", but the mantle will be about 5" or 6" out from the front of the tank.
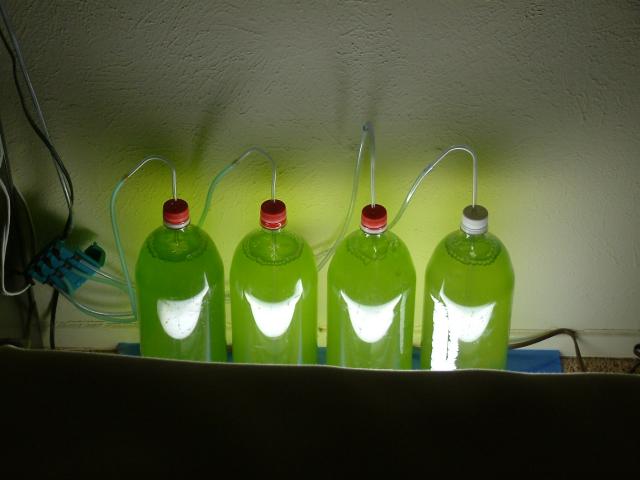
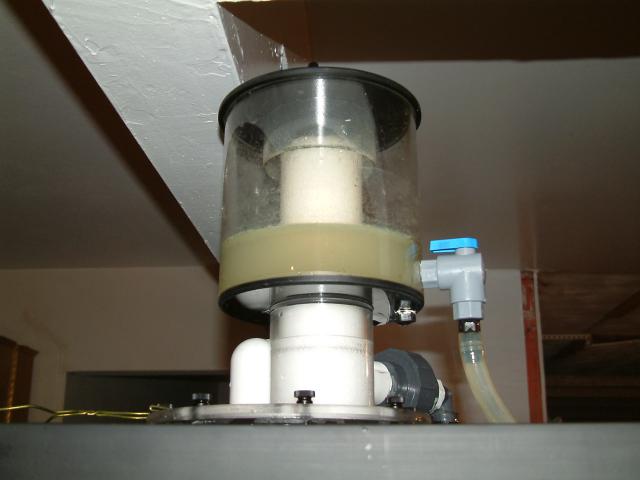
And just for fun, I thought I'd show you my new culture of phytoplankton brewing. I started these about 4 days ago from the algae disks from Florida Aqua Farms. I'm looking forward to growing my phtyo in the new fish room!
I've been meaning to share this little tidbit about the water heater project that was mentioned earlier in this thread. When copper plumbing is run to a water heater, typically it is threaded onto galvanized threaded pipe. Due to the differences in metal, it is required (recommended) to use di-electric unions. This does something beneficial, although I've never taken the time to find out what. It was good
enough for me to know you needed it and thus I'm familiar with them.
Anyway, when I removed the fittings from the water heater, the di-electric union that the hot water passes through was completely solid! You couldn't see through the hole like you could on the coldwater side. When I pressed on that smooth surface, it wouldn't budge. After unscrewing the galvanized pipe and holding it up to the sunlight, I could barely make out a few tiny spots of light through that obstruction. It's hard to believe I was getting any hot water all this time. Although I have all new fittings now, I really can't tell the difference. Still, I thought it was interesting and if some of you plan to rinse out your water heater of the sediment, you might as well check those pipes on the top as well, to see if all is clear and working.
Day 5 - Saturday, 7/24/04
Okay, did I mention how much I hate sheetrocking?!
Done at 5:45 am.
Of course, I had to get around the plumbing. A special cut indeed.
Metal edges.... need to put one in that upper corner.
I drilled the holes where the overflow boxes will be, but haven't cut them out completely.

Time to go tape and bed.
Three hours later, the final three pictures for this morning. 8:48 a.m.
All the tape and bedding is done.
Later this afternoon, it'll be bone dry and ready for paint. I'm not going to worry about sanding it smooth, nor texturing. That is too messy and simply not needed in this application.
You can see the holes that are cut out for the overflow drains.
Later that day... I just got the paint, so I'm off to get things ready for tomorrow. I also rented a U-haul truck to make the tank move easier, hopefully.
I just finished painting the walls, platform and support system. Everything is gloss white.
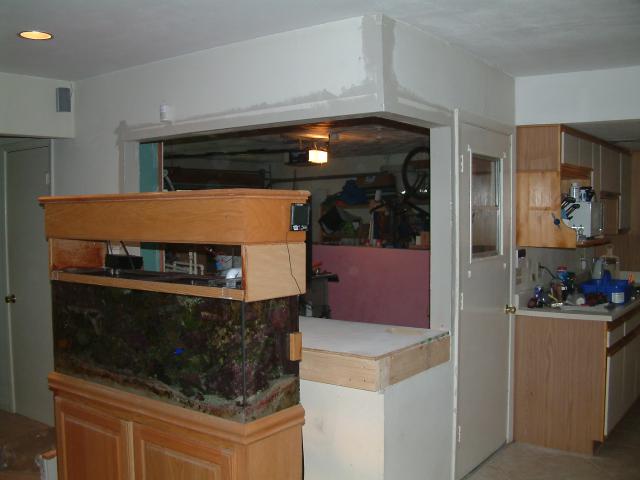
Once the tank is in place, the edge of the wall on the left will be visible through the side panel, especially when viewing it from the
kitchen side. So I bought a small can of black exterior gloss paint to cover the 4.5" x 30.5" area that would be seen. I will probably not clean the glass on that end, and didn't want a white vertical stripe showing through the glass.
Or perhaps I'll have the opportunity to take pictures from that side, assuming I have the room and equipment out of the way. I will cover
the area of the side panel that is in the fish room with black acrylic or cellocast (black plastic sign material). That way I can remove it when necessary.
Here's a couple of pictures, now that it has been painted.
And the CPVC is now supported finally. I'll probably add more brackets later. How could I insulate these? They hug the wall and the brackets would be too small. Is there any need since they won't be exposed to the elements?
Once the tank is in place, I can go ahead and put up the new walls that will isolate the room from the garage area. More sheetrock, more tape & bedding, more painting... and I guess more wiring too. Might as well make the wall handy.
A few hours later, near midnight... This was very aggravating. I already cleaned up everything, and just needed to put a final coat of black paint on the edge of the opening that faces the tank wall. So I wouldn't splatter the platform, I put a section of newspaper there to catch
any drips. When I set down the full quart of black paint on the newspaper, it fell right through the overflow box opening and dumped 90% of the contents all over the concrete, the new white paint on two walls, and the door entering the garage from the kitchen.
For what should have taken 2 minutes tops, I ended up spending over any hour trying to clean up that black morass. The tint in that stuff is
not to be toyed with, I assure you.
It could have been worse, I suppose. I could have dropped the can on my carpeting.... I repainted the stained areas, and the floor looks better.
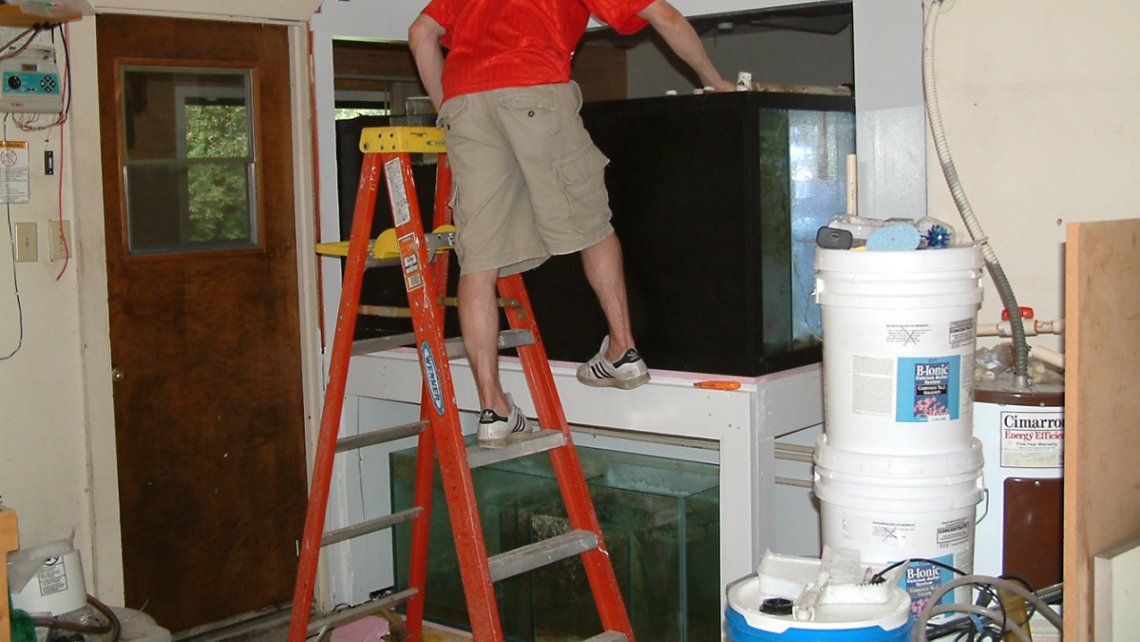
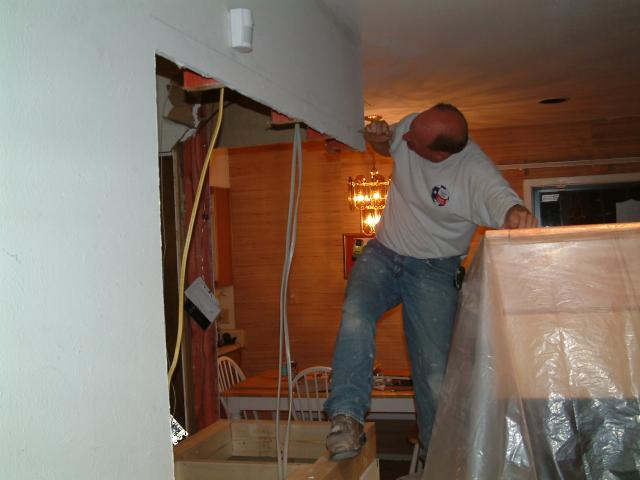
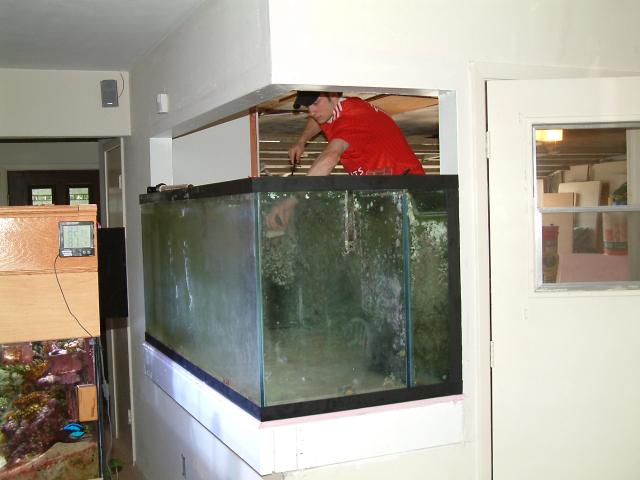
Day 6 - Sunday, 7/25/04: The tank moves in today!
I'm over here, waiting for the tank move to begin.
Final shots:
You can see how I painted the edges of the walls that will be up against the tank. The one on the left is the only one that needed it, as the one on the right will be up against the back of the overflow. Since I don't really want/need algae growing in the overflow, I painted it black as well.

Many hours later, a quick summation...the tank is in place and filledup as far as I dared (almost to the locline connections on the overflows).
We did so much today, and at times I thought someone was literally going to be killed by this tank, but it has tons of promise. I took a lot of pictures, except during the move because it took all 8 of us to carry this beast.
A few club members came over after the tank was in place, and helped with more stuff.
More sand was added, but it is only about 2" deep currently. The fish are still in a trashcan of water (they came with the tank) and I dropped in some flake food about 20 minutes ago, which they all ate hungrily. I'll probably have to change the water in there tomorrow!
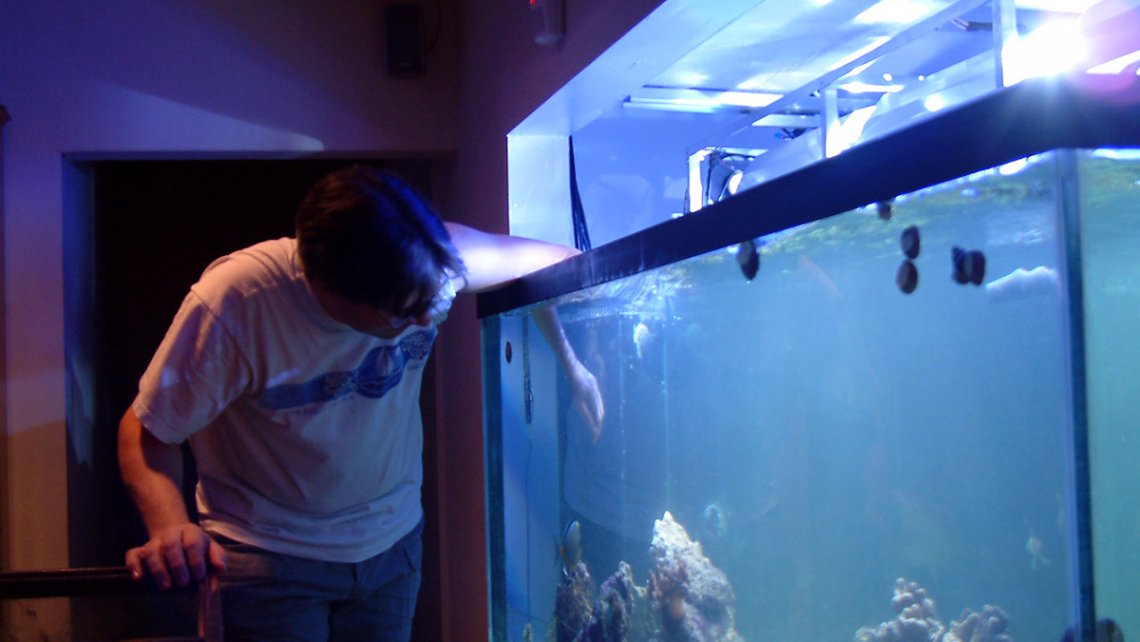
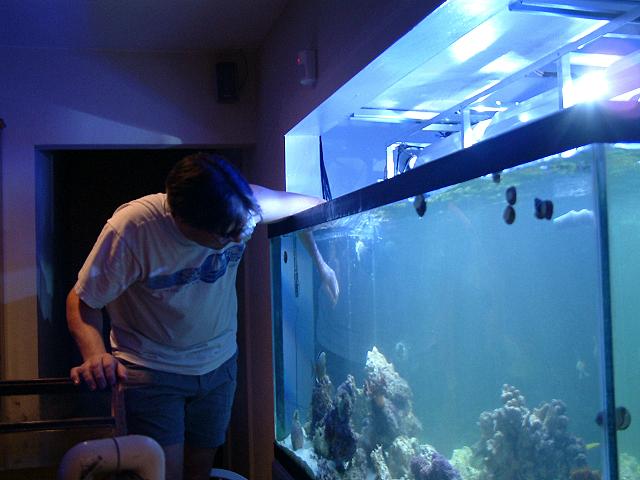
What else....(5 minutes until the backup)... Evan took the time to clean the tank inside, and used a cool little gizmo made by "Dawn" (the dish soap). It is available at Walgreens, and is battery powered. Completely submersible, it cleaned off the glass including coralline. Best $8 ever spent, as there was no risk of scratching. The brush at the top of the device rotates, and the top-most bristles are stiff enough for coralline. Here's a thread about it on ReefCentral.
The U-haul truck has to go back in a few hours. (yawn!)
Here is the more detailed recollection of the day's events...Moving this tank was a huge challenge, and even with all the preparation on my part, it still was overwhelming. I want to thank all the club members that joined in this effort - André(Dré), Chris(marine_noob), Chris (phaux), Brian (BrianC.), Barry (bfonc1), Todd (patteto), Evan (Quiksilver) - you guys are the best!!!!
These guys worked so hard, and never complained once.
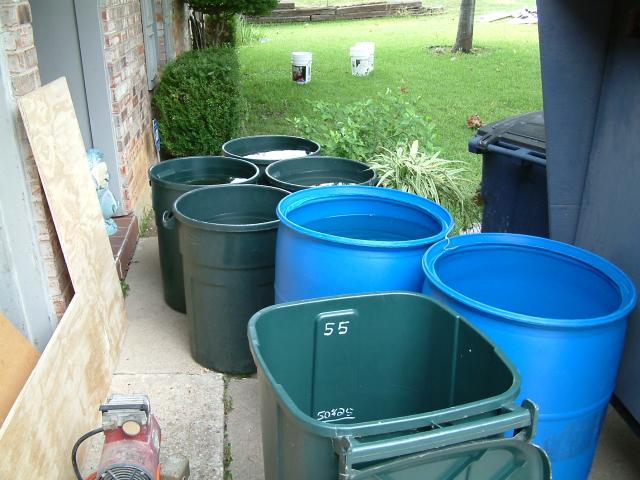
When we got to the house where the tank was, it had to be disassembled and the water drained. We brought a bunch of trash cans and barrels to take the water to my house, as well as the steel frame, canopy, and wood panels.
Barry focused on disconnection all the plumbing parts, so when it was time to put it back together late last night, it was quite a jigsaw puzzle.
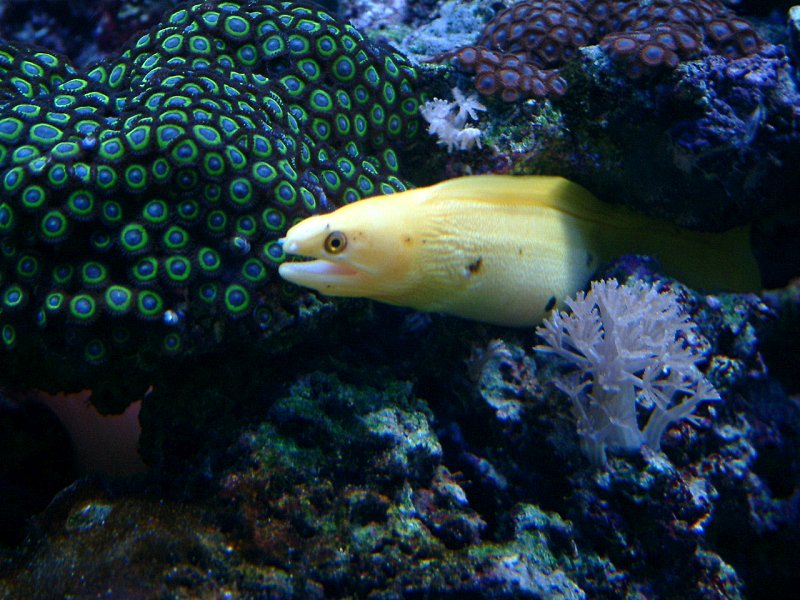
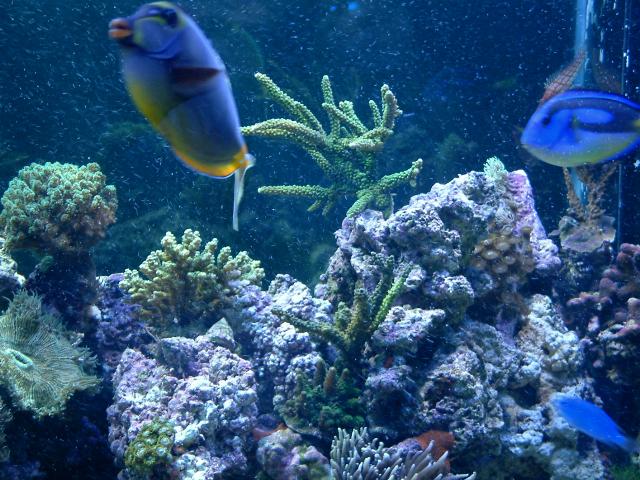
About 30 or 40 lbs of LR were pulled out by Brian, and kept submerged in one of the trashcans with tank water. Evan and others drained the tank into container after container, and barrels of water will filled up on the Uhaul. When the tank was down to about 4 or 5" of water, I got out a large net and caught all the fish. There are 5 tangs - a (blonde?) Naso, 2 Hippo Tangs with yellow bellies, a purple tang, and a Powder Blue Tang. Additionally, I got a female blue Mandarin, a lawnmower blenny, a clownfish (not sure if it is a true or false percula yet, as I never looked at it closely), a small Australian (something) that was trapped in an overflow), two bangai cardinals, and a golden eel. Here's a picture of the eel from a few weeks ago.
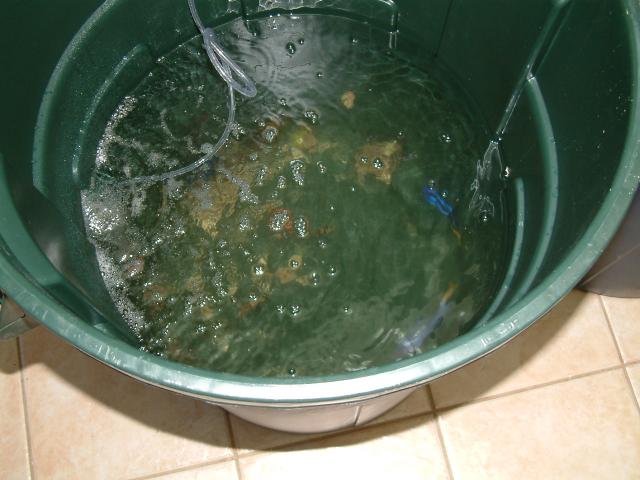
Once all the fish were in a barrel of tank water, we took all the water, fish and LR to my house. After getting an airstone each trashcan with livestock, we went back for the tank.
The tank was up on a 40" steel stand, and the 8 of us discussed how we would pick it up and carry it. One thing you don't think about with a used tank is how slippery they are to hold onto, due to water and salt creep. Carefully sliding it forward, everyone was very careful to keep all their fingers safe, we were able to get it off the stand and onto some 2x4's on the floor.
At this point, I really should have used furniture dollies, but I was afraid that the massive weight pressing on those dollies would act like pressure points and break the base of the tank. That is why I decided to use man-power instead.
We picked it up and made our way across the room and to the open front door, which were double doors so there was a big opening to go out. However, the trick was getting through a very narrow hallway as you pivoted out the front doors, and that is when we ran into real trouble. There simply wasn't room for men to be on the sides of the tank, which put all of the weight on 4 guys, two on each end. The rest of us scrambled to squeeze in where we could, but muscles were straining and eyes grew wide with the realization that it was growing heavier by the second with all 8 people helping. Some of us used our thighs to support the tank while others attempted to help. I know that I've got a bruise on my thigh, and Evan proudly showed me his. ("Chicks dig scars!" he says) Chris quickly crawled under the tank to get to the other end to help support it, but it was just too much!
At this point, I really worried it was about to be dropped by one or more of us, and someone would be crushed, or their bone(s) be broken by the weight and mass of this 72" x 30" x 30" tank.
Quickly we agreed to lower it, which was a real feat of control, considering how worn out we were - adrenaline was already used up. We were able to set it down gently across the threshold, where it teeter-tottered and all of us could remove our fingers safely. whew!!!
We took a break and planned our next move. About 10 minutes later, we summoned the strength to tackle it again, and pivoted the tank across the threshold of the doorway so that we all had room to pick it up at once. All we had to do was pick it up, and carry it forward about 14 feet and slide it into the back of the U-haul truck. 1, 2, 3! it was lifted up, but it wasn't nearly as heavy as it was in the corner situation. We moved it onto the truck, setting it on 2x4s.
Then we went back for the glass sump. The sump is 48 x 18 x 18, and built with 1/2" glass. It took four of us to pick it up, and get it into the truck. Btw, I hate the sump and you can bet I'll make a much nicer one that will do the job well.
Chris and Barry used their trucks to carry the canopy, woodwork and steel stand.
When we got back to my house, the first thing we did was all guzzle down some nice cold RO water. Next, we struggled with that stupid sump again, and got it under the new platform. (sigh)
Again, we mapped out how we would carry the tank and insert it into position. We moved more stuff out of the garage to make sure we had plenty of maneuvering space, and now 9 of us brought it in, as John joined the group with fresh strong muscles.
Even though I intentionally left the foam sheet oversized in case it moved, and even though we put soapy water on the surface so the tank wouild slide, the sheet moved forward and there was nothing we could do to put it where it needed to be. So we cut some small pieces to fit in the spaces where there was none, and then pushed the tank into its final spot.
YAY!!
Again, I want to thank all of you that helped move my dream tank. Evan decided to stay and volunteered to clean the tank. As noted above, he was able to use the "Dawn" scrubber, as well as plastic scrapers and sometimes metal ones. Because the tank was dry, he would spray a spot with tank water with a spray bottle, then scrub or scrape away the algae. Here is the thread about the cleaning tool, along with a link to the product's image.
Meanwhile, John rinsed out three buckets of live sand that came out of a 120g yesterday. I didn't want to chance phosphates being released into my new system, so he poured some of the LS into a bucket and ran water through it until it ran clear. All this rinsed sand was added to the LS that came with the tank, and stirred up. There is probably 2.5" of sand in the tank now.
At this point, Kaveh came over and started cleaning all the equipment. He cleaned the Tunze Streams, the LifeReef skimmer, the Durso standpipes and returns, locline, etc. Working over the sink with various instruments including dental tools, he proudly produced nice clean parts - ready to use again.
One thing we discovered during the move was that the bulkheads had to be replaced. While the guys were cleaning, I drove to Brad's house to get new bulkheads, then to Home Depot to get all new plumbing for the drains, returns, and closed loop.
Evan found all kinds of snails that were transferred into the fish barrel.
For the next couple of hours, we fought with the bulkheads to get a good dry seal. I swear I need to invent the perfect wrench for those wretched things, because they are a reefer's nightmare!
Unfortunately, I didn't have all the right pieces for the plumbing, so the return pump (Ampmaster 3000) was not hooked up. I'll buy new parts today, so that tonight I can get everything circulating.
Kaveh and Evan filled the tank up with as much water as possible, without passing the locline connections. As long as no water goes in the overflows right now, the garage will stay dry.
The skimmer wasn't working properly, but after a good soaking in hot water and vinegar, it was disassembled for cleaning. Scott (Scotty's_reef) came over and helped with that little project. Thanks Scott! A weird thing that I discovered was that the intake to the pump was really clogged. It turned out there was a rubber hose washer in the intake of the pump, blocking at least 80% of the water from getting in. How weird is that? I can't even imagine how or why such a washer would be in a reef setup, let along get sucked into the intake of a Mag pump.
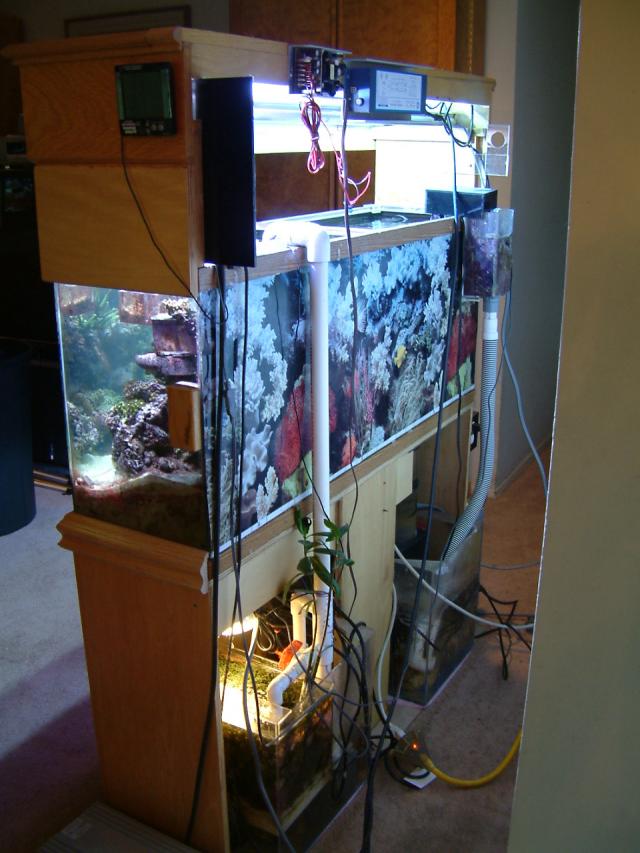
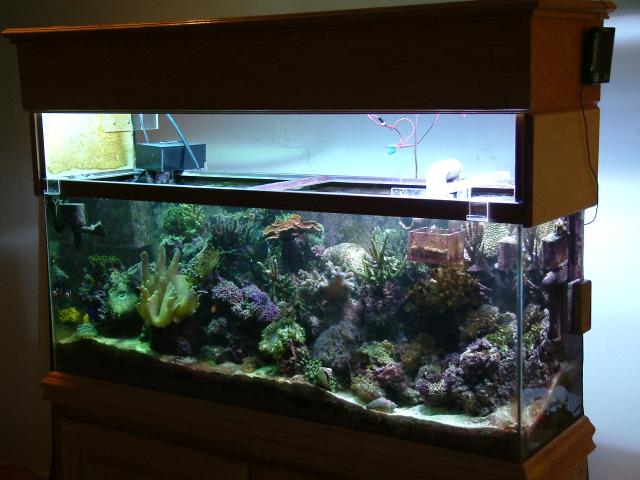
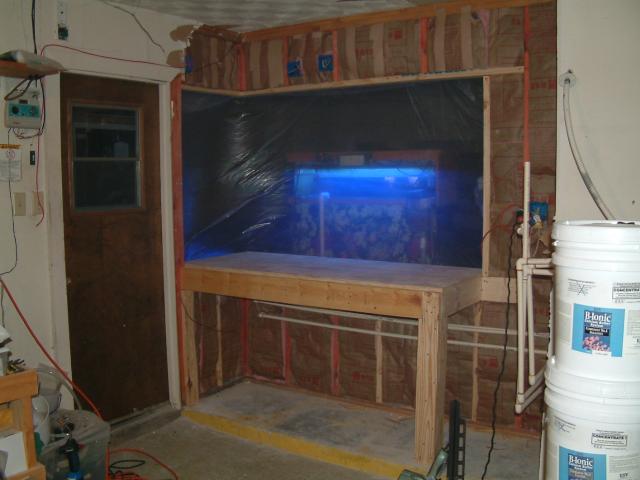
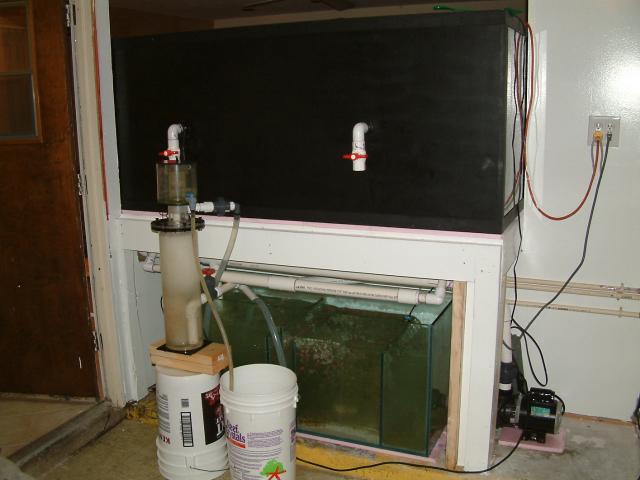
Now that everything was clean and ready to use, I set up the skimmer in the display to help clear the water. Here's what it looks like currently.
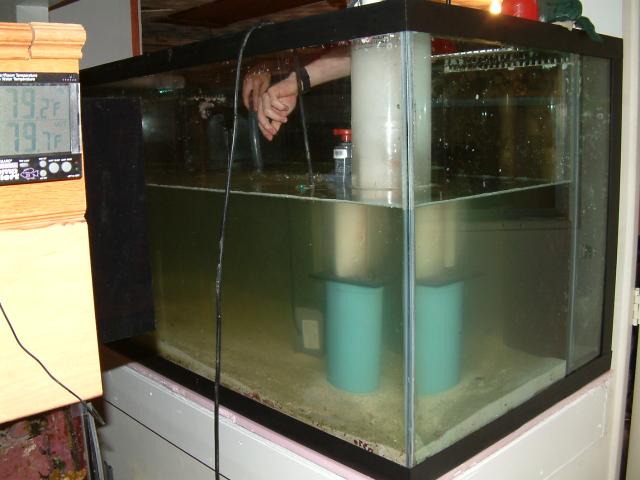
It is on a terra cotta pot to elevate it, but it created a great foam tower immediately, and has been skimming for the past 6 hours. Running a drainline from the collection cup to a trashcan behind the tank, about 1" of water has been removed.
Meanwhile, the fish are all fine from what I can see. About 3am, I fed them some flake food and they all seemed to eat with excitement. I have an airstone bubbling, a small powerhead and a heater (78F) keeping them happy for now. Hopefully tonight's plumbing will get done and they'll go back into the tank.
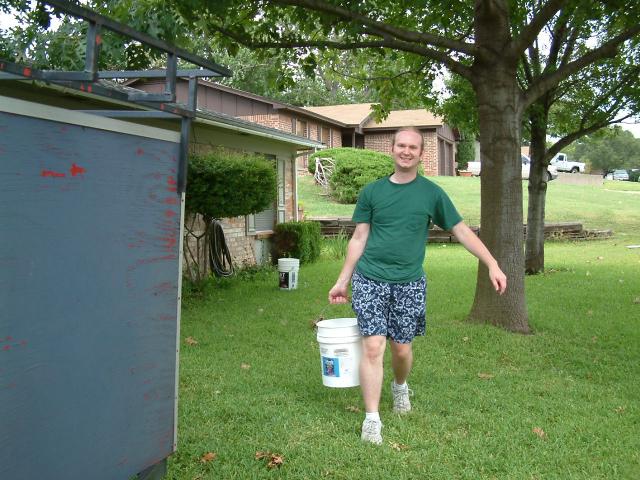
The tank was never cloudy, due to the method we used to add the water to the tank. I secured a cup to the end of a 1" hose. Kaveh brought trashcan after trashcan of water to the tank and Evan use a Rio to pump water into the tank. Here's a picture of some of the 280g of water. The blue barrels hold 55g each.
With a large serving platter on the substrate, the water would pump into the cup and overflow gently onto the platter. You could see the back of the tank within the first 30 minutes of filling up the tank.
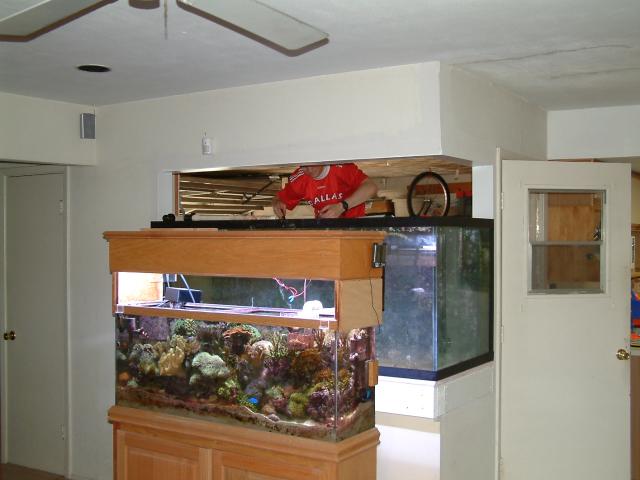
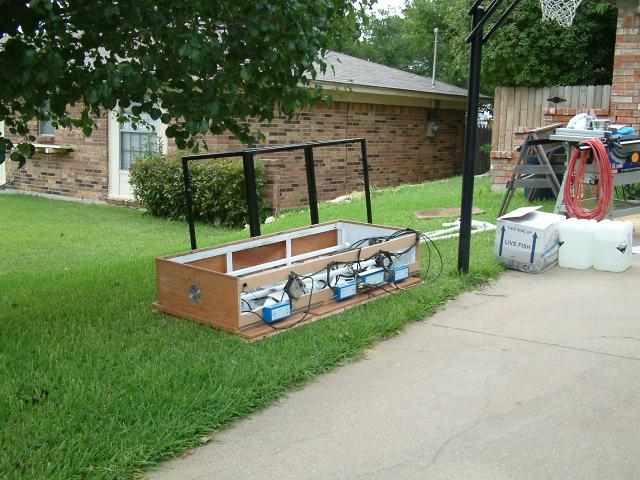
Here is a picture of the canopy and stand that came with the tank. I'll be using the stand as a workbench for building sumps. The lighting turned out to be 3x250w, not 3x400w. And one bulb was shattered before we arrived to pick up the tank. It looks like the lighting was splashed repeatedly with the return lines, because the former owner didn't want too much water to siphon out when the return pump was off. We drilled holes in the return lines to avoid that problem.
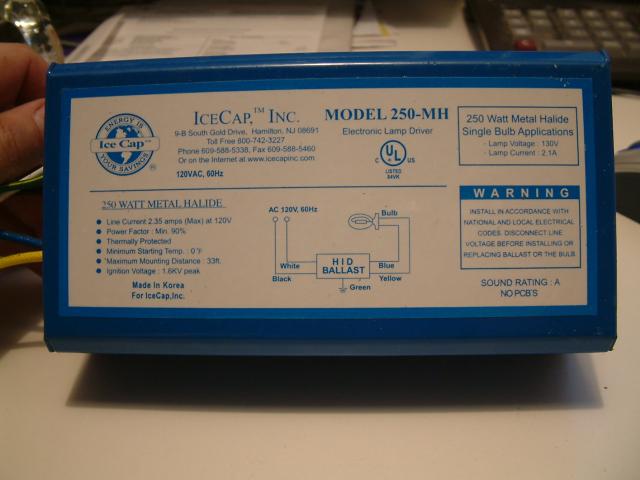
Btw, the ballasts are IceCap for the 250w. Does anyone know how to determine which bulbs will work with it? XM? Ushio? The bulbs I have have only one marking - "250w MH" Not too helpful.
So now you are up to date, assuming I haven't bored you with the details.
Day 7 - Monday, 7/26/04
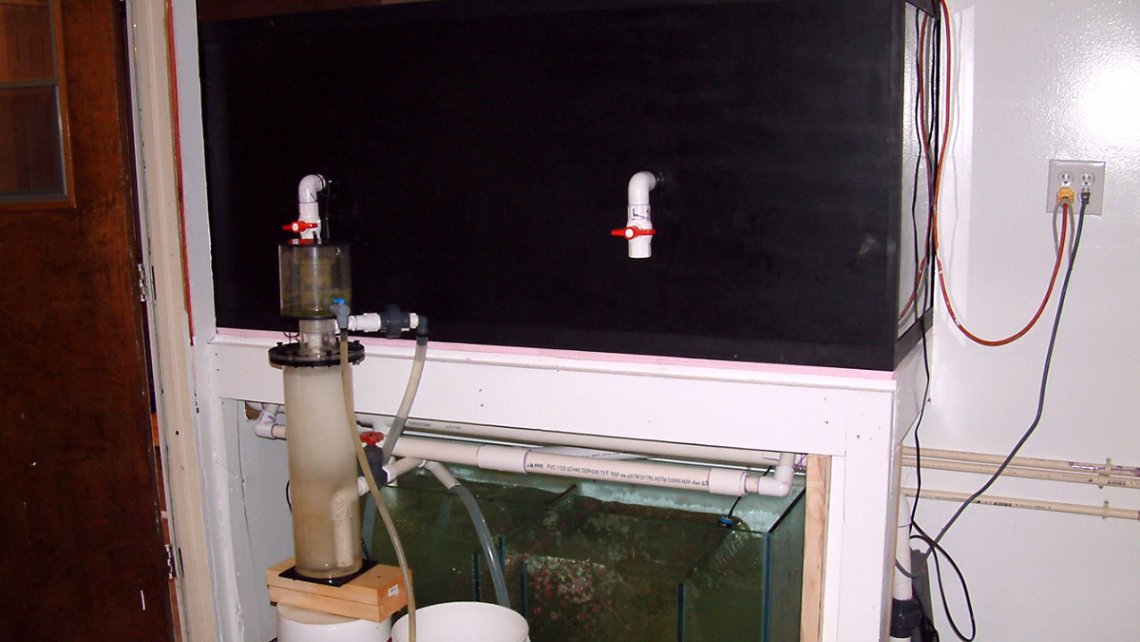
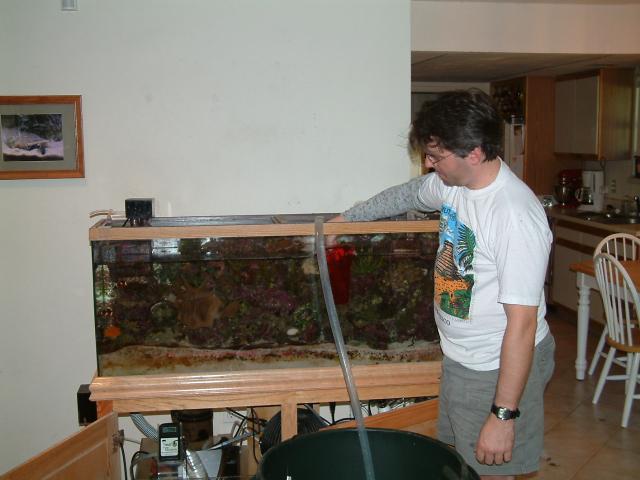
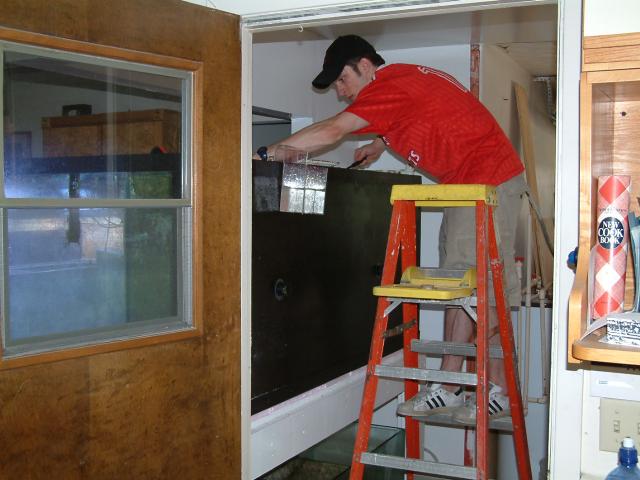
I'm going to have to go to work again. This evening the tank was plumbed and the fish were put back into the display.
The return pump is a Dolphin Ampmaster 4700. Yesterday, I took it apart to clean it, and found a whelk stuck in the impellar section. I wasn't able to remove the impellar itself (is that even an option?), so I cleaned what I could reach, and reassembled it. From the top of the pump, I'm using 1.5" Spa-Flex tubing. I put a ball valve on the return side to avoid too much flow. Here's a shot of it running.
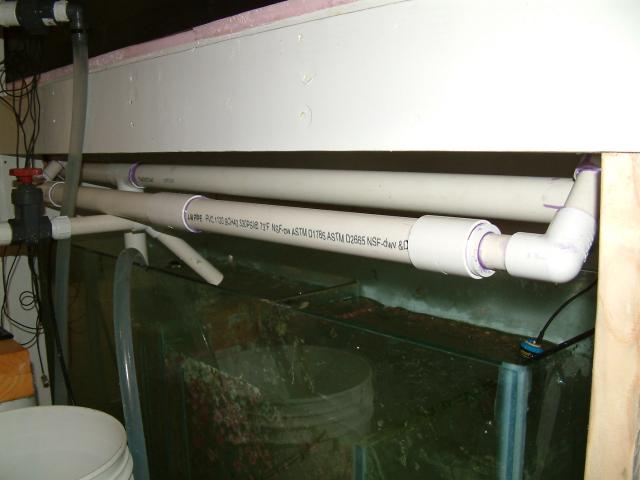
By using Spa-Flex, I was able to put things where they'd work best without the rigidity of PVC. The tubing makes a soft curve that kills into a 1.5" Tee. The Tee is in the center section of the tank so that both returns get the same amount of water volume.
From the Tee, I continued with 1.5" plumbing until it reaches right beneath the return lines in the tank. At that point, I reduced the fittings to 1". Through an 90° elbow, into a 45° and then straight up in the tank until it reaches the locline tubing.
The drain lines are tied together, and are 1.5" plumbing that drain into the sump. The Ampmaster 3000 puts out so much flow that the drain lines actually did not keep up so the ball valve has been turned slightly to reduce the flow.
I haven't tackled the closed loop yet. The Tunze Streams aren't working, but I've got a thread in the Tunze Forum going. One Stream pump is soaking overnight in vinegar water, in case something is impeding the impellars rotation. I can't figure it out yet.
Due to the nature of this sump, there is absolutely no way to put the skimmer in there and have it function properly. For now, it is set up behind the tank and flowing into the sump. I'm trying to dial it in so it will start removing the particulates in the water.
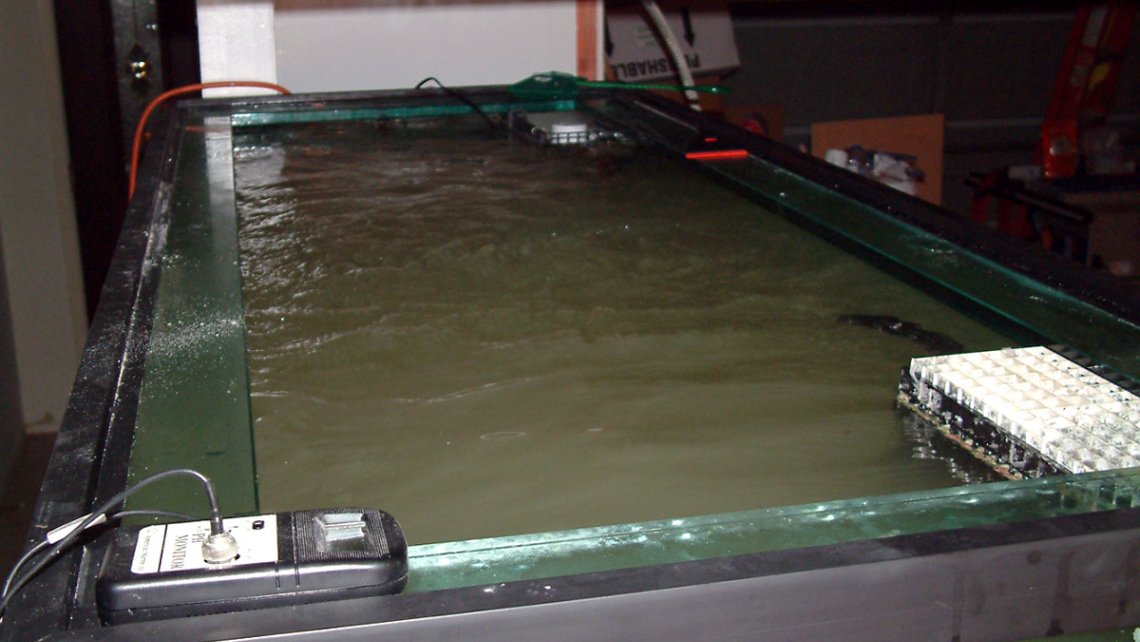
Once the pump was started up, the tank grew cloudy very quickly. At first, this was due to microbubbles but after adding all the rest of the water it was still cloudy. My guess is that this is sediment/detritus from the original sandbed that was laying on the surface undisturbed after the move. Once the skimmer kicks in, it should come out nicely. This is one of the rare times that I think a "sock" would be very useful.
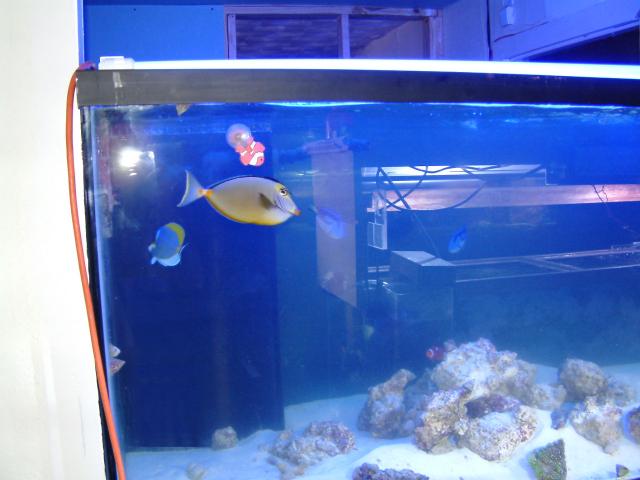
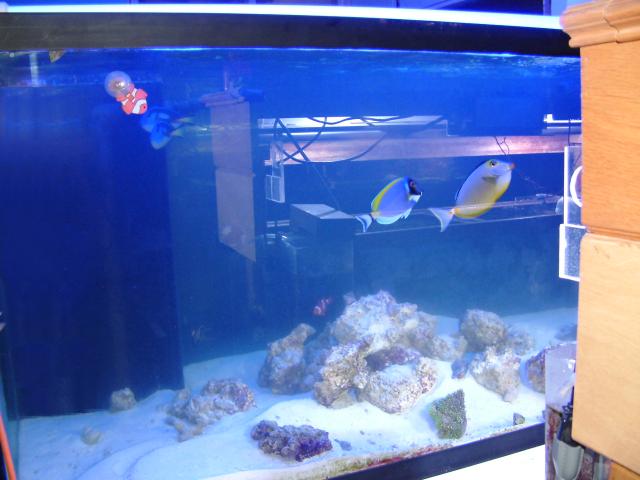
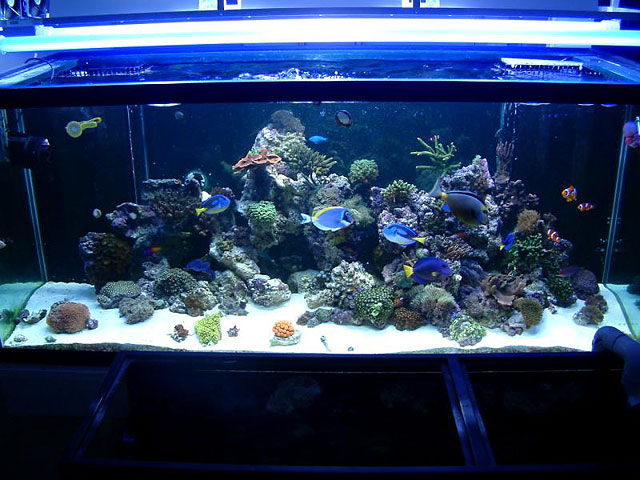
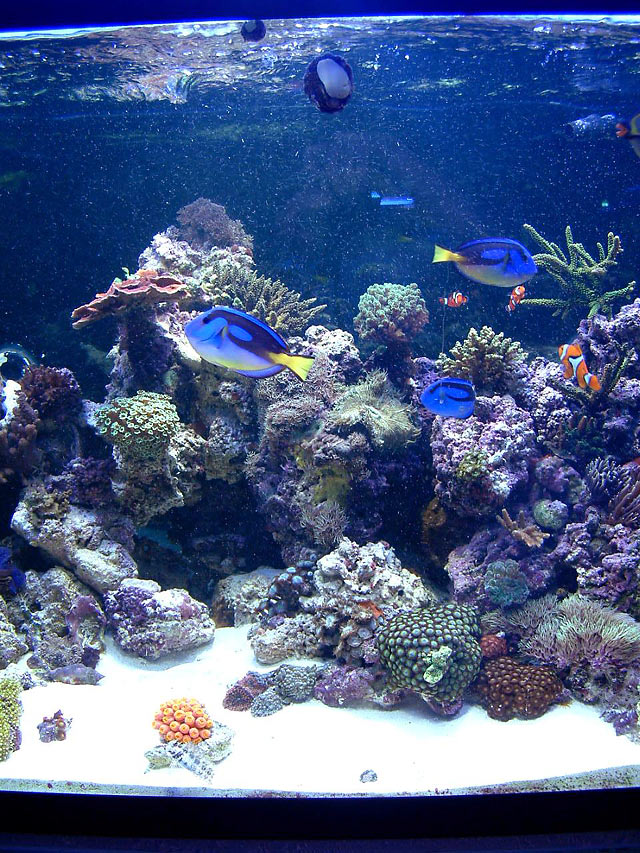
Up until now, you've only seen the tank from various head-on angles. Here's one from the top. Note the heavy current, using only the two returns. (No Stream pumps, no closed loop)

I love that there is no center brace. The Eurobracing is 3/4" glass and this is the same thickness as what was used for the base of the tank. The walls are 1/2".
If the lights were over the tank you could see the fish better, but for now I see the Tangs appear and disappear as they come closer to the walls of the tank.
As far as I can tell, all the fish are eating. The tank runs relatively silently from the front side, but the sound in the garage side is louder. Watching the water shoot through the sump is simply impressive. For some reason, the water in the return section is rocking back and forth like the new Tunze WaveBox, which is really weird.
Tomorrow, the other walls go up so I can trap the heat in the garage area. Luckily, a cold front blew in on Sunday, but we will hit the mid 90s on Wednesday. Once the walls are done, I'm going to tackle the lighting.
The back of the tank seems to have some type of black background, more than just a paint. I'm not going to try removing it at this point. I may ask Mitch what it is, in case anyone asks me.
I didn't want to clean the tank with muriatic acid because I didn't want to create a cycle. The LS was left in the tank, as there was only 1", and all the coralline algae was scrubbed and chipped back into the water. After a few hours, the majority of the water was pumped back into the tank, and there are no detectable NO3 readings currently. Plus, I had people like Evan that offered to clean the glass excitedly, while I ran across town getting plumbing parts. Evan was very proud of how clean the glass was, and I was proud of him doing so with nary a scratch.
The black acrylic covers are an idea from Weatherson on ReefCentral. I won't have to drill a hole for the durso cap, because mine don't come up that high. For some reason, InterAmerican put some black eggcrate on edge, glued on top of the overflows (2 squares high) to act as teeth. I'd like to simple remove those and let the water flow through smoothly, and put the black acrylic horizontally on top of the opening with a 1/2" to 3/4" gap perhaps.
I received a question about my feeding technique:
I feed the pureed food every day, between 8:30 to 9:30 pm. The fish know my schedule. Well, my two existing reefs do, the new guys look hungry all the time and I have such a soft spot for them in my heart that I'm having a hard time not feeding them tons. 5 tangs and all the other new fish - I don't know how much to put in there! With my 2 reef tanks and my son's 29g, I break of a small piece smaller than a Reese's Butter Cup (and not as thick), and thaw that in the microwave in some water for 10 seconds. Then I take a fork to break it up so it thaws quickly. I fork in the larger chunks into all three tanks. Then I go back to my 2 reef tanks, and pour in the liquid food that the fork didn't pull out so that all the livestock has a chance to eat the tiny stuff. This has worked well for me for a long time.
Phyto is fed every other day. Since you are starting from scratch, you feed a little bit at first, then in two days, feed again with a little bit more. You'll keep increasing the amount until you reach your maximum level. On my 55g I feed 1 cup of phyto every other day. Since your tank is a 135, you'd probably feed 2.5 to 3 cups every other day. Of course, your population isn't as dense as my 55g. I would start with 1 cup, then 1.5, then 2, then 2.5. From then on, 2.5 cups.
It's a good idea that you grow your own, because that much phyto is costly.
Btw, if you are buying DT's phytoplankton, it is much more concentrated. 2 tablespoons of DT's is the same as 1 cup of home-grown, ime.
Back to the project... Today the walls went up. I was hoping to have it sheetrocked in, but the walls took forever to go in, because nothing in my garage is square or true. It was very frustrating, as the ceiling has many major issues and we had to make adjustments for just about every board. It would have been nice to just build two walls on the driveway, bring them into the garage and secure them, but that wasn't possible. Even the garage floor is sloped, but I'm pretty sure that is intentional so that those that desire to wash their garages out once a year can do so.
Then when everything started working out well, the 2x4's were too short. Back to Home Depot. I was able to take back the extra plumbing fittings I didn't need, and the credit I obtained equaled the amount the longer 2x4's cost.
Evan and Kaveh spent the evening helping me get the walls in, and put one more piece of sheetrock on the fish room ceiling. I framed the door opening to fit a 32" door (opening is 36" x 83" - so any framers out there can confirm that was correct?), with a header and cripples... pretty much the works. Overkill I know, but if the ceiling comes down around me, that door frame and corner will be my salvation.
My son Phillip took all the lights and fans off the old canopy. Scott came over around that time, and offered to help. He went ahead and rewired the two 6' actinic VHOs and we put these over the tank so we could see in there. The 55g's MH has been lighting up the front of the 280g nicely, but it was nice to have some light shining down from above.
All the fish are doing well, and the fighting conch was rescued from a predicament he was in and now is submerged in a nice sandy spot. There are still a lot of microbubbles, and I had to pause and remember the advice I've been giving out for some time now: "new plumbing takes 2 weeks to slime over and break in." I'm sure it will be fine. The sand is really moving around with the little bit of LR that was put in the tank.
For those of you that liked the Golden Eel, I'm pleased to report that it did eat a piece of deli shrimp that I put in the tank near him. I was told he would only eat from his feeding tongs, which are broken and ancient history. I took a small piece of shrimp and thought I'd be able to lower it near the eel with a piece of rigid airline tubing, but it didn't hold. So I held it in my fingers, and swished it in the water for a few seconds, waited 10 seconds, and did it again. My son's tiny eel came out into the open, so I gave the shrimp to it. I put it right near where its head was, and watched. The little snowflake eel took the piece in his mouth and pulled it back out of sight to eat in privacy. Now that I had no food for the big Golden eel, I went to the kitchen to get another thawed piece (I was feeding the BTAs as well, so it was ready.) When I came back, the Golden Eel's body was visible, but his head was in the area that the snowflake had gone. I watched, and the eel went in deeper. Not knowing who would win that one, I put another piece of shrimp in the same spot I put the first, and watched closely. The Golden eel backed out and literally smelled the new piece of food. Then it pulled back and smelled the rock nearby, then a snail shell, then the food again. After about 90 seconds, it finally determined that piece of shrimp must be dinner, and he gulped it down. His neck was mishapen for a few seconds, then it did this thrusting swallow. I was happy to see it eat anything, because I was told it eats silversides and had not had anything for a week. Now if it coughed it back up later, I don't know. I'm hoping for the best.
So here are a few pictures. This is the IceCap ballast we've been discussing. It is a 250w MH ballast, and I have three of them.
Here's Evan perched on the ladder. You can see the Actinic VHOs glowing above the tank. They are sitting on the glass euro-bracing, and can't fall in. The VHOs use an IceCap 430 ballast.
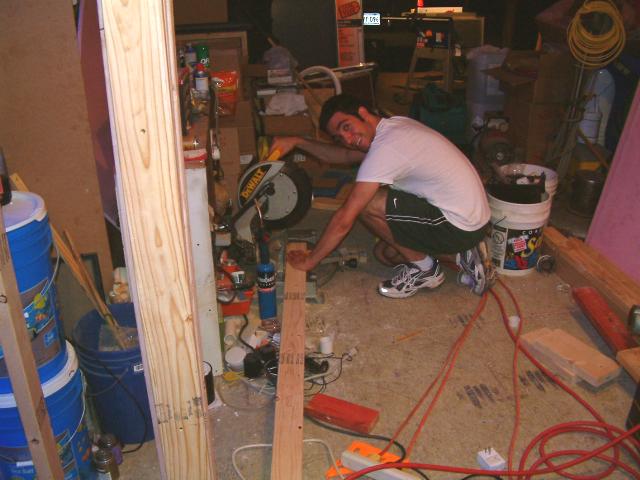
Kaveh loves power tools, and helped cut all the boards for the walls. He enjoyed using the framing gun too. As you can see, the garage is so full of stuff that we hardly have room to work. I can't wait for it to be done so I can get things organized and recover the lost space.
And here I am, not looking at my best. This was a very frustrating job, but it is ready to sheetrock. For those of you looking too closely at the studs, remember this is not a load bearing section and that the house has trusses. I just need to stop the external temperature of the garage from affecting the tank.
The room is roughly 8' x 7', and feels nice and spacious. I probably could have made it larger to hold all the extra stuff we accumulate taking care of our tanks, but I'd prefer it be a functional area more than a storage locker. I'll have things accessible on the walls, and at least one water storage container.
Week Two
Day 8 - Tuesday, 7/27/04 - The Halfway Point
Plans were made and many questions were answered on my part as well as by others. I had to work and the tank project had to wait.
Day 9 - Wednesday, 7/28/04
Today, the tank is much more clear. The sand is really being displaced by the current. Seriously, I can't believe Tunze Streams are needed, nor a closed loop.
When I got up to check in the tank, there were a million microbubbles. I went into the fish room, and the skimmer had drained about 3g of water into a bucket. The sump water level was lacking the equivalent, because the return section is so small!
Wondering if the bubbles were being caused by the lowered water level or because of the anti-siphon holes, I opened the ball valve 100% on the Ampmaster 4700, watching the water levels rise in both overflows to match the water level in the display area. Still tons of bubbles. So I added 5g of RO/DI and reduced the flow again, and the bubbles are going away.
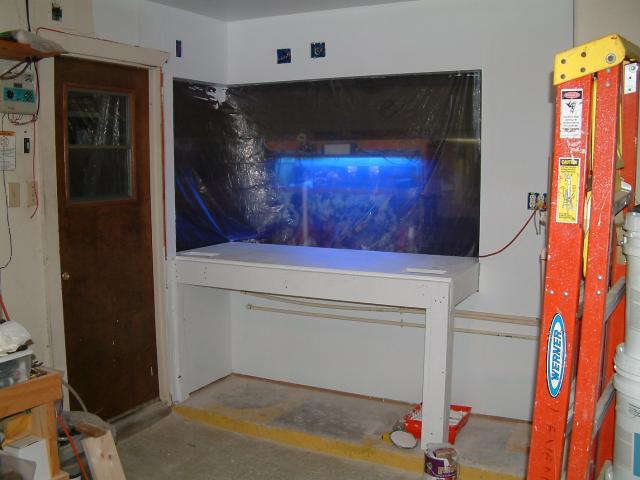
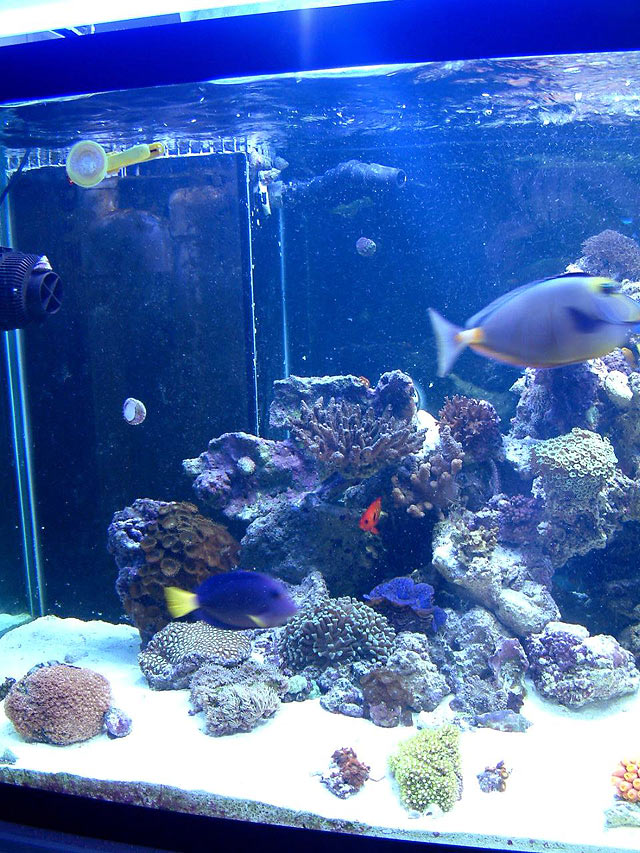
I took a few pictures of what I can see. Remember, the only lighting I have over the tank are two URI Super Actinic VHOs (72"), plus what light shines in from the 55g's 10,000K XMs.
![]()
I bet getting some lights over the tank will make a big difference. Here are a couple of pictures of one or two tangs.
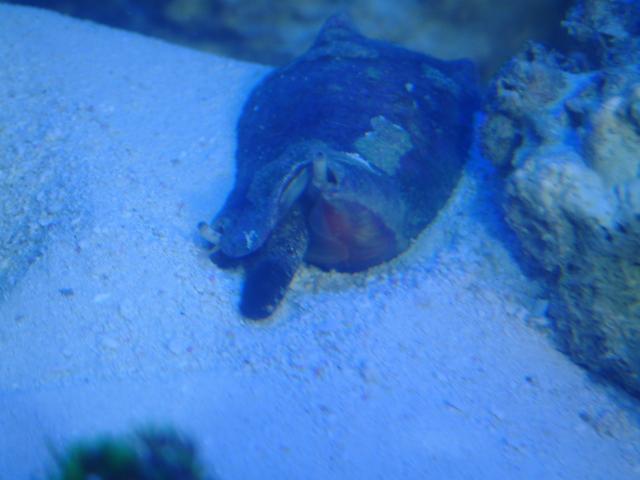
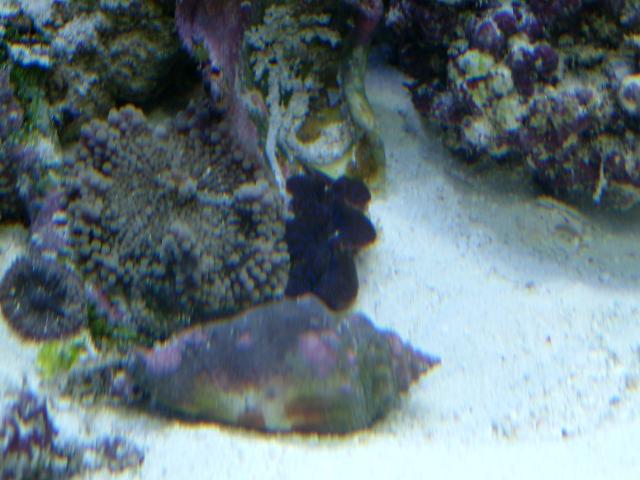
And one of the Fighting Conchs.
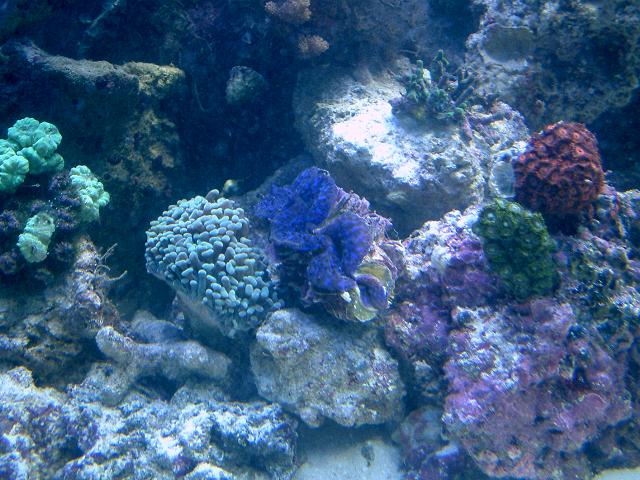
I have more LR in my 55g sump that I can move over to the 280g, but they have aiptasia.
As I've mentioned before, I have a LifeReef Skimmer. Never having one before, I've been trying to understand how it works and what issues it has. To be frank, it is pretty simple in design, but not working as well as I'd hoped.
The crud it was accumulating in the riser tube of the collection cup was vile in nature, but it wasn't filling the cup yet. When I'd close the gate valve on the output of the skimmer, the water level would rise in the main chamber, and water would leak out the neck of the skimmer. My fish room floor has gotten wet a few times in the past couple of days as water dripped off the top of the skimmer body. Basically, I felt the design needed tweaking.
Late last night, I decided to take the cup off and wash it thoroughly. When I was finished, I noticed an O-ring around the tube that fits into the skimmer's main chamber, pressed up against the skimmate cup. I decided to remove the O-ring and insert it into the neck of the tube the cup inserts into, and then force that cup into and through the O-ring. Problem solved, now it is water tight and does not drip any longer!
Leaving the skimmer running with the water level high up in the body last night, some crisp foam began to finally collect in the cup. Finally I had it set correctly, right? As noted in my previous post 30 minutes ago, the bucket under the skimmer collected about 3 gallons of water. Oops. At least it did pull fluid out of the tank.
Each day, I learn one new thing about some of this equipment I never had before.
I have 10,000K XMs over my 55g right now (175w) and don't really like the color to be honest. Looking at JB NY's 250w comparison page makes me lean toward 14,000 Coralvue bulbs. Thanks for the suggestion about HelloLights.com. I've used them in the past with good results. The XMs came from CarolineCorals.com and they were very fast and the price was great. {note: they are now out of business as of Sept, 04}
I cannot believe how long it is taking to finish out the room. Part of the problem is the lack of space in the garage, but with it raining outside, I can't fill up the driveway with all the sundries of construction, nor my equipment. The inside of the room is roughed in, wired, and rocked. I bought an insulated steel door and that worked out nicely. Btw, the opening was too large. 34.5" x 82" would have been better. In the pictures, you may notice to top of the door doesn't touch the sheetrock, so I'll have to use some tape and bedding to mask that.
As you can see, the ceiling is a wavy mess.
The new 32" door, with metal threshold and doorknob.
The outside of the room needs to be finished tonight, because my water heater is disconnected again to allow me to run the pipes through the sheetrock. Water is shut off to the house. The rocked section has insulation, the section on the right is what needs to be done in a few minutes.

The skimmer is pulling out some cool looking foam right now. Think that is all drywall dust?
The wiring was run in the walls to the various gangboxes, but are not connected to any circuit. I thought it would be wise to go ahead and get that ready in case I decide to crawl in the attic and run one more circuit. I say in case, because it is hot in the summer and I'm not really that motivated, but I do have reason to get that done. I want to relocate the light that is in the garage area to the fish room, and run a new light to the center of the garage with a shoplight.
The current light switch will turn on the light in the fish room, and the new box outside of the room will have a switch for the area where I work to make sumps and such.
The sooner I get all this sheetrock stuff done, the more quickly I can reclaim space in the garage for the rest of the things that need doing.
It looks like I'm not going to have any time to work on the tank tomorrow, so I lose an entire day unfortunately. I've got a number of jobs to do tomorrow and that is how it is. Maybe I can get the tape, bedding and painting done at least. Then Friday I can tackle the lighting of the tank. I thought I would have started on that by today.
If you read GregT's Sump article #3, he recommends going toothless on the overflows. His reasoning is that teeth, eggcrate and mesh tend to trap various foods and algaes which act like bait for the fish. By running smooth overflows, the fish don't go over the top. At least in theory.
I do agree that snails, and even those daring hermits may be able to get into the next area, and the downtube, and the skimmer section, then the refugium and finally the return section... and challenge death face to shell as the Ampmaster awaits patiently, hour after hour. I have time to think about it, but eventually I'll just have to go with one method or another.I can make teeth easily enough, and insert them.
A drain in the fish room would have been a nice feature. The kitchen sink is only 4 steps away from the room so I'm not concerned about cleaning stuff up. However, when things leak, that is a different matter. I do have the sheetrock off the floor by about 1", but if there was a decent flood it would still get it wet before it could seep out into the rest of the garage floor. I'd not even thought about baseboards, let alone silicone.
In the meantime, I had my first flood. Not like you'd think though. After the sheetrocking was done by the waterheater area, I rejoined the CPVC with couplings and waited. The cold water side didn't look very well glued because it wasn't aligned nicely. I had my doubts, but turned on the water.
While installing some outlets in the new gang boxes, suddenly there was a loud 'whoosh' and water was shooting out of the new wall and pretty much over the waterheater. Madly dashing for the front of the house, I turned off the water main.
This time I re-glued it better, and waited 30 minutes before reattaching the other end to the water heater. When I turned on the water, it held. I considered standing guard by this fitting for the next 24 hours, but...
So the room is ready for the mudwork, the floor is drying as we speak, and the adventure continues.
Day 10 - Thursday, 7/29/04
Today, the inside walls of the fish room were painted. I didn't get the second coat put on yet, but a lot of other stuff took up my time.
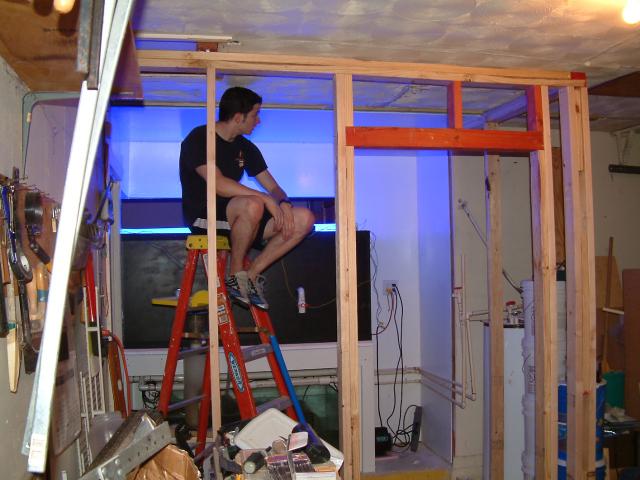
Evan and Kaveh have been coming back day after day, working tirelessly without complaint as we create each new item from imagination. The light rack is done, and we tested it out.
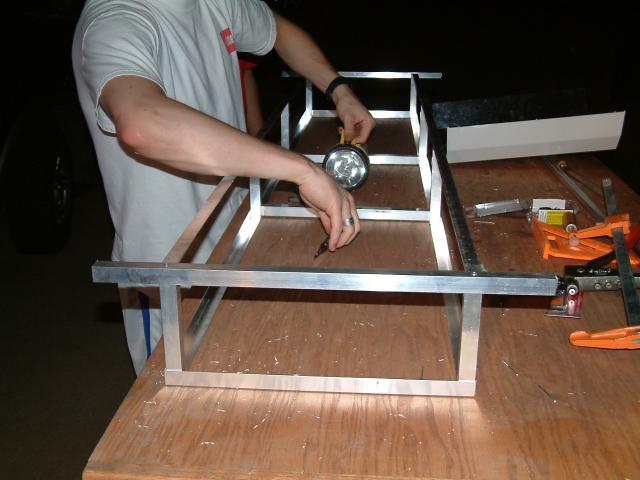
The rack is made of 3/4" aluminum angle iron, and 3/4" square rod corners & cross braces. It was assembled by drilling 1/8" holes and using 1/8" (1/4" deep) pop-rivets. When the rack was done, you could hold it with one hand - nice and light. The MH reflectors were riveted in place as well.
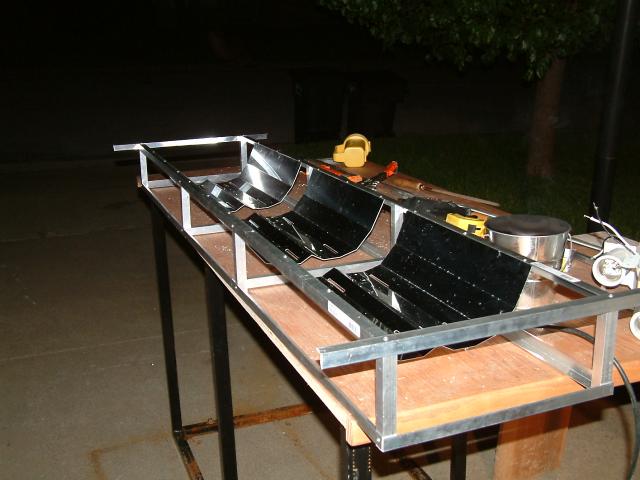
Then the VHOs were secured to the longer pieces that extend along the bottom of the rack. However, after they were installed, testing them was a disaster. They would not come on. After a few failed starts, it was determined that one end cap was the problem and I replaced it with a spare. Still it would not come on, trying over and over. Suddenly, smoke came out of the IceCap 430! At this point, we noticed one of the wires had come loose from another end cap. I got another IC 430 out of the garage that was repaired last year. It was my backup. Plugged it in, and still nothing!!!!
Took the IC 430 of my son's 29g, and it lit the bulbs perfectly. So after 1/2 an hour of frustration and 3 ballasts later, the VHOs worked. We carefully set the rack on top of the tank to see how it fit and how it would shine down over the water.
Since I only have two 250w MH on hand, we tested those to see how it looked. I still need to get a third bulb soon.
Here's what it looked like from the front.
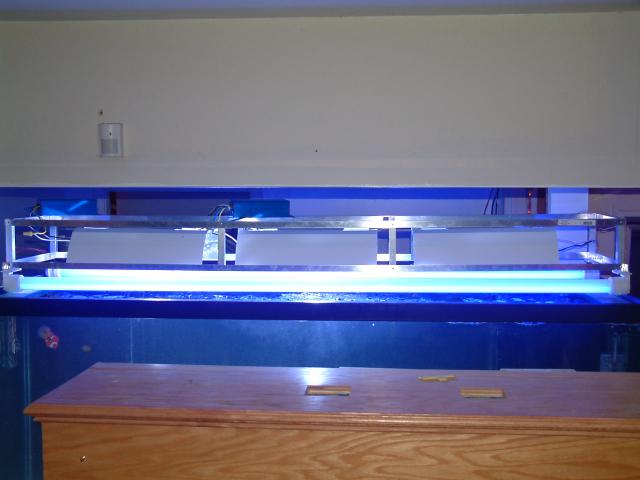
I still have to design my sliding bracket system that will allow me to push the lights out of my way from the front or the back of the tank. I'll probably build a shelf over the light rack, and the slider tracks will run beneath those. That way I can put the ballasts on the shelf, and keep them nice and dry.
Next we messed with this stupid sump. If anyone wants this thing, it's going up for sale. I'll use the money to buy acrylic to make a much better one for my particular setup. Remember, it takes four guys to carry this one, as it is built out of 1/2" glass. 48 x 18 x 20 (or 21 I think). Due to the micro bubbles, we tried to add an extra baffle at the end to stop the massive flow of water and air that is crashing into the intake of the Ampmaster 3000. After trying a few tricks and wasting 30 minutes, I decided to not take any chances and left it as is for now. Still, it was nice to see the tank without micrububbles briefly.
The Calcium Reactor was added to the system because it was handy. I've had it running for the past few days in the laundry room to test it for leaks, and this evening Evan noticed it wasn't working. Maybe recirculating the same water elevated the Ca too high, because the tubing leaving the reactor and going to the pump has turned cloudy for some reason. Or maybe it got vapor-locked. After a little fiddling with it, it came back to life and so I decided to put in on the main tank (Evan couldn't wait another day).
Day 11 - Friday, 7/30/04
3:00 a.m. My tank turned cloudy suddenly, in the past hour. My sand was blown around because Evan had pointed the returns downward, but I grabbed my pH Pinpoint Meter and discovered my pH was at 7.33!!!
Immediately, I turned off the CO2 and the Calcium Reactor. Then I used some baking soda that I'd baked a couple of weeks ago, and used that to bring my pH back up to 8.0. It was only down for about an hour, and I hope the fish are okay.
Later that day...I woke up just in time. My first job was to check the 280g and make sure the fish were swimming right side up. Current pH is 7.8 (but that could be 7.89 because the pH Controller doesn't show the number in hundredths). Then as I was heading back toward my room, something blue caught my eye. My little Hippo Tang was lying on the carpet!
I picked up Tucker, and he was still soft but dry. I quickly immersed him in the 55g's sump and held him as he started breathing again. He's down there now, but I don't know if he'll pull through, especially since I don't know how long he was out of water.
5 minutes later, I checked on him again and he was swimming too closely to the return pump, so I put him back up in the display. I tried to put him near his favorite coral, and he's tucked into a spot breathing. He's acting like he's blind, but that could just be a temporary side effect from oxygen depravation (hopefully).
While shopping at Home Depot again, for the 9th day in a row I bought what I think will work out perfectly for the rolling light rack. The track is used for pocket doors, and is rated for 100 lbs. I think the light rack weighs about 10 to 15 lbs, as it is all-aluminum and light bulbs-only. The ballasts will be connected above, either on a shelf or on the wall itself.
I'll build it tomorrow, and then post some pictures if it works as planned.
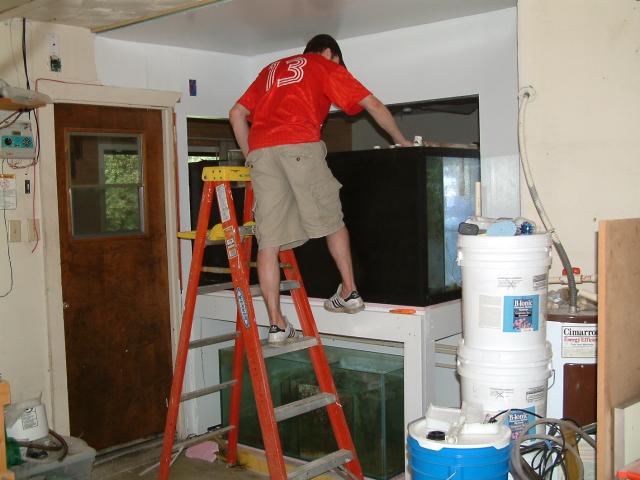
Day 12 - Saturday, 7/31/04
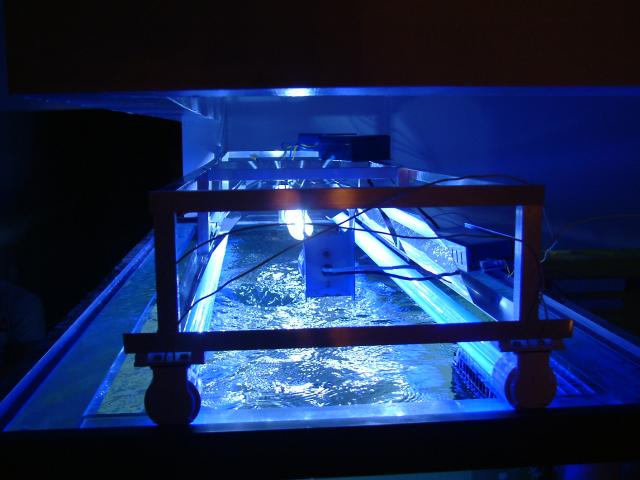
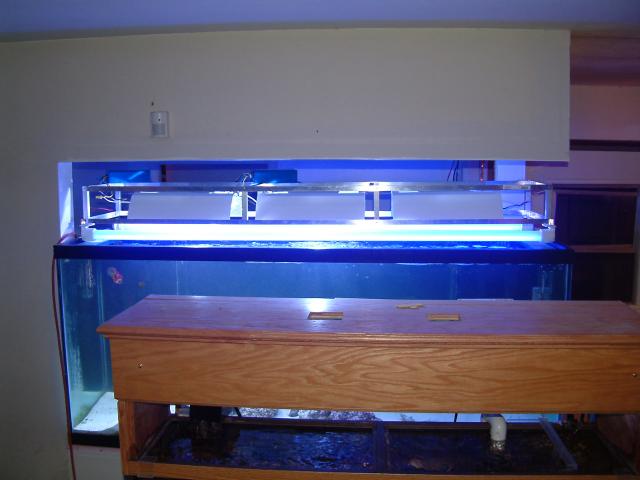
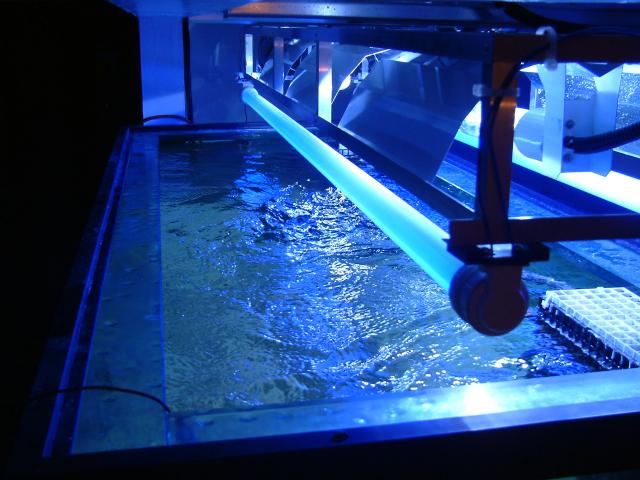
Great news! The rolling light rack works perfectly!!! This is sooooo cool!!!
Here are the pictures of the light rack. First, here it is suspended.
And here it is lit up. As mentioned, one bulb didn't work, so only two are lit plus the VHOs.
The rack is suspended from a modified pocket door rack. Each track is bolted to an inverted shelf bracket that is very strong. Once the shelf brackets were screwed into the studs of the wall, a board was painted and placed across these to put the ballasts safely up away from the water.
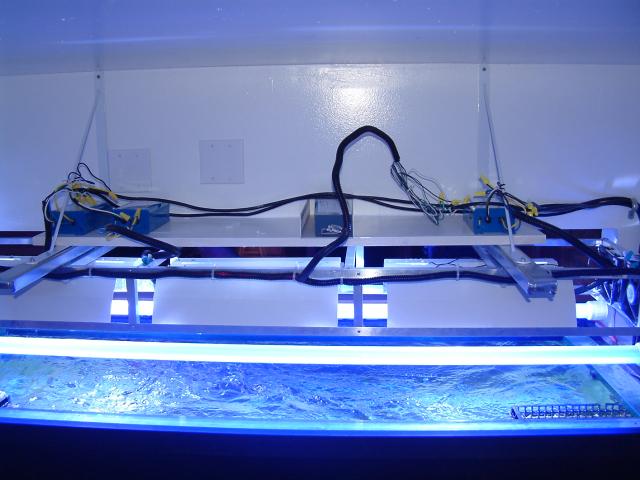
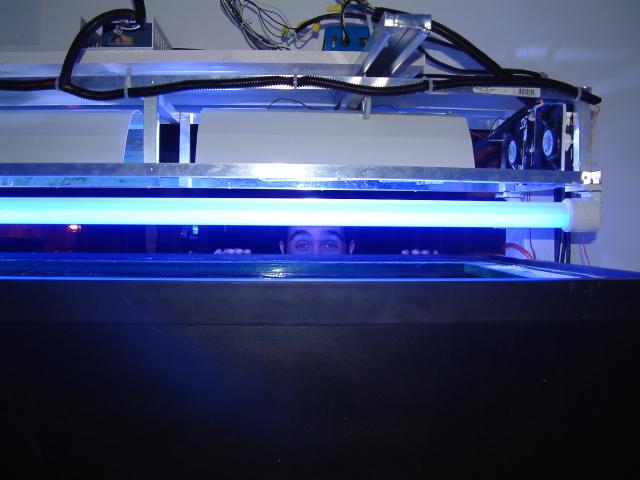
At one end of the light rack, two IceCap cooling fans are mounted to blow fresh air across the MH bulbs. Six feet away at the end facing the kitchen, you can feel the warm air. Kaveh mounted them in the rack, and then decided to peek at you in this image.
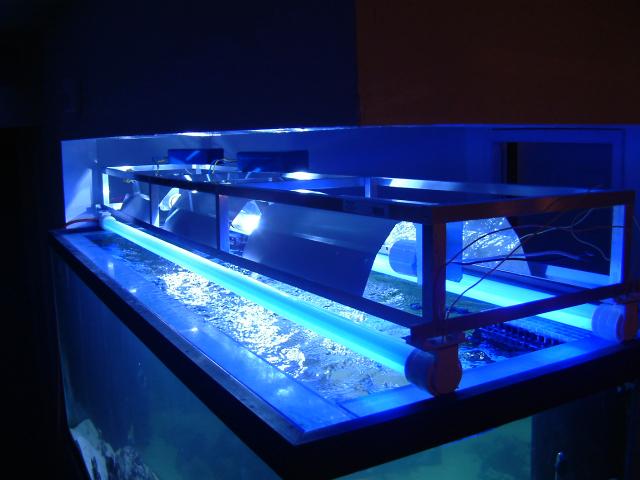
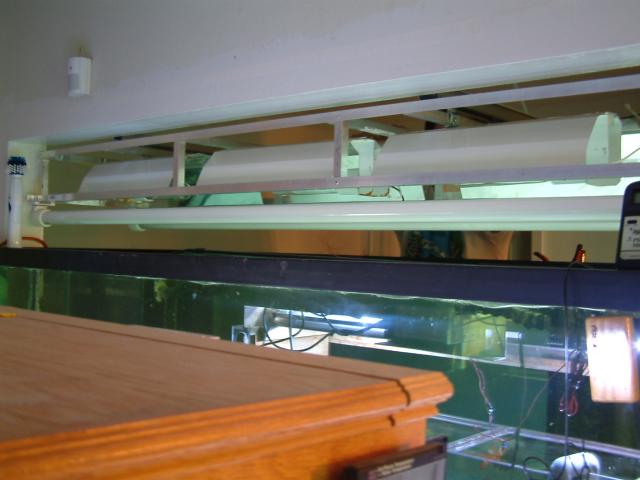
These next two pictures show the light rack from the fish room. First, the rack is pushed toward the front of the tank. You'll see the hanging tracks extended to the back.
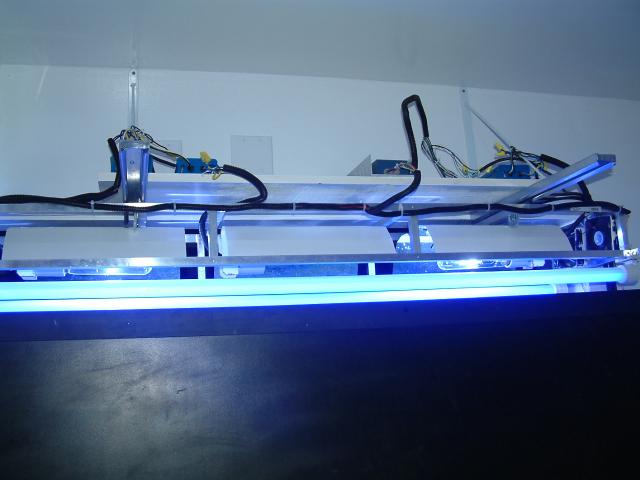
And now they are pulled toward the back of the tank.
This will be easier to grasp. Here is a picture with the lights pushed to the back of the tank, viewed from the top.
And with the lights pushed the front of the tank.
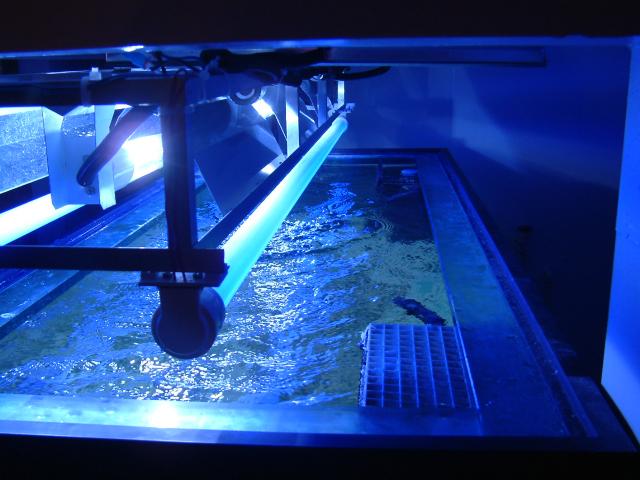
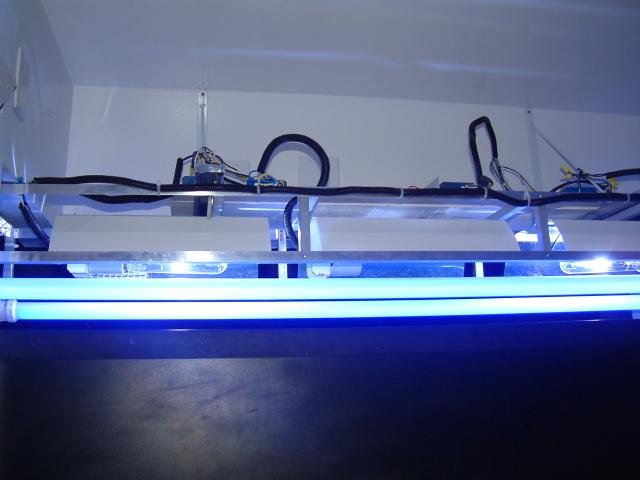
With the lights out of the way, there is about 10" or 12" of space to reach in. The VHOs are 4.5" off the water. The MH are 7.5" off the water. Putting the rack over the center of the tank is relatively simple, but there isn't anything that actually makes it be in the center, such as a bump or stopper. Not that it is necessary. This project came out very nicely, and I have to thank Evan and Kaveh for all their help.
The next step is to add the woodwork to finish this project, add the A/C, and move in the livestock.
Day 13 - Sunday, 8/01/04
I bought an 8,000BTU A/C window unit at Sams Wholesale Club. It was $146, and has a dehumidifier built in. I'm about to cut out the hole in the wall where it will go in the fish room. First I had to work on the electrical circuit.
A new 15amp Circuit now runs to the new walls, which will support various items plugged in, including the new A/C unit. It says on the box it uses 8 amps! That sounds high, so I'll look at the paperwork more closely.
The light in the ceiling of the fish room now works, and the new switch to the garage light works as well. What I did was take the wiring that lead to the garage ceiling and moved the end of that to the center of the fish room. That way the switch that was by the door would turn on the light in there, instead of in the garage. (The way it was, the light was left on so many times since the walls went up because you didn't see it with the new door closed.) Then from the new circuit, I ran a new switch and wiring that runs to the original ceiling box of the garage. When you exit the fish room into the garage, you can flip the switch on to light up the garage.
I'm gonna go cut an A/C hole...
A little while later...The window unit fits the room nicely, and I have it at 74F currently. If any of you use a window unit, I'd love to know what setting you've found works well for your tank room. Because I expected the outer portion of the unit to drip in my garage, I hastily made a gutter and secured it temporarily, with it angled down on one end so it can drip into a bucket. However, after several hours, nothing has come out of the unit. Not a single drop. This unit has a dehumidifier built in. Perhaps it simply evaporates?! Strange and surprising.
I did not take a picture of it because the hole I had to cut and frame into the wall wasn't too pretty. Tomorrow I'll put some molding around the A/C on the inside and outside, then I'll post a couple of pictures.
The garage is nice and toasty, but it is 80F outside and humid. While I was cleaning up tonight, I noticed (but didn't time it precisely) that the compressor seems to turn on for about 1.5 to 2 minutes, then cycles off for maybe 5 to 7 minutes. My guess is that once the canopy is in place and the air in that room is trapped, it won't cycle on and off as much. Tank temperature was 82F without the A/C unit, and now it is 81F.
With the wiring run in the attic earlier today, it is so nice to have a light in the fish room. I found a great looking light at Home Depot, but it was out of stock. Of course, it was $70 and the one I have right now is $3.
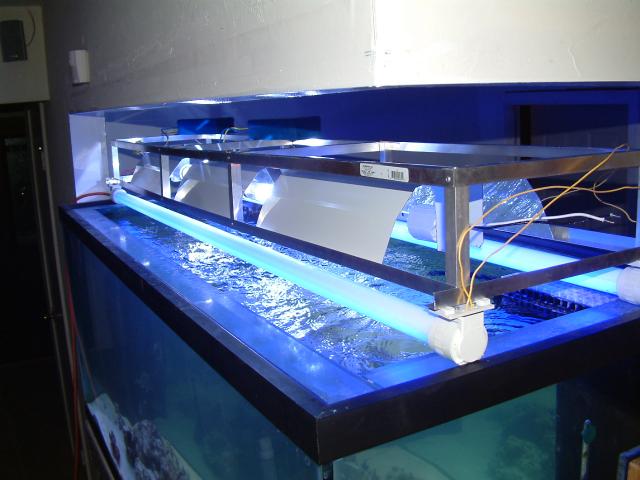
Here are some details about the Light Rack:
It was created from my imagination, although Weatherson definitely gets credit for putting the idea of riveted aluminum in my head with his fantastic setup.
I wanted a frame that was only as large as the MH reflectors, to keep the profile to a minimum. The rack had to fit over the tank, and allow me to move it in the present space provided. I also wanted the VHOs incorporated, so nothing was in my way when I had to work in the tank or clean it. I still may add some flashing on the front and back of the track to reflect light even further into the tank and also reduce the glare when looking at the top of the tank.
The rack is 69.5" long, 5.75" tall and 16" wide. The MH section (the majority) of the rack is actually 14" wide. To be able to mount the VHOs under the rack and not block the MH at all, 16" pieces were put at each end. You can see this when you look at the pictures from the end of the tank, one or two pages back.
The construction is made from 1/8"(thick) 3/4" angled aluminum, sold in 8' lengths. The four corners and the cross braces along the top are made from 3/4" square tubing. Using tubing made fastening with aluminum rivets easier. If you need close up pictures, I can add them to the thread.
The VHO's are 2.5" off the top of the tank, so there is no risk of the rack and those bulbs (which are at the lowest point) running into anything that might break them. The VHOs are 4.5" off the water. These are 6' long VHO actinic bulbs mounted in waterproof endcaps. The tank is Eurobraced with 4" wide strips of glass, so the endcap area is relatively safe from any water contact.
There are three 250w 10,000K MH bulbs, each in a spider reflector. The reflectors are riveted on the bottom front and back track. They were 13" wide, so by making the light rack 14" wide, the reflectors could be secured right along the inner edge of the frame and not have a lip extending inward that would impede any of the light shining downward. The MH bulbs are 8" off the water.
The frame is very light-weight, even with all the bulbs attached. Carrying it was simple and almost a one person job, but it was easier having a couple of people there when hanging it from the rolling track mounted above the tank. I noticed that when the light rack was resting on the tank, the center of the rack did dip lower. Perhaps 1" angled aluminum would have had more rigidity. To make sure there were no problems with the rack flexing and putting pressure on the VHOs, I spaced the two rolling tracks over the light rack 37" apart. That worked out perfectly, because the weight was evenly distributed and the rack remains straight.
The rack moves a total of 12" from the back of the tank to the front of the tank, but sits centered for even lighting. The tracks were bolted to a pair of shelf brackets. The brackets are screwed into the wall with 3" deck screws (designed for outdoor use and thus waterproof). The brackets fit nicely on the wall, leaving .5" of sheetrock beneath them. This worked out well because once the track was mounted, I immediately knew the rollers would not be able to roll too far forward. The wall acts as a stop. When cutting the track to length (22.5" each), I left a little extra metal at one end that I could fold over to act as a stop on the fish room side. This prevents the light rack from rolling too far into the room.
Two IceCap fans are mounted at one end of the light rack to blow air across the MH bulbs and get the heat off the water. Since the rack is not enclosed, it has plenty of venting ability currently.
The rolling track was purchased at Home Depot. It is the track and rollers designed for a "pocket door", and was rated to hold a 100 lb door if I recall correctly. The rack probably weighs 15 lbs. I bought a 60" set-up for $13, knowing that I would be able to get both tracks from the one piece. All the metal was cut on a DeWalt compound miter saw with a metal cutting blade. A jig saw or hack saw could do the same, but it would take longer.
I hope these details help you as you design your own rack. If any of you want to create some type of 3-d drawing based on the pictures you saw, measurements could be incorporated and I can put that up on my site (linking it into this thread). Otherwise, I can just add some measurements, overlaying those on some of the pictures.
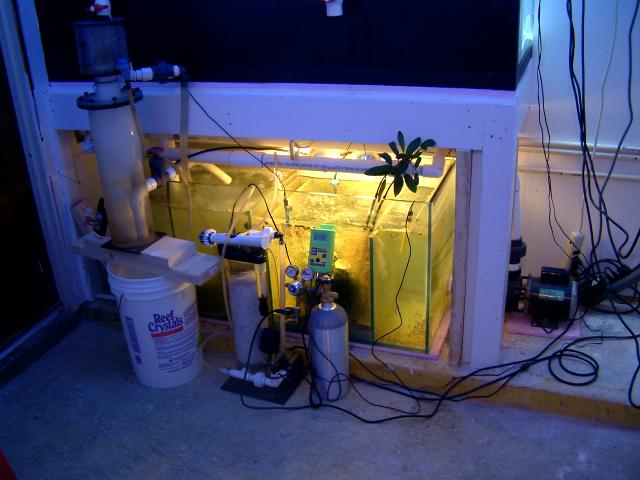
After observing the current sump, I'm pretty sure I'll be replacing it with something better. This is a sketch of a sump I've built twice already.
Here it is installed:
I'll probably do something similar under the 280, although the return pump is on the right and the skimmer would be on the left.
In thinking about the entire design and space available, I'm planning on making the landing I have the current sump on a little wider - by maybe 8" to 10" wider. By doing so, I can put the skimmer in the sump but have the riser tube and collection cup out in the open (in front of the back of the tank). Putting a refugium in front allows me to control the flow of water draining into that compartment. Plus if I make a wider sump, it can hold more volume. When the return pump turns off (due to power or pump failure), I'll know the sump can hold the water.
Plus this gives me the perfect set up to put a permanent plank across the back of the tank at platform-level. When I stand on that, I'll be able to easily reach into the tank. I got this idea from the 800g thread in the Big Tanks Forum.
This is a future project, but something I've been thinking about.
Day 14 - Monday, 8/02/04
The livestock will move over today, and then the 55g can finally be moved out of the way. At that point, a shot from the front would be possible. Today is Day 14.
The current sump is 48 x 18 x 20 or 21 tall. It has a large skimmer section that I can't use, because the baffles are 15" tall. The next section is the refugium and water is shooting through it so fast. Finally, there is a tiny 10g return. On a 280, that is like a drop in the bucket. It must be replaced with something better.
The livestock has been moved. That took about 4 or 5 hours this evening.
Kaveh worked on one rock after another trying to remove as many mushrooms as possible. Many were growing on the larger pieces of LR that I needed to start the aquascaping with. He removed hundreds. I went ahead and dumped all of those in my 29g that is virtually empty now, so they can heal up and be raffled off at the next meeting. There are three ocellaris (false percula) clownfish, and a bunch of micro-featherdusters.
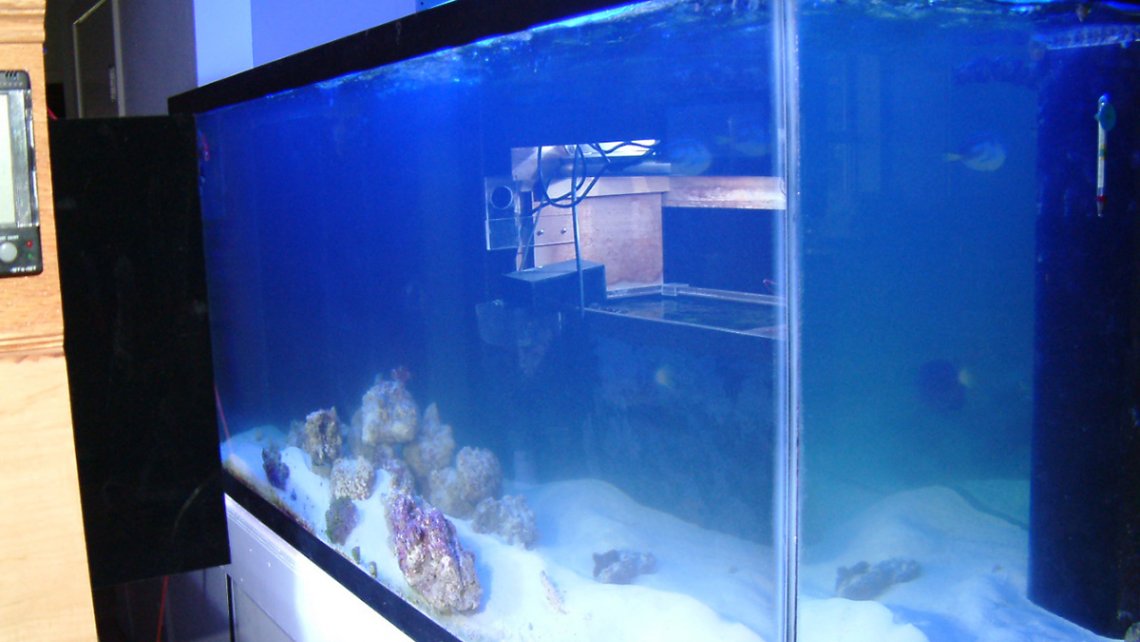
Here are a few pictures, but keep in mind that the water is cloudy with all this activity. First most of the LR and various corals were moved from the 55g. The SPS were put in the sump of the 55g to keep them safe.
Here's the sump area with two 19w floodlights over the combined cheatomorpha, baby brittle stars, cops, and a Crown Conch. I recoved him from the refugium under my 29g, and had to unearth the LS to find him. My two mangroves are visible.
I had to shoot this picture from up on a chair, so the top of the 55g would not obscure the view.
The right side is rather barren, with a very unhealthy goniopora. I bought it from a reefer that had great success with it for 9 months. I put it in my tank, which was almost the same conditions, and it shut down within 45 days. Maybe it'll like this set up better?
The middle of the tank.
The right side.
Many of the corals are closed up, but some opened up quickly. I really didn't bother with acclimation of anything. Things just got moved, including fish. The sun coral opened up immediately, as did some zoos. A few SPS slimed, and some LPS were shriveled up. Over the next few days, I'm sure I'll have to rearrange some livestock as it opens up.
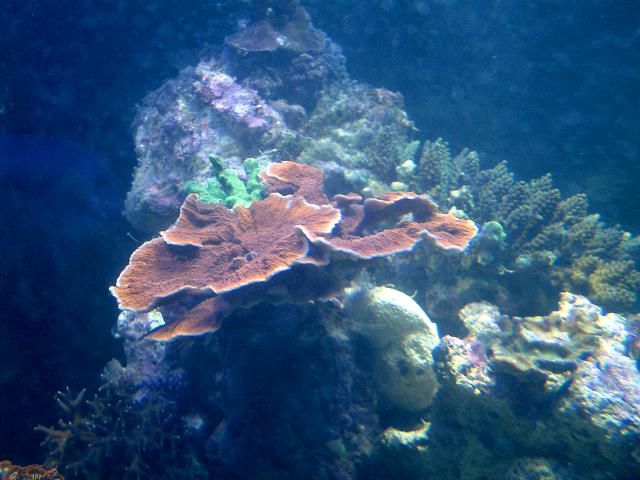
This is a fungia, a plate coral. It was given to me when it was about the size of a dime. It is now about the diameter of a tennis ball. It is glued to a piece of LR, so it is elevated off the sand. Small toadstool leather in the background.
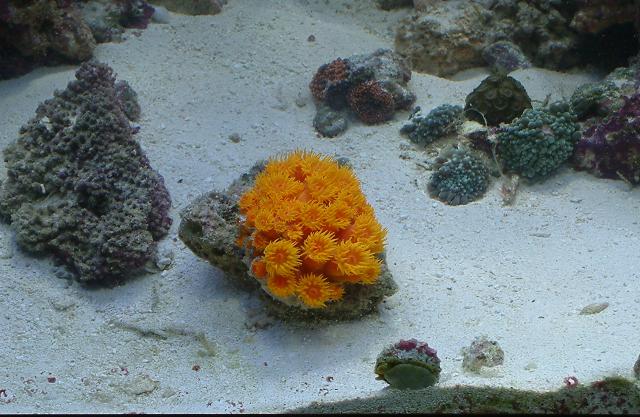
The sun coral. Needs to be fed actually.
My 2 yr old Maxima clam in his new home.
Montipora foliosa, with room to grow.
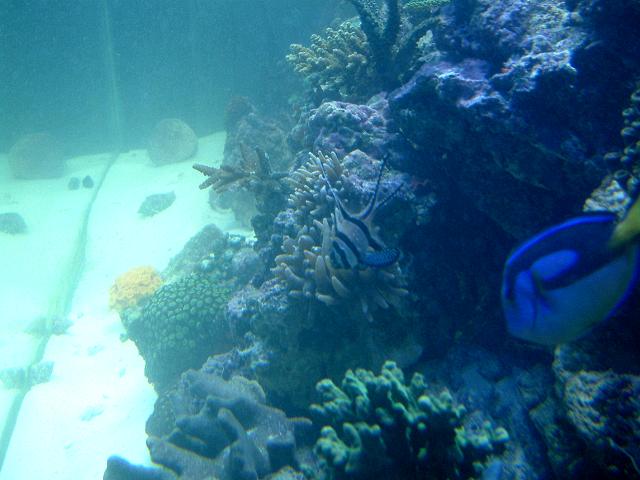
Here is a picture from the end of the tank. It is cloudy, but you can see my BTAs right behind the Bengai Cardinal.
And with the flash. Btw, that is Tucker swimming at the top:
Evan helped me place the rockwork, because it is very difficult for a number
of reasons.
#1) The 55g is still in the way inhibiting easy front access.
#2) The 280g is 6' long and 30" deep. Tough to each more than a third of the tank at a time.
#3) Some LR has corals growing on them, so I didn't have an empty slate to work with.
I'm getting some micrubbles in the tank today, but my plumbing is only 8 days old, and the return section of this sump is pathetic. I'm going to build a series of horitozontal baffles that will help impede the bubbles from the cascading water.
Update: 8/04/04
Current temperature 77.8, pH 7.8 - lights come on in the next hour.
The a/c - dehumidifier has no problem keeping the tank cool. Yesterday the high was 82.3 F. I'm going to have to put the IceCap fans on a timer as well, to avoid cooling the tank too much at night. Or bump up the A/C unit to a slightly higher tempearture in the fish room.
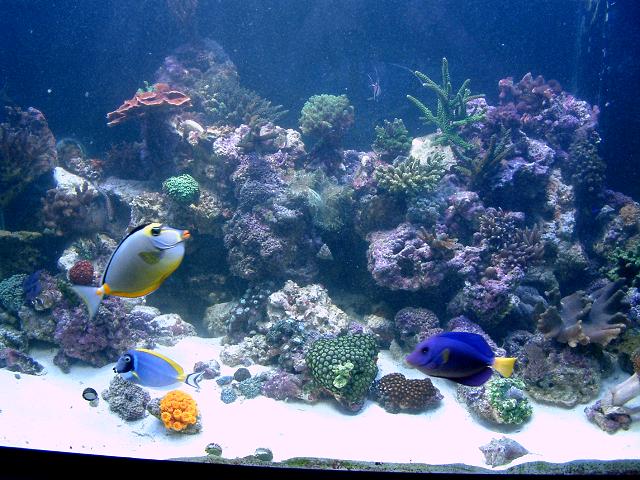
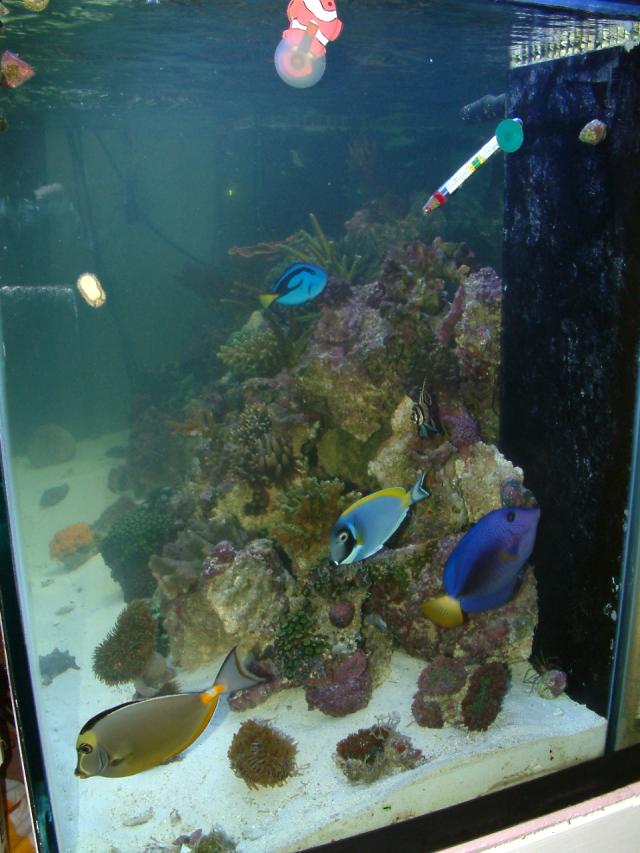
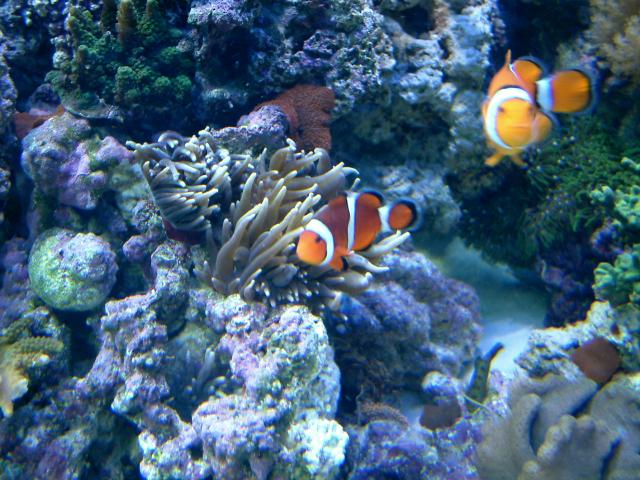
This is the list of fish in the tank, in case you are still reading.
1 Percula (6 yr old female)
3 Ocellaris (under 1 yr old Tank Raised)
2 Blue Mandarins
2 Green Target Mandarins
1 Six Line Wrasse
1 Threadfin Anthias
1 Flame Angel
1 Coral Beauty
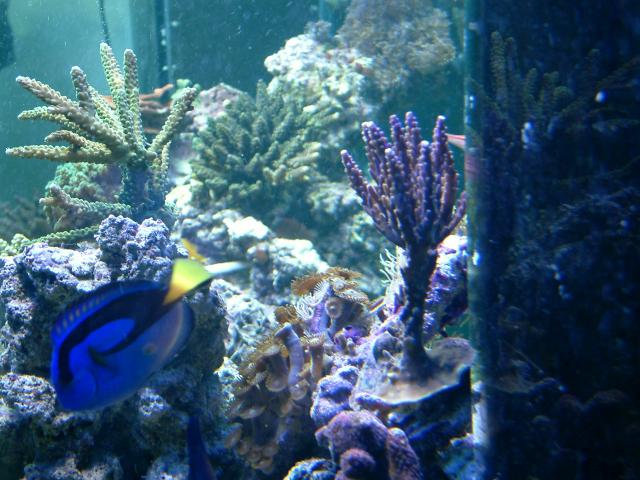
2 Blue Damsels
1 Naso (large juvenile) Tang
1 Purple Tang (large)
1 Powder Blue Tang (large)
2 Blue Hippo Tangs with yellow bellies (large)
1 Blue Hippo Juvenile
1 Lawnmower Blenny
1 Longnosed Hawkfish
1 Pseudochromis elongatus (tiny, thin and 1.5" long)
2 Bengaii Cardinals
1 Royal Gramma
1 Yellow Clown Goby
Plus a couple of serpent stars, fighting conchs, an abundance of hard and soft corals , 2 maxima clams and a featherduster.
8/05/04
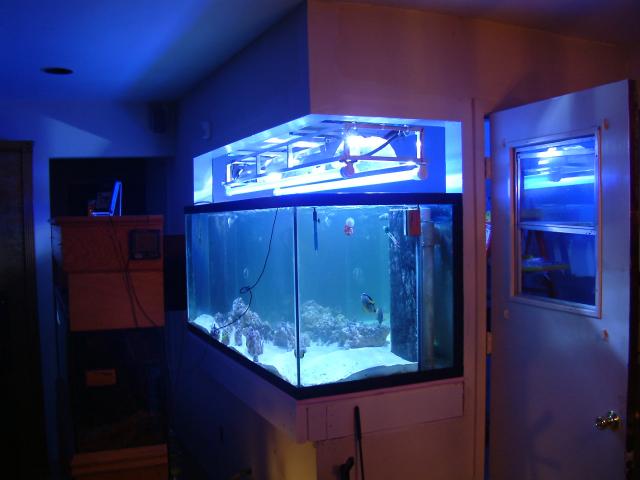
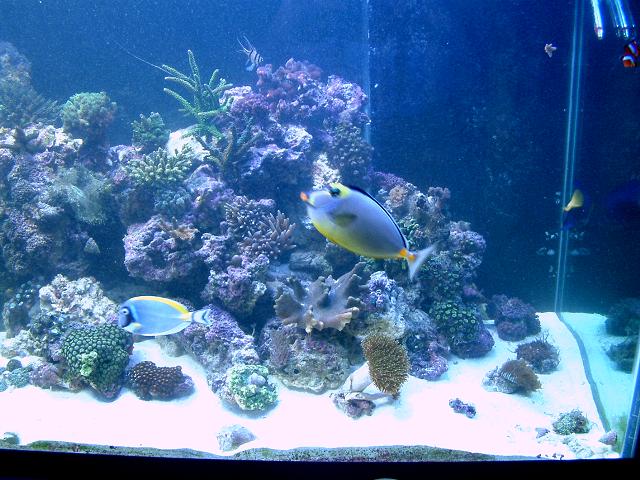
Here is a full tank shot. Because the 55g is still in the way, I have to stand on a chair to show the bottom area of the tank. You can see the 55g in the foreground.
Please remember the canopy woodwork is not in place, so I'm getting a lot of light bleeding into the camera lens. Add to that the "new tank plumbing" of microbubbles, and the fact that I had to top off a few minutes before these pictures were taken.
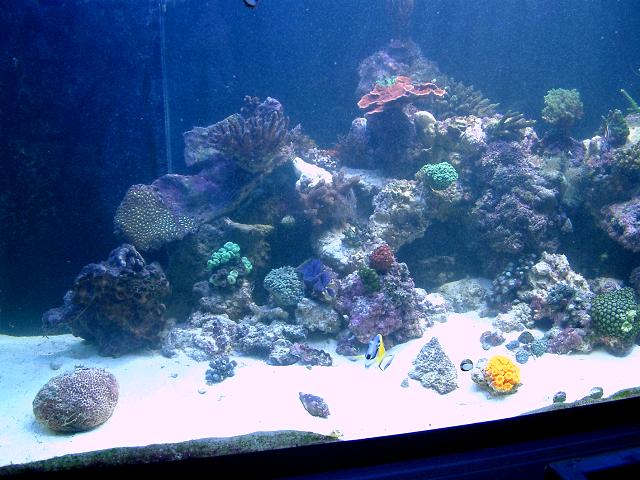
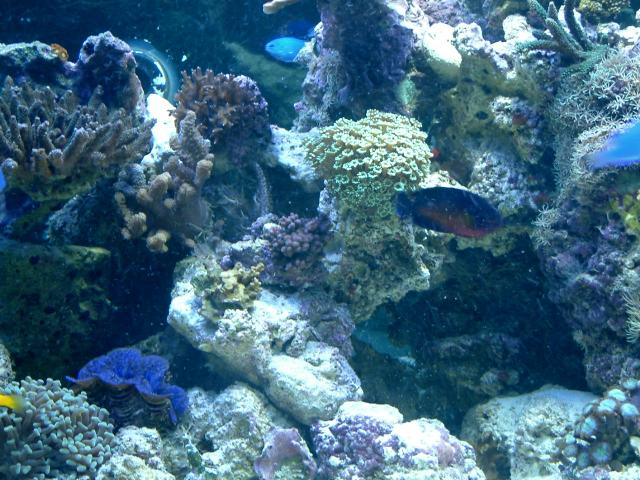
The left side of the tank:
The middle:
The right side:

No room for a tripod... so these images are a tad blurry.
My two year old Maxima
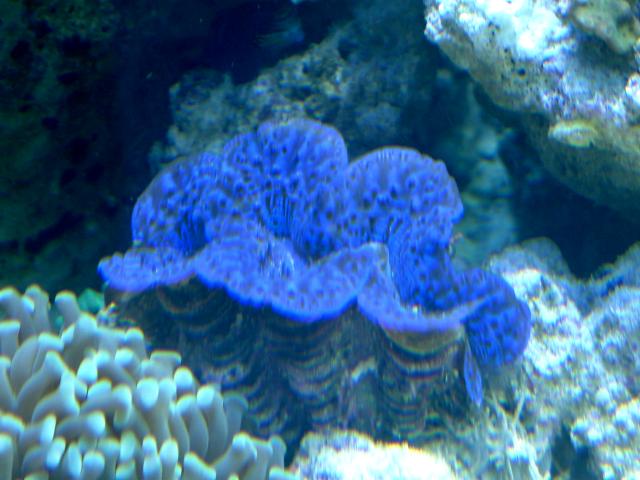
and the baby Maxima
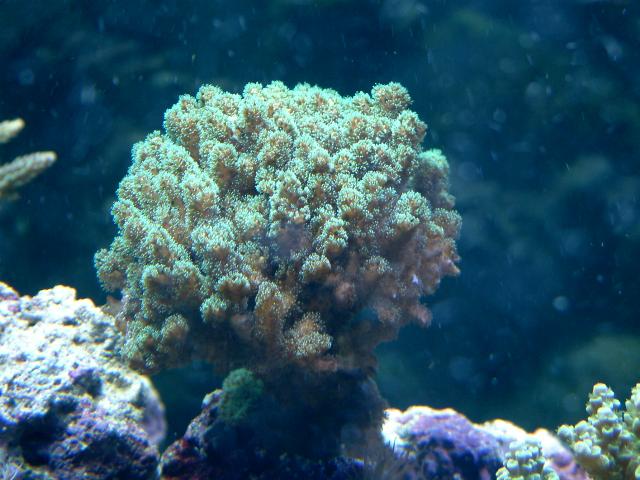
Pocillopora (fuzzy)
Peak of the rockwork
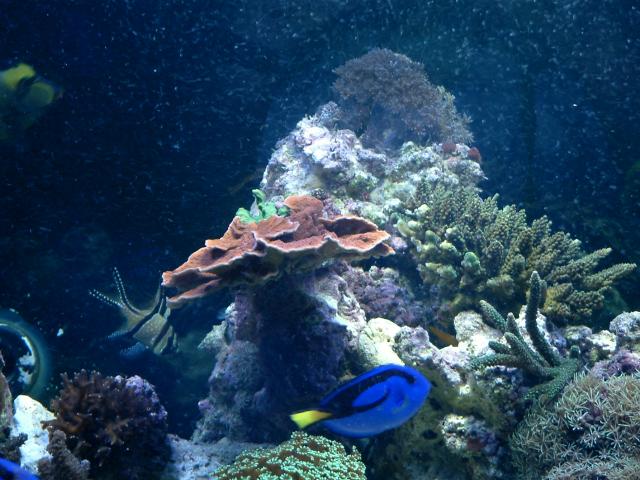
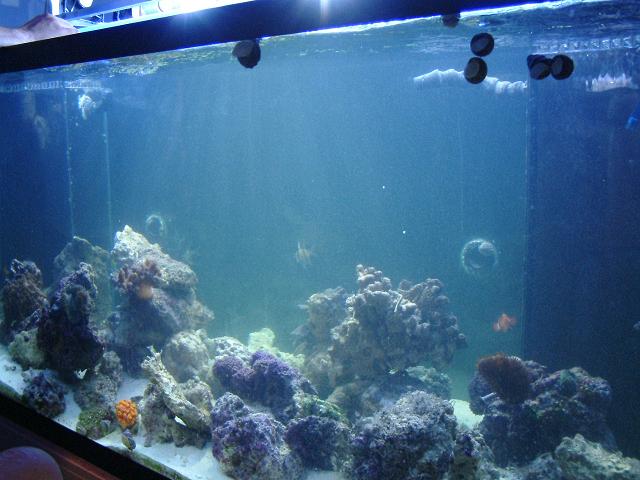
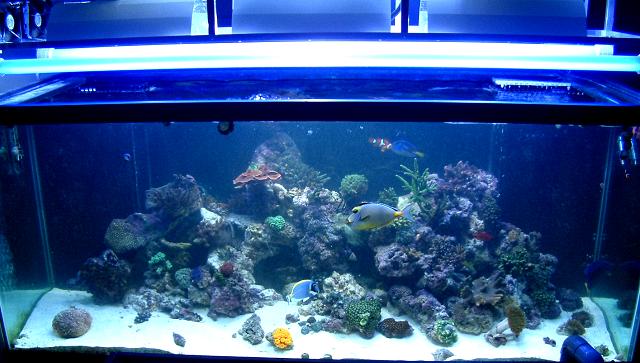
Reef Shot
BTAs (third one is barely peeking out of a hole beneath the others
This Milleopora grew onto the rock behind it, so it is attached in that way.
I need to support it with some rock soon,but for now it is "hangin' out".
Tricolor Acropora - this guy has fallen about 5 times so far, and I'm having a hard time finding a spot where it will stay. My guess is that the Tangs swim by so quickly it throws it off its perch.
Zoanthid patch
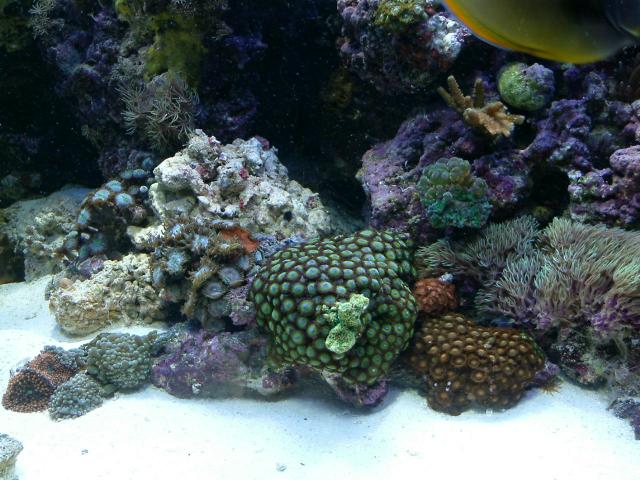
Some SPS
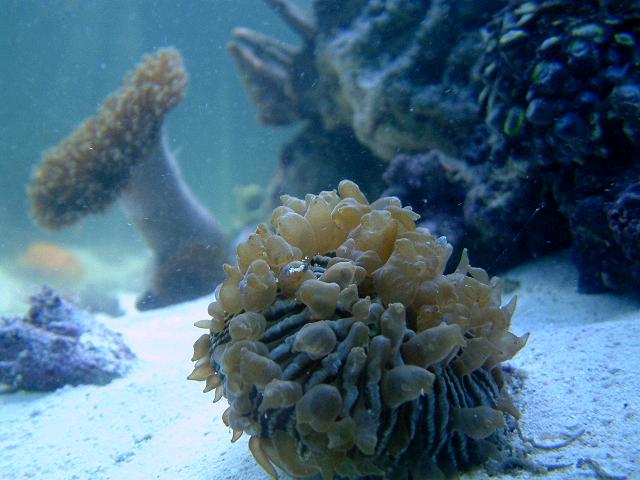
Frilly mushrooms, ricordia, and a plate coral to the left
I just finished making a new batch of fish food. Unfortunately, Super Walmart no longer sells the frozen seafood bag that I used for the base of my mixture, so I went to Central Market (that store is amazing, but may only be Texas-based). I was about to buy their 1 lb/9.99 seafood delight, which lets me put in what I like in that 1 lb. I chose shrimp, scallops, squid casing, and squid tentacles. They were telling each other that my fish eat very well. Normally I add a bunch of the cubes of food from the LFS, but I didn't have the time to drive across town today to get $20 to $30 worth of stuff.
After processing this fresh seafood, I added:
3 tsp Formula One Pellet
3 tsp Formula Two Pellet
2 sheets of Nori, sliced in ribbons
1 tsp Spirulina Powder
1 tbsp Garlic oil (from a container of minced garlic)
some left over frozen krill
a decent chunk of frozen Cyclop-Eeze
1 (capsule's worth) of Beta Glucan (Weatherson's suggestion)
3 squirts of Roti Rich
1/2 cup phytoplankton
All of this was run through a food processor. It came out into a pinkish paste, which was scooped into for sandwich sized ziplock bags. Pressing those flat to create a thin sheet, they were frozen.
Since the recipe was different from what I usually use (Home-made fish food), I rinsed off the processor bowl and blade (carefully) in the tank, and the fish went nuts. That's a good sign.
So as you can see (if you read all the way down to this point), the tank was up and running by Day 14. At the start, it didn't seem like it was going to be that big of a deal, but when we were immersed the goal became a personal challenge. I want to thank Evan for all of his help, because he really stepped up to help make the goal a reality.
Would you like to read the build thread on ReefCentral? The documentation continues on page 24 (of 580 - as of 5/2008). The tank was constantly documented for about five and a half years, and became one of the longest build threads on their site.


