Cooling with fans
I'm based in Texas and have been in the hobby since 1998. In all that time, I've never used a chiller for my tanks. I prefer to keep the room temperature comfortable for me around the clock, and thus my aquariums have never gotten overheated. However, in the summer months it always helps to use cooling fans. They are economical, relatively silent and take up little space.
The typical reason for a chiller is because the aquarium has pumps and lighting that add heat day and night. Other causes can be enclosed canopies, tight cabinetry, and glass tops on the display tank that trap the heat rather than allow for natural cooling. Finding the source of the heat is the first step in reducing the problem, but keep in mind that trapping heat in the winter months may be desirable rather than having to use electric heaters to keep the tank's temperature up around the clock. There are a variety of ways to cool a tank. Many people use fans available at Home Depot or Walmart, because it doesn't cost much and can bring the temperature of the water down several degrees. This is very important with the summer months approaching.
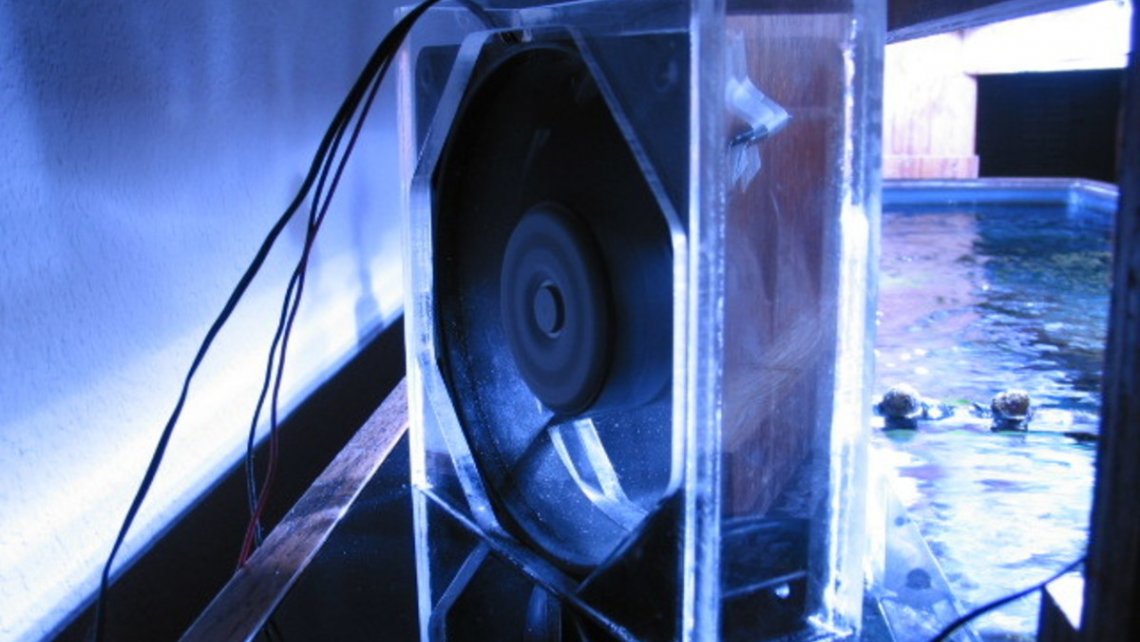
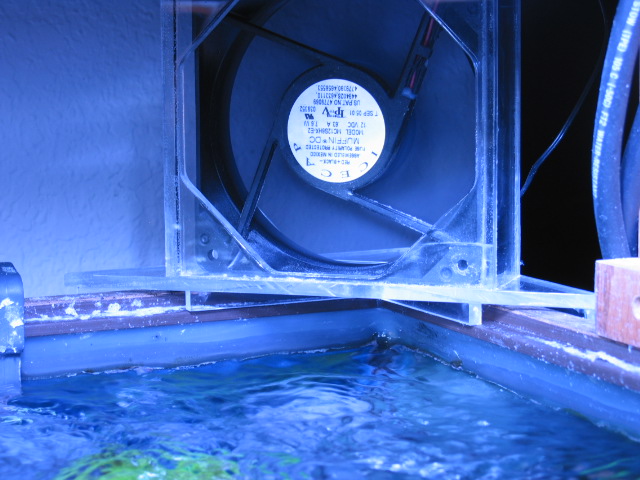
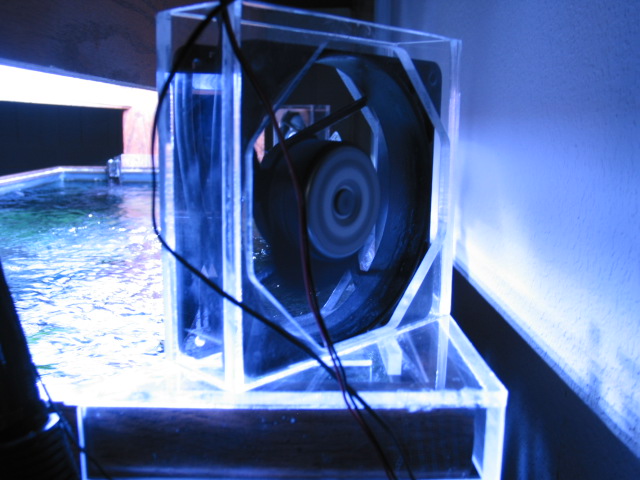
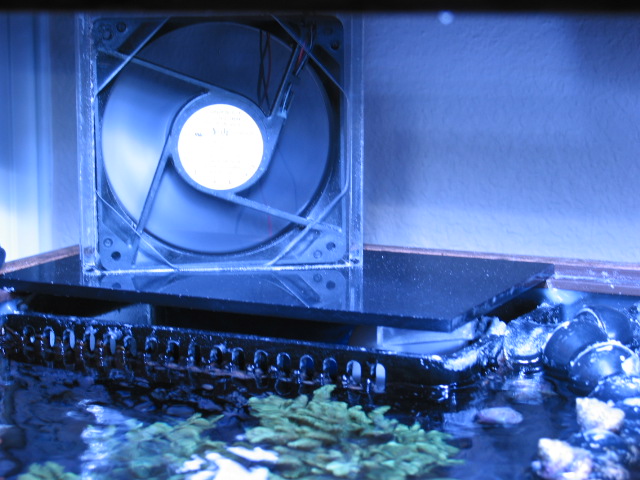
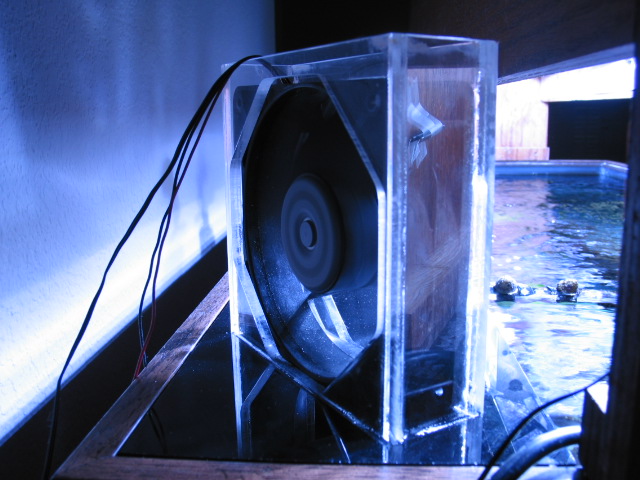
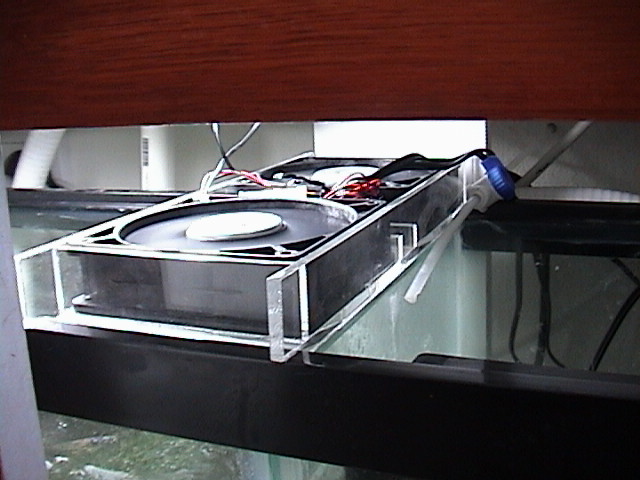
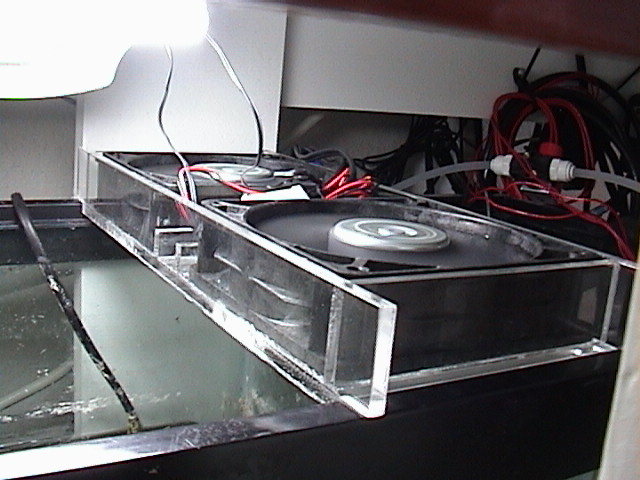
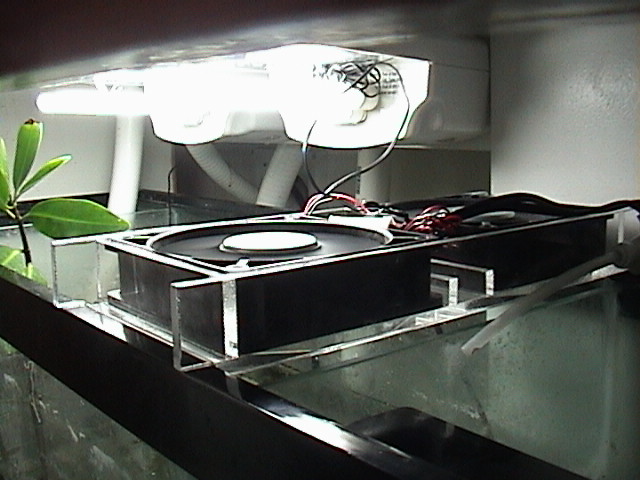
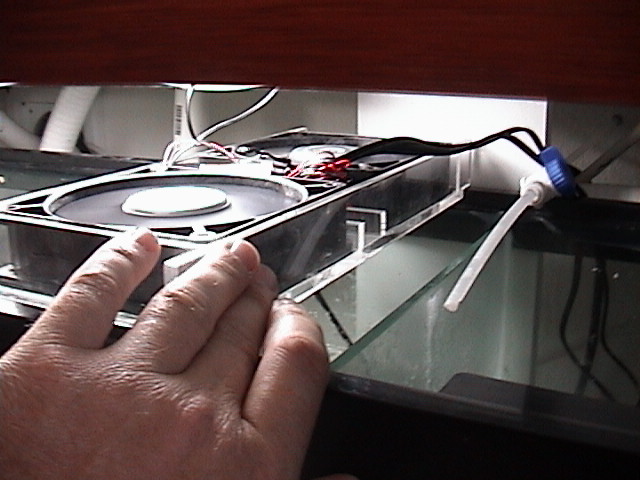
The 29g reef used power compact bulbs that were 4" off the surface of the water in an enclosed hood. To reduce the heat in that tank, I installed a cooling fan blowing down in the return section of the sump, providing evaporative cooling. It worked great. I used a small Hamilton 3" fan blowing down on the surface of the water in the return section of my small sump. When I designed the bracket, I wanted to make sure the fan was secure and wouldn't fall into the water accidentally. I also wanted to be able to easily remove the fan so I could clean the acrylic frame.
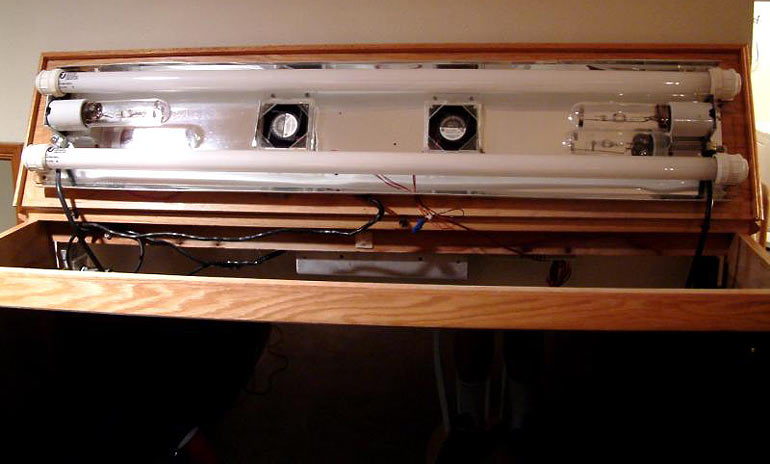
The 55g reef had metal halides built into the canopy, plus VHO lighting. I raised the canopy up off the water quite a bit but it still ran pretty warm so I installed some fans in the canopy's lid. Some of my original comments have been included in this write up, hence the switch from past tense to present tense here and there. Don't hate. 
Since the water temperature had been reaching 83F and we weren't even in summer yet, I knew it was time to get it done. Over the weekend, I modified the woodwork and reflector material to allow for the cooling fans. These were 24v fans, with a powersupply that can run up to four at a time. It was a DIY project, using parts I had on hand.
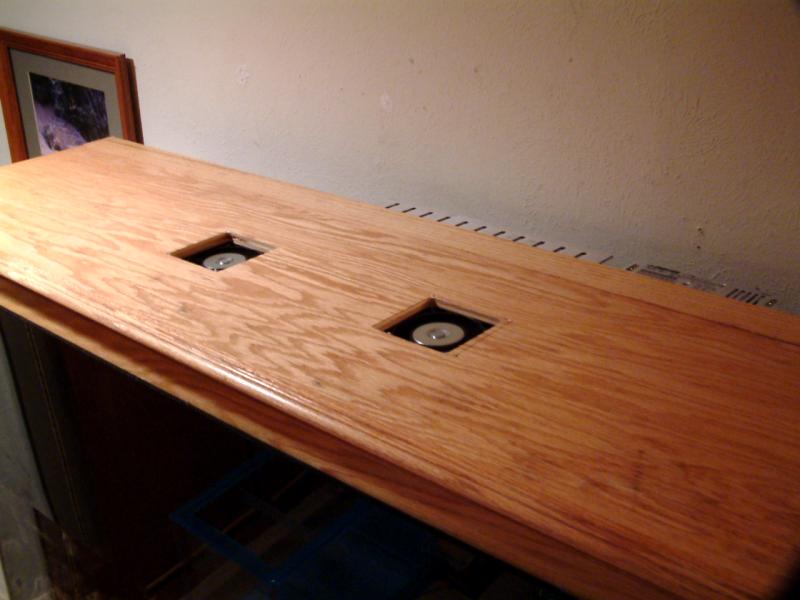
I wanted the fans in the top of the canopy, out of sight. They are removable if necessary by pushing them up from below. These fans blew downward onto the surface of the water.
The canopy flipped open, to see the setup.

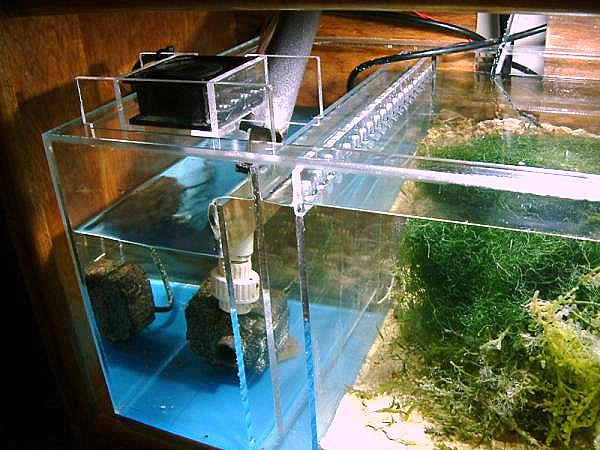
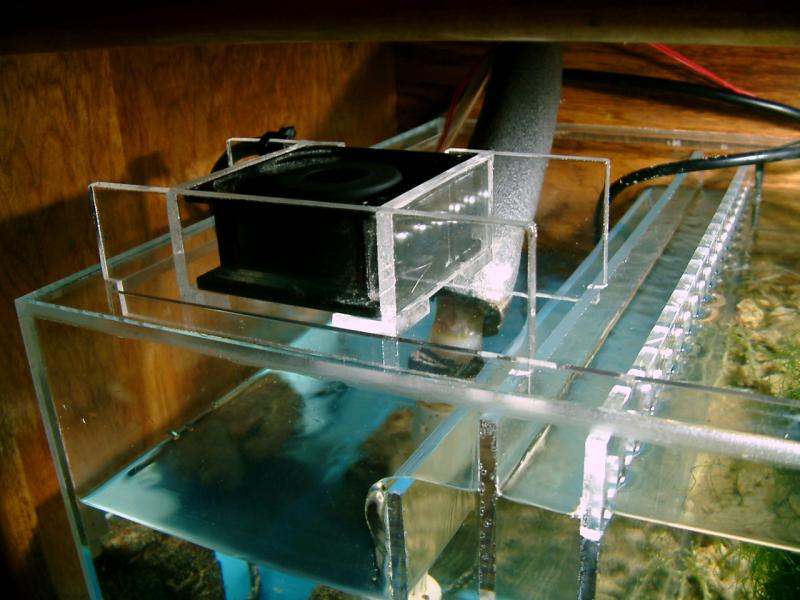
A close up of the cooling fan and acrylic bracket I threw together.
Within 24 hours, I've watched the tank temperature drop nicely, now that I finally got this done. During the peak heat of the lighting period, the tank was 79F instead of 82-83F.
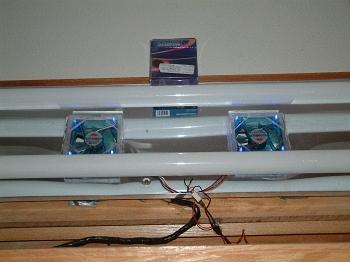
After putting up with the noise of those 24v fans, I replaced them with 12v fans instead. The new ones came from Fry's Electronics, and while they run more quietly, they also move less air. 31cfm at 25db. A nifty feature about these fans is that they come with 4 blue LEDs built in. So I modified the LEDs to point straight down on the reef giving the tank a blue moonlight effect.
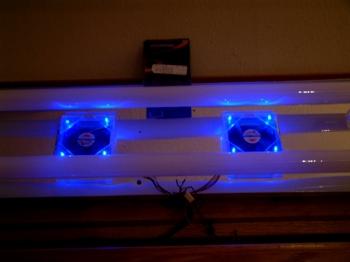

This shot is intentionally over-exposed to give you an idea of all 8 LEDs pointing downward. Too bad I left the light on in the room behind me when I took this shot. Anyway, in person the appearance isn't as bright as this.
So, what modifcations are necessary to do this? Each fan has four LEDs pointed toward the center, as you can see in the top picture of my computer case. You'll have to carefully remove a waxy plug that has been used to hold the LEDs in place. I used an exacto-knife, and kept my fingers out of the way. This is not a quick process, and it will take you about 2 to 3 minutes per LED. Then you just point them downward through the tiny holes in the corners of the fan where the screws would normally go to secure the fan in place.
I made small acrylic brackets in my canopy to drop the fans in from above. A small square was cut out of the top of the canopy, and the acrylic bracket was aligned beneath that opening. That way I can push the fans out if necessary for cleaning or replacement. To further my ability to move the LEDs in different directions, I drilled a small hole in each corner of the bracket that corresponded with the location where the bulb was situated, and pressed the bulb through the hole so they extend out about 1/8" beyond the bracket housing. Now they can be pointed where needed, and readjusted if necessary.
The fans cost $9.99 each, although they were on sale briefly for $3.99 when I was building my computer. I should have bought a number of them that day in case I needed more. Oh well. If you don't want to go to the detail I did, you can still do this project easily enough. I like that the fans have the LEDs incorporated, so I didn't need extra switches or cords. When the fans are on, so are the lights. Maybe in the winter I'll have to shut them off to avoid cooling the tank too much, but for now I can view my reef late at night. (Yes, that was what happened and incidentally I could glance at my tank latenight and know if the fans were on or off merely by checking for blue moonlighting or not.)
The 280g reef originally had two 120mm fans installed in the rolling light rack to blow the heat away from the metal halide bulbs.
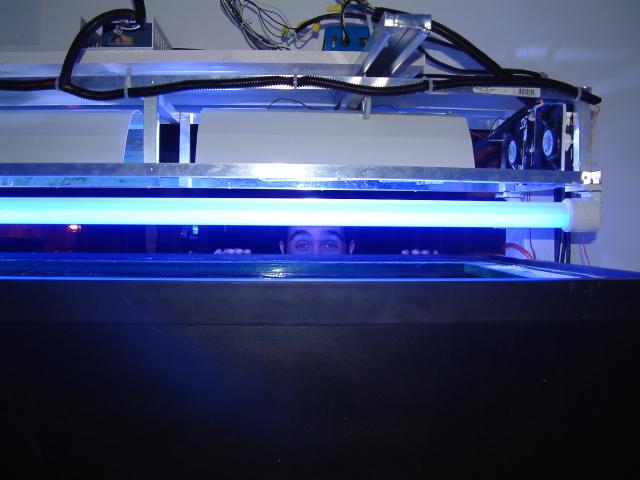
Later I had to change this because I changed the orientation of the reflectors to run perpendicular to the reef. The fans wouldn't do a thing blowing up against the side of the first reflector, so I moved them to stand on the edge of the eurobracing of the aquarium to move air across the surface of the water and keep the temperature controlled. I knocked in not one, but both of those fans on different occasions when working near that area, each time tripping the GFCI breaker. Oops! Drying out the fans for two days, I was able to use them again but it resulted in my taking time to build an acrylic bracket to hold them securely. I also incorporated a small LED bulb to remind me that the fans were on, because if they continued running late at night and cooled the tank too much, the heaters would kick on to compenpensate. These low voltage fans weren't hooked up to my AquaController II because I only had to use them seasonally. During the summer months, I'd plug them into a timer to run them a specific amount of hours I'd ascertained to maintain the necessary target temperature range. It worked quite well.

I should point out that the reef was in a fishroom and that room had a wall A/C unit to keep the room comfortable as i pointed out at the top of this article. The fans simply assisted. If I'd run only fans that room would have gotten quite hot each day. Also, a vent fan pulls out hot humid air from the room, exporting it via the roof's Whirlybird vent system. Ive used a vent fan in the fishroom since 2005. Had I incorporated a chiller, the room would have gotten even hotter from the exhaust vent. This combination of a cool room and fans has worked out very well for many years.
As an aside, there were times when the power would go out in my neighborhood. When this happened, I'd turn on the generator and keep that A/C unit running, and I'd hang out in the fishroom since it was nice and cool in there while my house was uncomfortably hot. There are reasons for my madness, I tell ya.
Soon others were asking me to make them fan holders for their tanks. After building this first bracket, I realized the second one didn't need to be as elaborate because his overflow box needed a black acrylic lid anyway. This corner bracket was cut to fit on the tank's trim using the dimensions provided (that's always the biggest challenge, getting accurate numbers from the hobbyist).
This second bracket kept the fan from tipping over since it was bonded to an overflow lid (or cover). The tank benefitted from cooling and the overflow was shielded from light, reducing algae growth within that chamber.
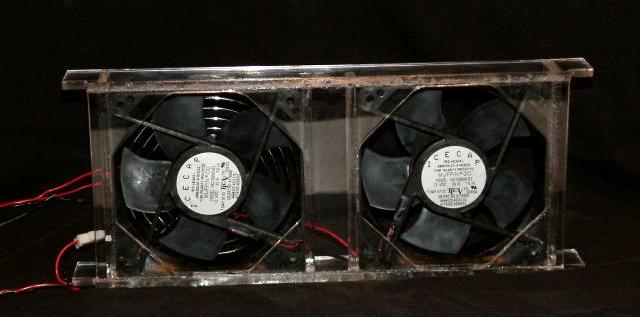
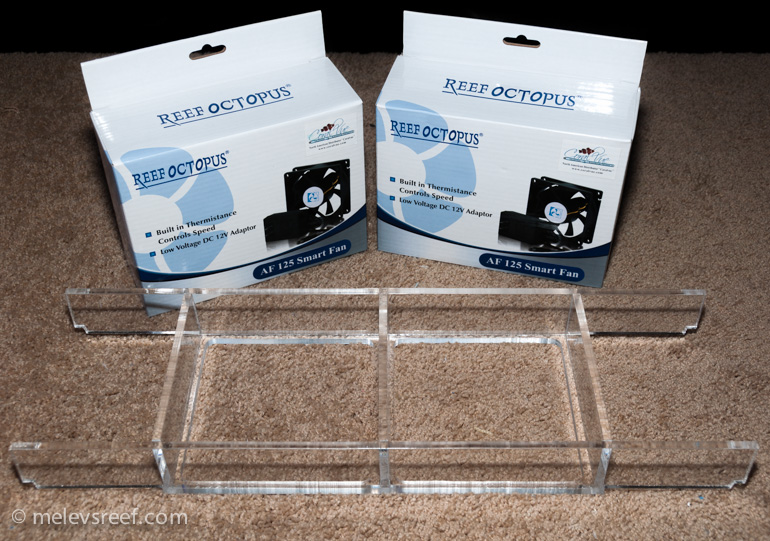
Another club member requested I make him a tray to hold two 4" IceCap fans over his sump, so I got to work. 
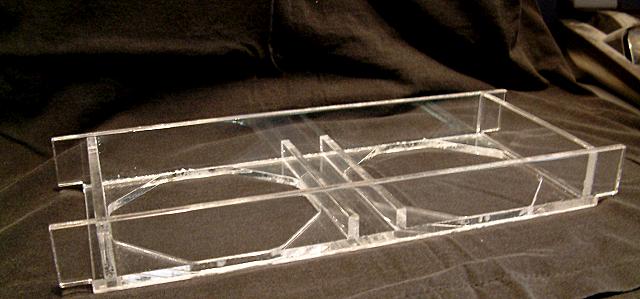
The first thing was to find out the span of the area the unit would set into. In the case of this sump, the area was 11 7/8" wide. The measurement to the outer edge of the sump from front to back was 12 3/4". If you look closely at the image above, you can see how I cut notches so that the frame could rest on the plastic trim of the sump. The base fits inside that trim, hanging down merely a 1/4".
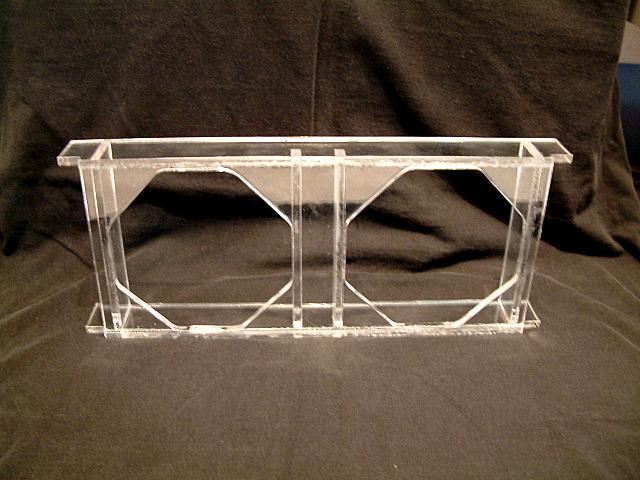
To create the openings, I created a wooden template. Once that was done, I clamped my acrylic piece on to the template, and drilled a hole inside the zone that would make that octogon shape. Cutting it out was easy with a Laminate Trimming router bit, as the roller bearing guided the blade as it traced the template's edge.
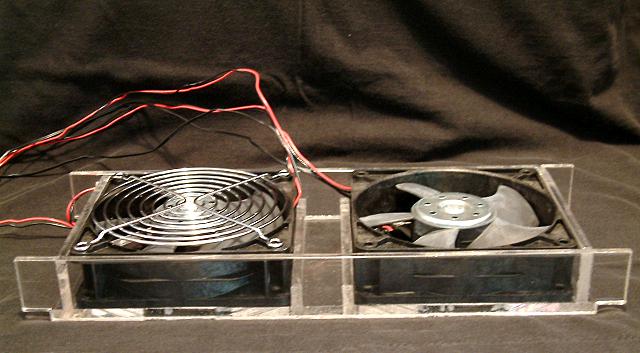
I wanted to make sure the fans would fit nicely and securely, so they wouldn't vibrate to travel. Mounting small rails in the center keeps them in place, and didn't interfere with the wiring. IceCap fans come in two sizes - 80mm or 120mm (3" or 4"), and include a temperature probe. As the ambient air temperature increases (within your canopy), the fans increase in speed. When the temperature drops, the fans slow back down again. They run very quietly at three different speeds, depending on the temperature. The fans are 12v, and each one comes with its own transformer plug (some call those "Wall Worts" because of their ugly size). IceCap fans run about $40 each, but you are getting a fan that is designed for saltwater exposure and to run as silent as possible. They last a long time, hence worth the price.
Done. :)

When I gave it to him at the meeting, he was excited. So the rest of the comments and pictures are from him...
Marc built it in no time from just a couple of measurements that I provided him, the overall width, and the width inside the plastic rim of the 40H glass aquarium that I use for a fuge and sump. I gave him the fans and those 2 measurements and it fits like a glove!
I run a chiller so I can't give an exact temperature drop but instead of it coming on many times per 24 hr period (including at least twice in the middle of the night!), the chiller runs maybe 3 times in the hottest part of the day with lights on. My controller is set at 80 right now but I may bump it up to 81 or 82 in hopes of doing away with the chiller altogether.
I'm able to triple my kalk drip and am seeing an ~.15 pH average increase and my alkalinity is holding steady.
Overall I can't believe how cool it turned out! Whisper quiet, precise fit, and all the [benefits] from increased cooling and evaporation.

Strategically placed temperature probes for maximum rpm (still quieter than my pumps).
Not much room! A clip on fan just didn't work under here.
I can slide it from side to side if needed.
I've been building fan trays now some time, and they have changed ever so slightly. With people running LED lighting these days, chillers are less necessary but cooling fans may be a good course of action for the summer months. If you need the fans and the bracket, I offer both from my shop: http://melevsreef.com/catalog/fan-tray-bracket

I will need the dimesions of the space within the trim of your sump for the bracket to set into, as well as the width of the frame/trim that it will rest upon. Those two measurements provide the necessary information to keep the bracket in place so it doesn't fall into the water. Using a controller, you can have it turn the fan(s) on and off as the temperature dictates throughout the day or night. The fan tray should be able to slide left or right along the top edge of the sump. The best spot is typically over the return zone if the reactors aren't in the way.
Something with HTML textformat


