Bigger, Stronger...More water than ever before!
|
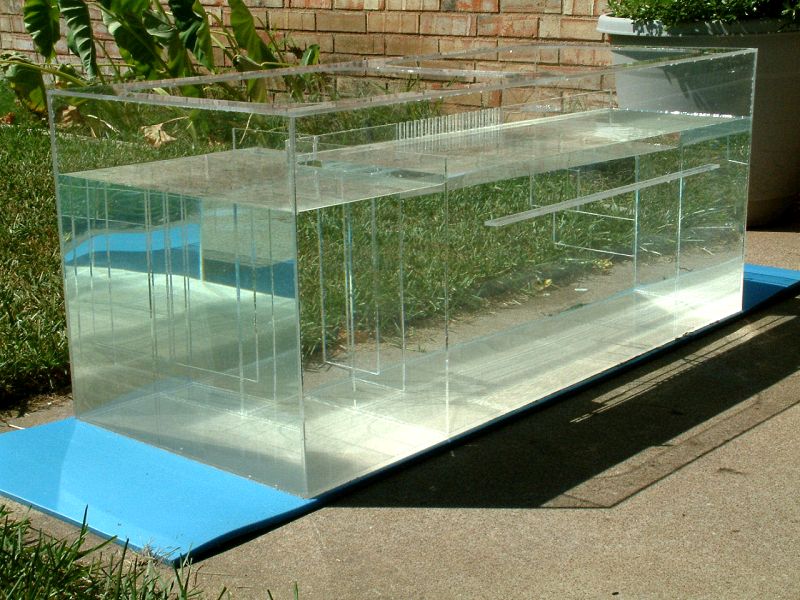
Danny, a new member of DFWMAS contacted me. He needed a big sump with a huge refugium to fit under a 210 gallon reef. Naturally, I wanted to accommodate his needs, and this is what I came up with. His skimmer's footprint needed a mere 6" x 6" space, but I gave him plenty of room regardless. According to the manufacturer, the skimmer could run in 15" depth, but he may need to put it on a small stand for good results. The skimmer can be easily accessed, as it is adjacent to the refugium. The refugium is in the front of the sump, so he can view it at any time. Teeth in the rear wall pour water into the return zone from the refugium. I had to add additional bracing in the refugium due to the size of the total volume. Height was a major contributor. A large bubble trap (2" width between baffles) feeds the Return Area, which runs along the rear of the sump. The rear right corner will be drilled for an external return pump. I did weld in a small piece of acrylic for a potential automatic top-off switch, should he install one later. This sump was built with 1/4" Acrylite FF, and because of the water volume, I had to add additional braces and reinforcements to assure this sump would hold its shape. If this has been built with 3/8" or 1/2", the extra bracing would have unnecessary. |
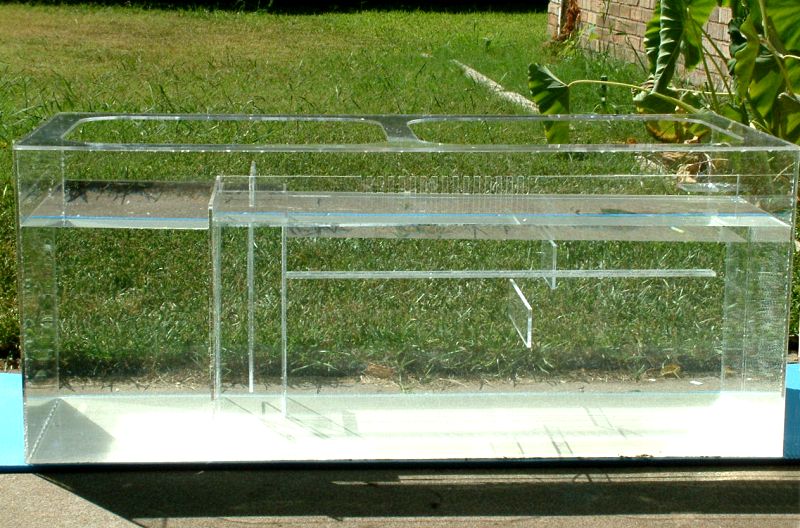
Front view - Bubble trap uses a 2" gap between baffles to allow for good flow.
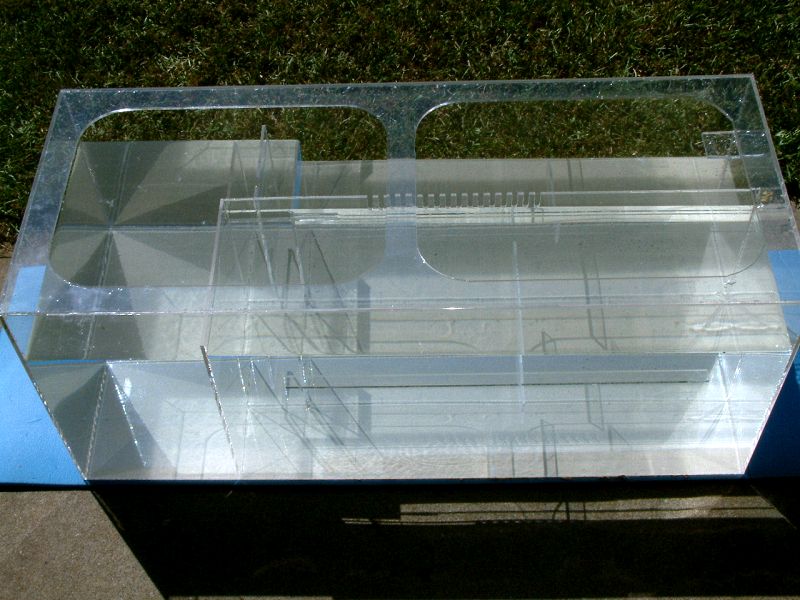
Top view: Refugium is the large section in front, skimmer section on left, return in rear.
Dimensions |
Outside dimensions Inside dimensions Input/Skimmer Refugium Return zone Bubbletrap |
48" x 20" x 20" 47.5" x 19.5" x 19.5" 11.25" x 19.5" x 14.5" 36" x 12" x 15" 31.5" x 7.25" x 14" 4" x 7.25" x 14.5" |
78.2 gal 13.8 gal 28.1 gal 13.8 gal 0.9 gal |
Additional space holds up to 26.5
gallons |
My 16 year old son helped me remove some double stick tape used during construction.
Rear view... Note the top is a solid piece routed out with two holes. Leaving a cross brace avoids expansion.
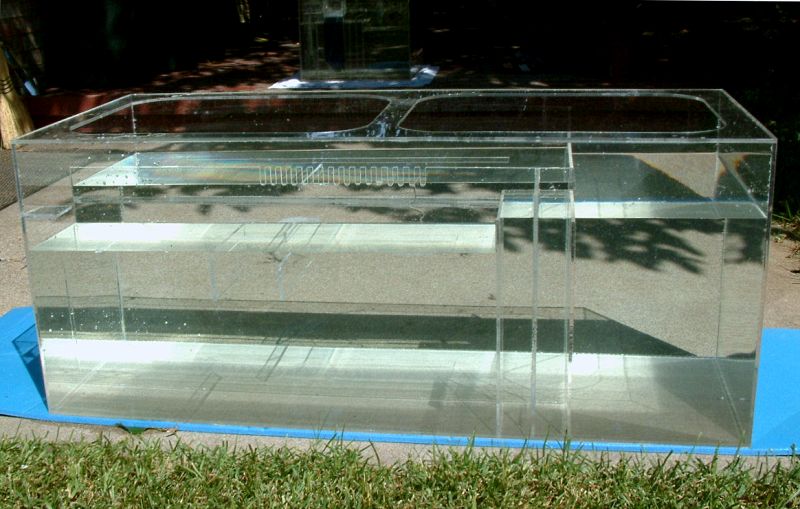
Another perspective, but hard to see the various compartments unfortunately.

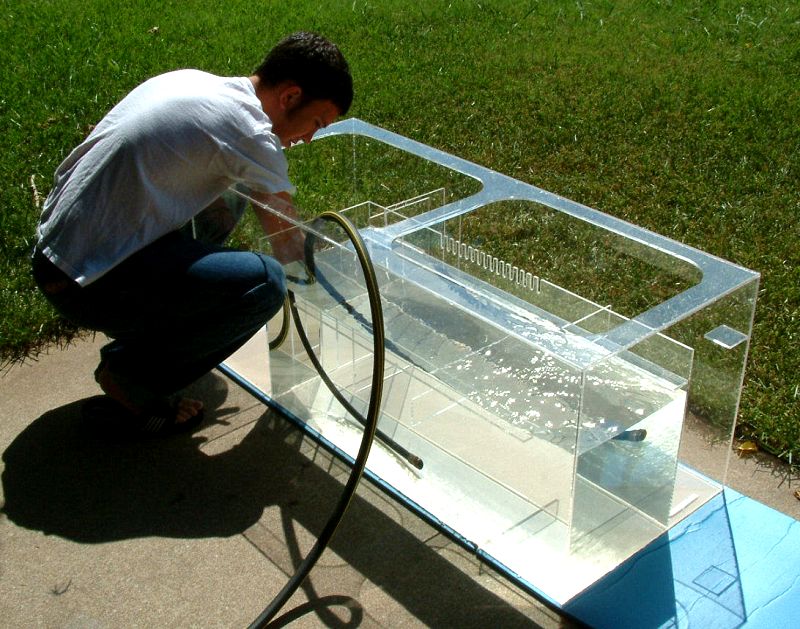
While filling the refugium area, you can see how the water pours through
the teeth to the return section.
The water level in this section will be ~14" deep, so the water will not fall
or splash. In the corner I
mounted a small piece of acrylic for an auto top-off switch, which Danny will install
himself.
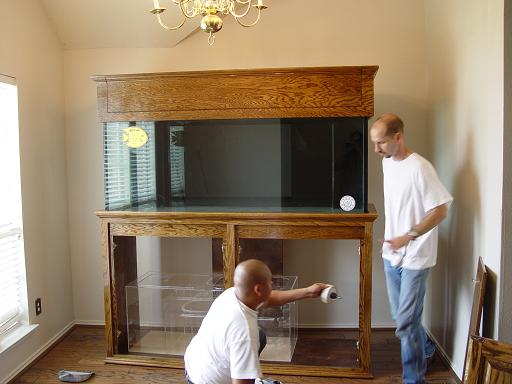
As you can see, the sump is in place beneath the new tank. It doesn't look nearly as large as before,
until you realize the stand is 48" tall. Note the men who seem rather small in front of this set up!

The skimmer is in place, and the external pump has been plumbed into the return area through a bulkhead.
Now it is ready for water.
Email Marc